Followers

Thursday, September 26, 2013

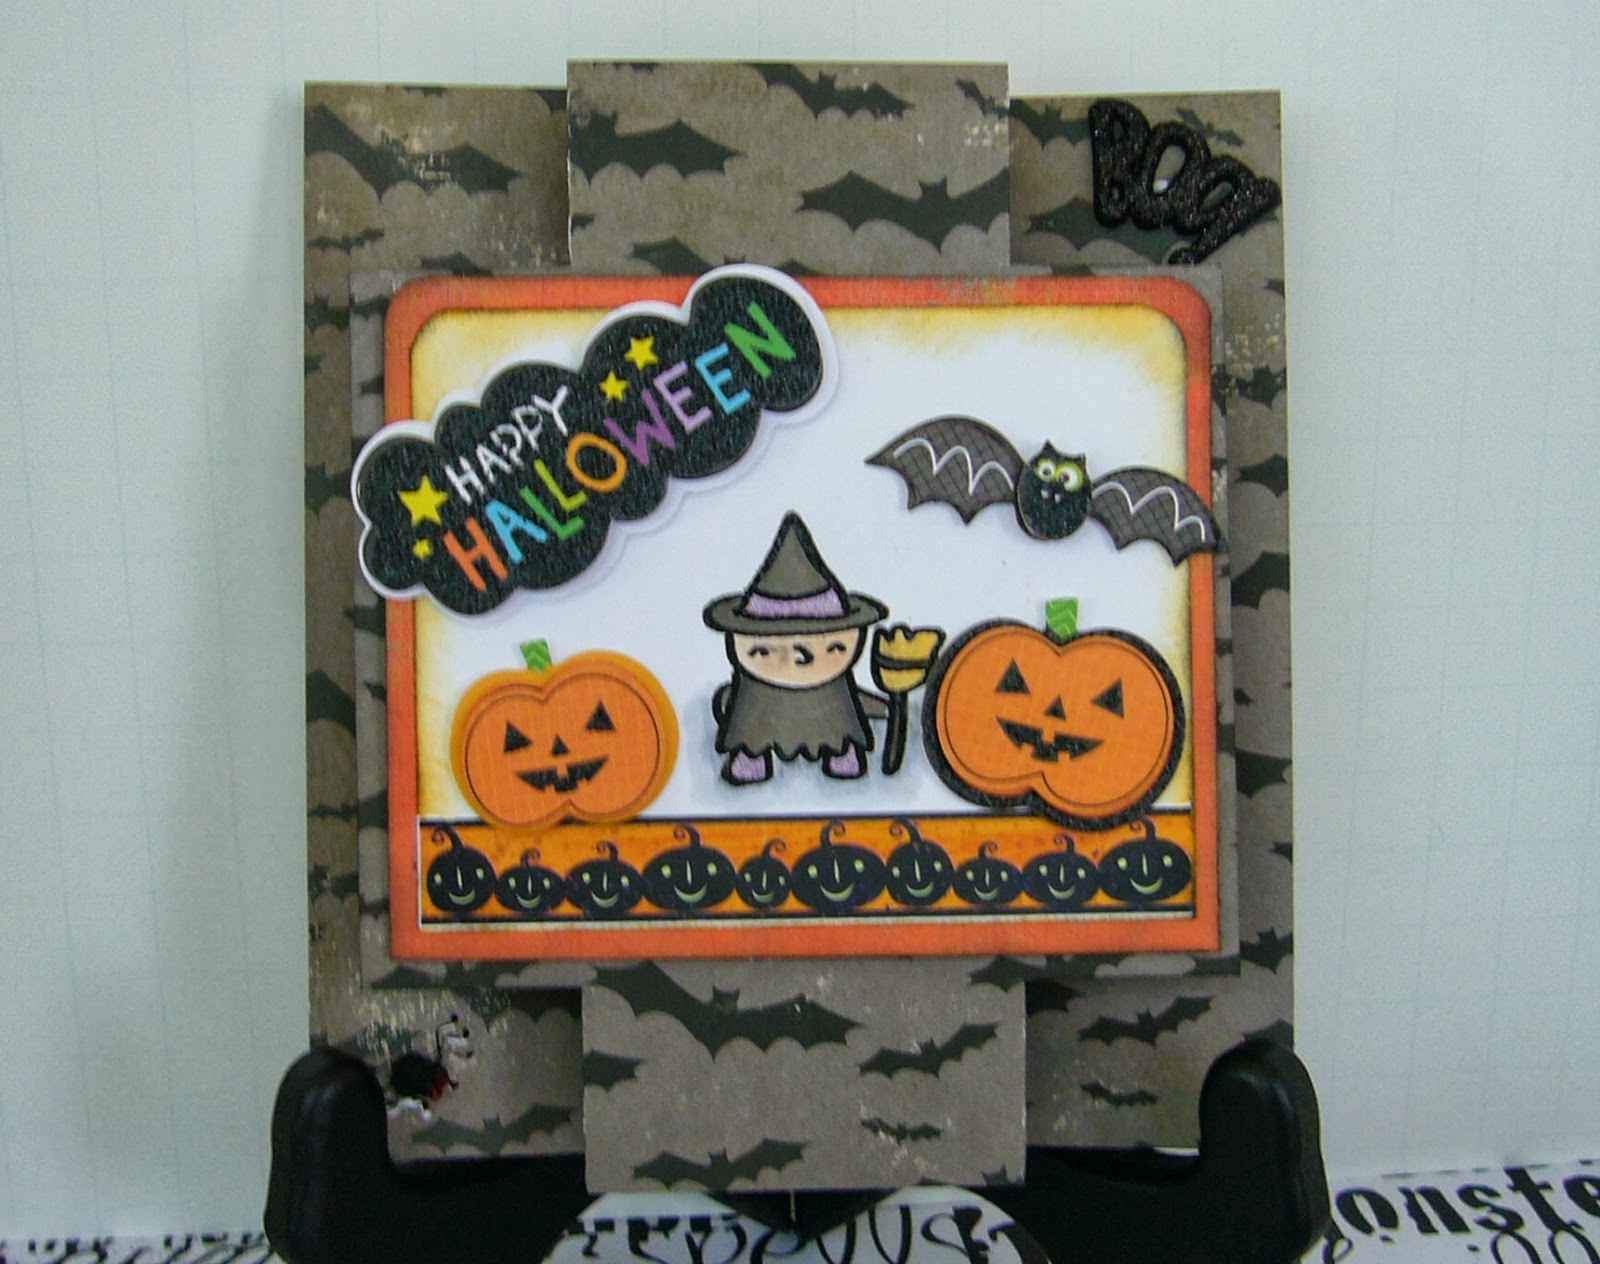
Fancy Fold Halloween Card

Hi everyone!  It's Halloween time over at the Card A Day Blog, and I have a cute fancy-fold card to show you.  My inspiration for this card came from Splitcoaststampers, but I have modified it slightly and changed the sizing.  I'll give you a look first, then go into the details.


I wanted my card to fit the standard A2 sized envelope, so I started with a card base cut at 5 1/2" x 8 1/2".  This card is actually a modified tri-shutter style, but with the different cuts and folds it features a centerpiece.  Here are the measurements:  make a cut 2 1/8" from each short side starting at 1" from the top and ending 1" from the bottom.  Turn the card and cut 1 1/16" starting at the previous cut and going in toward the center of the card.  Do this on all four corners. 
 
 
This photo of the back of my card should give you an idea of what you will have when you fold.  It works best to score your card (top and bottom) at the 2 1/8 and 3 3/16 points.  The 2 1/8 scores will make 'valley folds' and the 3 3/16 scores will make 'mountain folds.'This will give you the centerpiece of your card which should now measure 3 1/2" x 4 1/4".


In the sample I saw on SCS, the designer cut out two rectangles and then added a centerpiece.  I elected to simply cut around three sides and leave the center intact.

Next I built the centerpiece using an orange dp as a mat and a piece of white cardstock for my background.


I stamped and colored the little witch, the bottom border is a rub-on, and all the rest are stickers.  I used my 1/4" corner rounder for the top of the two layers and did some ink distressing around the edges.


You can see in the previous three photos that the stickers, themselves, are multi-layered.  Also, they are affixed with foam tape as is the full front piece.

This card can stand alone very nicely, as you will see in the next photo, or use an easel to feature it as I did in most of my photos.


I hope you've enjoyed my fun little card.  It was actually fairly quick to make; especially since I used ready made embellishments.  If you have questions, please leave them in the comments with a way to contact you.  I will answer as quickly as I can.

Here are some details for you:
     Paper:  Making Memories "Spook Alley" pack-card base
     Stamp:  Pink By Design "Guess Who" set
     Inks:  Ranger Distress "Spiced Marmalade" and "Black Soot" and Versamark
     Embossing Powder:  Stampendous "Detail Black"
     Embellishments:  Recollections Layered Accents and Rub-On, Jolee's boutique Spider, Recollections BOO!

Thanks for visiting!  'Til next time...

Big HUGS!
CHRISTINE

Monday, September 16, 2013

3.....2.....1.....BLAST OFF!

Greetings, Earthlings.  Please do not attack -- we come in peace.  Repeat -- we come in PEACE.
YES, it's fun to be silly sometimes, and the silly bug got me for this weeks' Card A Day Blog theme.  It's a full week of 'Kiddie Cards.'  I must warn you that making cards for the kids is not exactly my usual cup of tea, but I did have some fun with this one.

I broke out the old Cricut, some aluminum foil, a few scraps and a new embossing folder that I couldn't wait to use.  It was only after I had all my card elements ready that I decided my card base would be black and cut to 5 1/2" x 4 1/4" to fit the standard A2 envelope.

As I am certain you have guessed, my card has an outer space theme.  I started out by cutting a piece of heavy duty foil and embossing it with my new folder using my Cuttlebug.  Then I used the Cricut Craft Room to prepare my designs for cutting.  Here is your first photo:


I wanted the background to have the look of the interior of a space ship -- no I've never been in a space ship, but I used to watch Star Trek.  Anyway, just let your imagination take over for awhile.  I cut all the pieces at 2 1/2" except the rocket, which I cut at 3 1/2".  I used Copics to do the small bits of coloring that were needed.


I layered the pieces that needed to be layered, then used some glitter pens to add a little sparkle.  If you look closely, you'll see that the astronaut's helmet shows that he's from the USA.  I didn't want to get too fancy so I just wrote the letters by hand with one of the glitter pens.


 The rocket was affixed flat to the background.  The other elements were added using foam tape. 


I haven't added a sentiment, yet, because I think this card could be used for a number of occasions.  However, I did add a layer for writing or stamping to the inside, as well as a few foil stars to bring a bit of the outside in.


If you haven't made any cards for the younger set, go ahead and create a few.  Even if you have no one to send them to personally, there are plenty of organizations who would love to have cards on hand to give to kids who could use a lift.


I hope you've enjoyed my little 'spacey' card today.  Here are a few details:

     Paper:  Recollections and heavy duty aluminum foil
     Dies:  Shapez (for Xyron) "Star" by Spellbinders
     Cartridge:  Cricut "Everyday Paper Dolls"
     Embossing Folder:  Stampin' Up "Honeycomb"

If you're here from the Card A Day Blog then you know about our monthly challenges and prizes, and I thank you for visiting.  If you've never been there, I'd like to invite you over to check us out.  We have several themes each month with the chance to win a nice challenge prize if you enter.

'Til next time.....

Big HUGS!
CHRISTINE

Wednesday, September 11, 2013

Easy Does It Thanksgiving

Hi everyone!  My post today, for the Card A Day Blog, is celebrating Canadian Thanksgiving.  It may seem a bit early to be thinking about Thanksgiving here in the States.  But our friends in Canada celebrate this holiday a month earlier than we do, so it's just the right time for them.

I'm so happy to bring this card to you today; especially those of you who may be somewhat new to making your own cards.  This card is really quick and easy to put together, and takes a minimum of supplies.  You don't need stamps or inks or special markers.  I used nothing but a card base, a few scrap strips of papers, a few stickers and rhinestones and some adhesive.

I had purchased some dimensional stickers on clearance after Thanksgiving last year, and decided that now was the time to use them.  Here are your photos:


Sorry for the blurry close-up.  I just wanted to illustrate the greeting on the circle sticker.  I started with the standard A2 sized card base.  After trying several scraps, I found some that were just the right size and shape that I needed.  I layered them on the base, affixed the stickers, and added a few rhinestones just because I thought they gave the design a bit more balance.  Couldn't be easier!!
 
You can see in the angled pics just how much dimension there is in the stickers I used.  They came from Recollections.  The rhinestones are from Studio18.   And that's it -- easy peasy!  So you really can put together a nice card without much fuss or mess.


If you haven't been there yet, be sure to check out the Card A Day Blog.  We have monthly challenges that you can enter with each weekly theme.  That means you can have up to four chances to win a great prize!
 
Thanks for visiting, and 'til next time.....
 
Big HUGS!
CHRISTINE

Friday, September 6, 2013

Sit and Watch the Leaves Turn

Happy Friday everyone and WELCOME!!  Well, my ds's visit ended Wednesday, but before she left she started playing with an idea for my card for this weeks' "Autumn" theme on the CARD A DAY BLOG.  So today's card is another bit of sisterly collaboration.

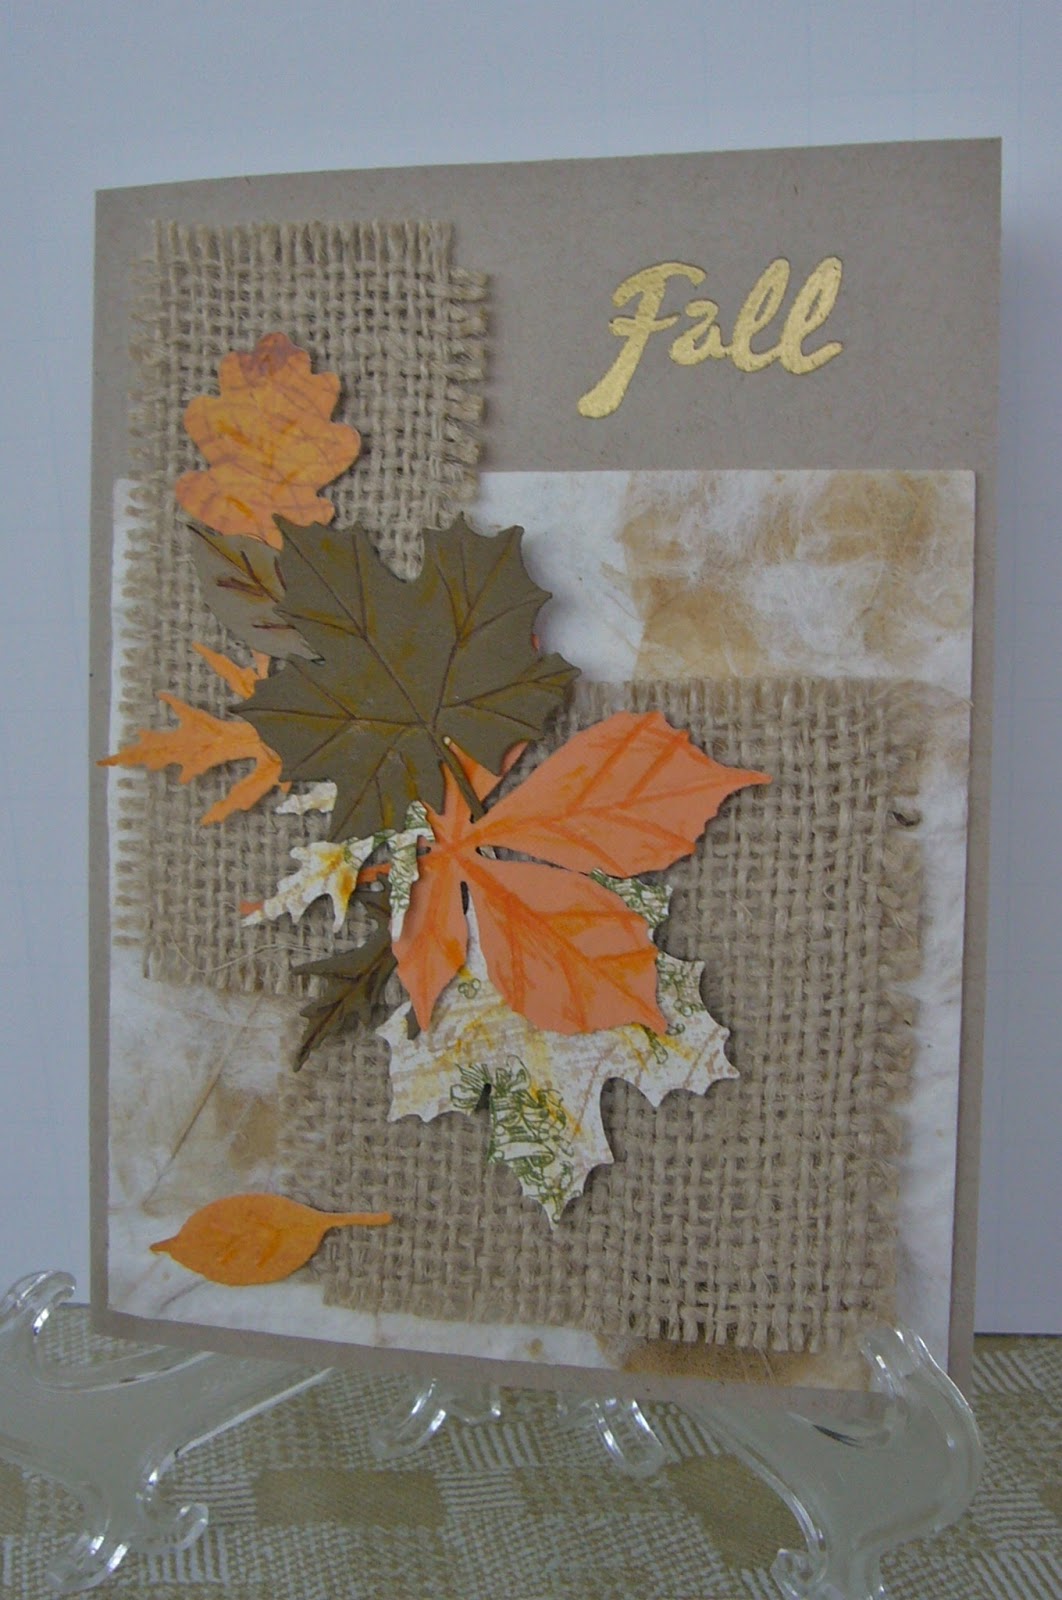
My sister's idea began with leaves and burlap.  She used a set of my dies to cut leaves from various scraps, and then cut some pieces of burlap to play with.  That's as far as she was able to get before she had to depart for home.   When I picked things up to work on the card I found a scrap of handmade paper that I thought would add nicely to the overall look.


I made a rough arrangement of the elements before I started to affix anything.  When I was happy with it I started adding drops of glue to begin setting everything in place.  The word 'Fall' was stamped with Versamark ink and embossed.


I hope you can see in these two pictures just how much dimension there is with the hand made paper, the burlap and all the leaves.

I used foam tape in just a few spots to keep things from flattening down.


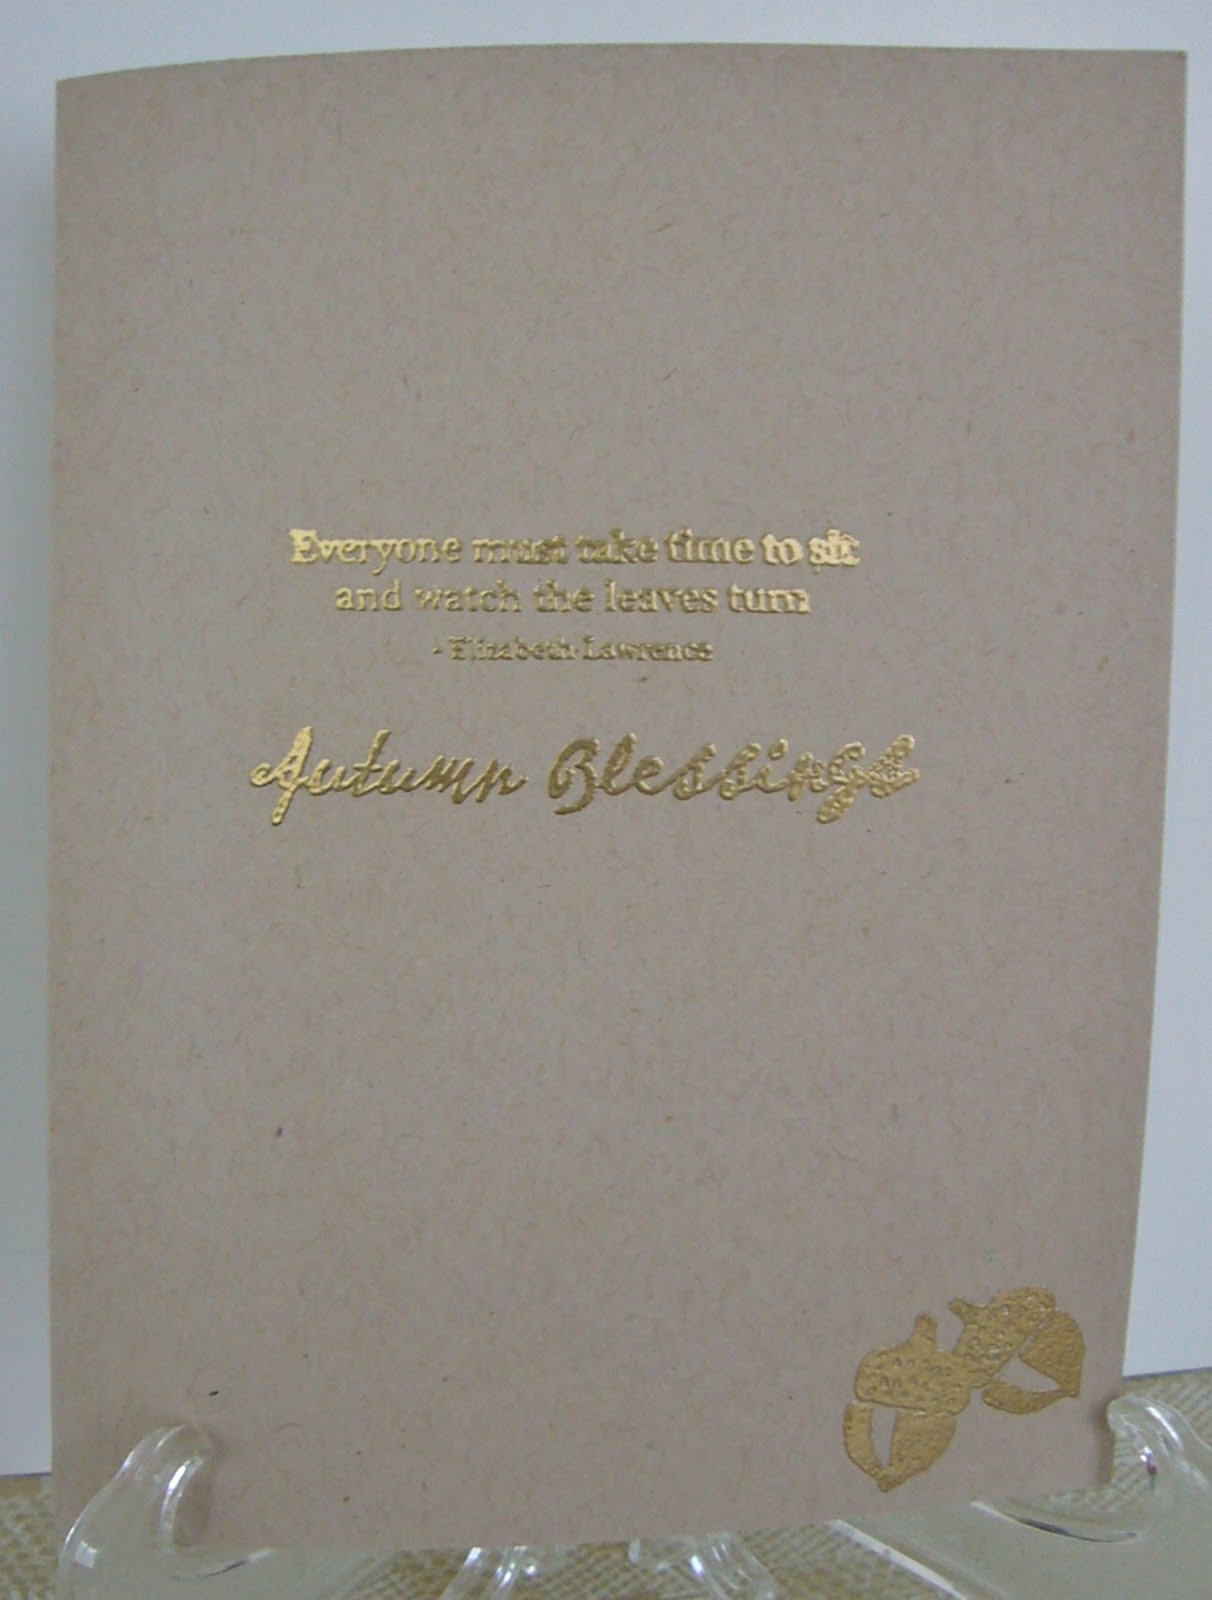
For the inside I chose a nice sentiment and added a pair of acorns to a bottom corner.  All were stamped with the Versamark and embossed.


Hopefully you can read the sentiment in the close-up shot.


This was a nice and easy card to put together, especially after my sis did all the cutting.  ;)  I did add some veining to the leaves.  If I had thought it through I would have distressed the leaves as well before trying to affix everything.  Oh, well, I did it a bit after taking all the photos!!


I'm going to leave you with a little tease today.  I am adding a new dimension to my crafting and hope to have some samples up for you soon.  Wish me luck!!

Thanks so much for stopping by today.  Here are your little details:

     Dies:  Impression Obsession 'Leaves Die Set'
     Stamps:  TCP Studio 'Autumn Harvest'
     Paper: miscellaneous scraps, Kraft CS cut at 5 1/2 x 4 1/4
     Embossing Powder:  Stampendous! 'Detail Gold'

'Til next time.....

Big HUGS!!!
CHRISTINE

Thursday, August 29, 2013

Let Your Light Shine

Hi everyone!  So happy to have you visit today.  We've been having so many bright, sunny days around here in the central U.S.  So, as today's designer for the Card A Day Blog, using the theme of "With Faith"  I decided to go along with the idea of light.  Also, since my ds arrived today for a visit, this card became a little bit of a collaboration.

At the time ds arrived, I already had my basic concept for the card, and had some of the elements prepared as well.  Here is your first look at the card:


I used a blue card stock for the background, and used a border design embossing folder inked with Versamark to give the embossing some extra dimension.  The cross and the sentiment were stamped onto the same blue card, and embossed using Versamark and silver embossing powder.  I used a Versamarker and the same embossing powder to frame the sentiment.  The sentiment piece was die cut and the cross was cut by hand.


A bit of ribbon was attached to the background piece, and the sentiment and cross were both layered using foam tape.


On the inside I simply stamped the cross with the watermark ink for a very subtle look, then stamped and embossed the greeting with the silver powder.


Here is a closer shot of the inside:


Probably the trickiest part in making this card was getting the embossing just right on the background paper.  I had to be sure the paper was cut for a perfectly (almost) symmetrical fit.  I also had to be aware of which side of the folder should be inked.  So if you try this technique, just be sure to consider whether you want to ink the embossed side or the debossed side.

 
When preparing the elements for this design, I started thinking about all the different occasions for which this card might be used.  It seems appropriate for get well, birthday, certainly for Easter, or simply to let someone know you've been thinking about them.  I'm sure you could think of even more ideas.

I truly appreciate having you take time out of your day to visit.  You always put a smile on my face!!

'Til next time.....

Big HUGS!
CHRISTINE

Tuesday, August 20, 2013

A Birthday HI!

"Milestone Birthdays"  That's our theme this week at the CARD A DAY BLOG.  My inspiration for this theme is a family member (name withheld to protect the innocent-heehee) who is celebrating quite a milestone birthday soon.....eight decades of life upon this glorious earth with no signs of slowing down!!

I must admit, my dh and dd helped me come up with the concept for my card.  I was able to take their general idea, and run with it.  I started by printing the inside sentiment directly onto the card base.  Here is your first look:
 

I knew I had a stamp of a pick-up truck with various stamps for truckloads.  I wanted to go with  hearts, flowers or a pile of gifts.  DD like the hearts, so I went with that idea.
 
I needed a road for the truck, and found a nice paper scrap to represent the road surface and a stamp that worked great for the center stripe of the road.  Of course, the speed limit had to be the age of the recipient, so I made the appropriate road sign. Also, I had some scraps of grass that were perfect to add to the side of the road.


I had started out with a plain white card base, and when I knew what the layout would be I chose a nice blue for the background sky. 


 The sentiment, speed sign and truck were all affixed with foam tape.


Once I had everything assembled I added a tiny rhinestone on the sentiment tag and some larger rhinestones as wheel covers on the truck.

Here is a close shot of the outside greeting:


 And, finally, here is the full card.


 I hope my family member enjoys the overall sentiment of this card, and I hope you like it, too!  If you have questions about any of the supplies used, please feel free to ask me in the comments section.  As usual, I added plenty of labels for reference.
 
'Til next time; thanks for stopping by!!


Big HUGS!
CHRISTINE

Wednesday, August 14, 2013

It'll Be Okay

Happy mid-week everyone!  I'm designer of the day over at the CARD A DAY BLOG.  This is a week of using some kind of embossing but without a specific theme.  So, I have a little rainy day card for you using both wet and dry embossing.  It's a cute little card, and really quite easy to make.

I decided to start with an embossing folder, and build my card around whatever design I chose.  In this case, I chose a cloud folder.  I knew I had at least one stamp that was handy that I could use with clouds for a background.  I used my Cuttlebug to emboss a piece of vellum with the clouds, and then picked a dark blue mat to give an overall look of a very gray day.  Just to keep things a bit neutral, I chose kraft card for my base.


I stamped my focal image and my sentiment on white with Versamark ink and embossed with black powder.  The embossing gave a nice outline to color in, which I did very simply using Copics in cheery colors.  I also gave the sentiment a bit of shading with the same blue Copic marker.


I then die cut the two pieces using a slightly fancy die for the label and a die that complemented the look of the clouds for the image.


Not wanting any glue or tape to show behind the vellum I simply used brads to affix the label and vellum to the mat.  I then used foam tape to affix the image piece to the vellum as well as the mat onto the base.


In all this was a relatively quick card to put together.  I got a slightly late start on creating, so quick was a good thing for me today. (heehee)

As always, thanks so much for coming by.  I do hope you enjoyed your visit!

Here are just a few details:
     Paper:  Gina K Designs "In the Navy"
     Brads:  Bo Bunny "Bodacious Brads" in Buttercup
     Embossing Powder:  Stampendous  "Detail Black"
     Stamps:  Pure Innocence for My Favorite Things "My Umbrella"
     Dies:  Spellbinders and Lifestyle Crafts
     Embossing Folder:  Darice "Clouds"
     Markers:  Copics Y04 (Acacia), B24 (Sky), E00 (Skin White), R11 (Pale Cherry Pink)

That's it for now --- see you again soon!!

Big HUGS!
CHRISTINE

Tuesday, August 6, 2013

DIE-riffic!!

We're having a week of 'Using Die Cuts' at the Card A Day Blog.  I tend to use dies in making many of my cards, so this one is quite a natural for me.  One thing I haven't done very often is use a die to make the actual card base.  So, that's what I have to show you today.

I started out with a left-over rosette with some embellishments for my inspiration.  I've been wanting to use this rosette for several months because it's just been sitting on a chair waiting for some action.  I knew that if I put it away somewhere it would most probably languish for even longer, so I took this opportunity to put it to work.

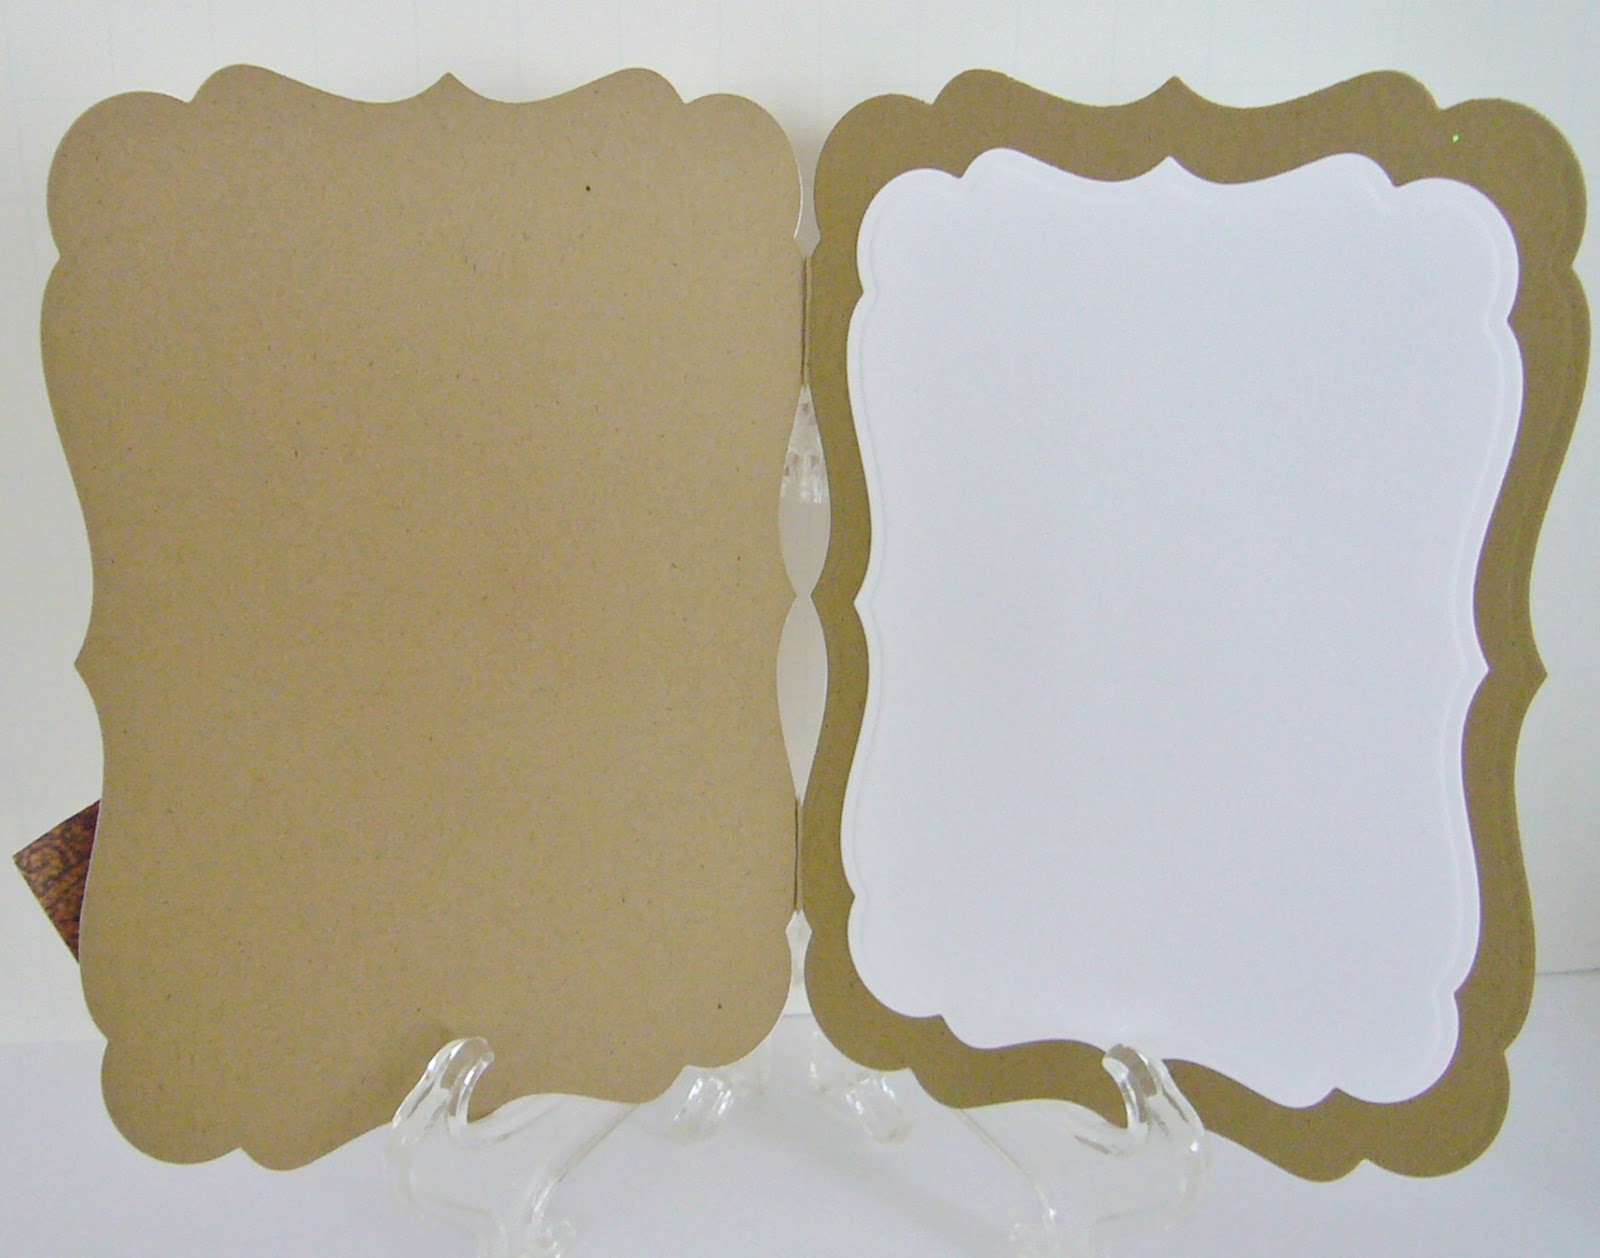
For my card base, I took some kraft card stock and the largest die from one of the Spellbinders label sets.  The die was just about the right size to make a card that would fit nicely into a standard A2 sized envelope.  I cut the card at 5 1/2 x 8 1/2, scored and folded it, and cut it with the edge of the die sitting just off the folded edge of the card.  That way I was able too get a nicely shaped card in one piece.  I cut a piece of dp with the same die, but made sure the die cut all around the paper.  Then I cut a third piece, this time a solid glitter paper, using the largest die and the next size smaller to create a frame.  I think I'd better show you a picture so you can see just what I'm talking about.


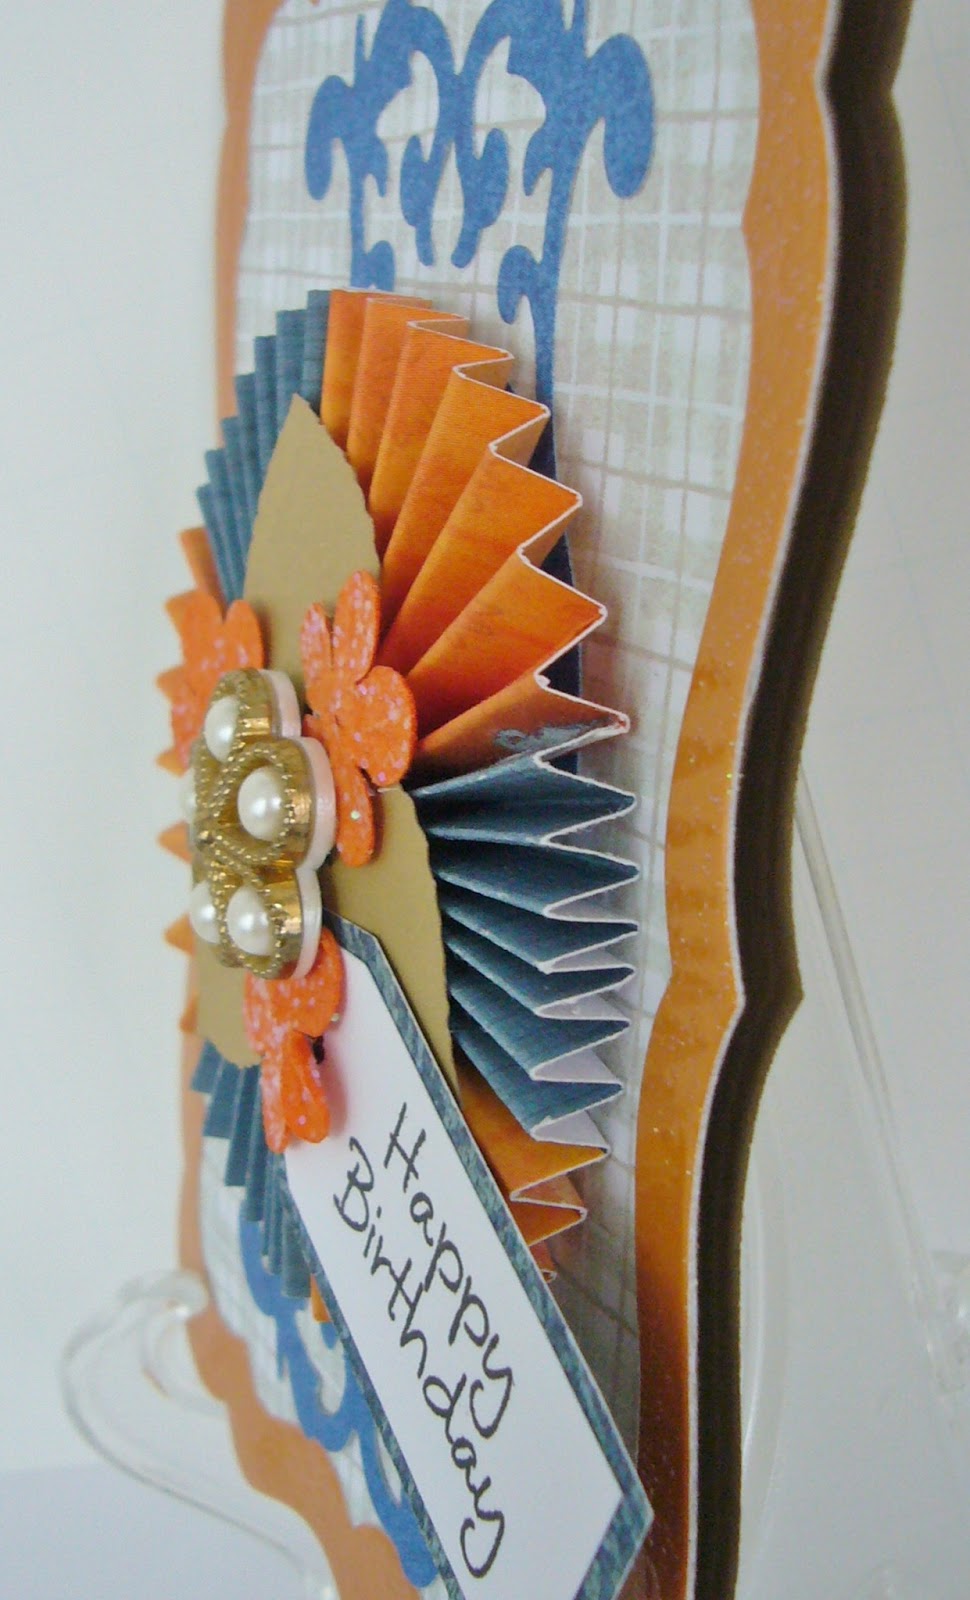
You can't see the kraft card base because I assembled the framed dp and covered the front to give the card a nicely cut full shape that doesn't show the folds.  Next, I used a scrap of blue patterned paper to create the trim around the rosette.  This was cut with a die from one of the fancy labels sets.  I cut this piece in half to be long enough to fill the space.

I then needed to finish the rosette with its embellishments so I arranged the pieces and glued them together.  I'm not sure if the leaves were die cut or punched (they've been around for awhile as well), and the glittery flowers came out of a package.  The pearl embellishment is a button, and the tag, I think, is a die cut.  Sorry to be a bit vague about some of the pieces, but they came from a stay with my sister, and I'm not always too great about writing down what was used at the time.


You can see from these angled photos how much dimension is on this card.  It will fit into an A2 envelope for hand delivery, but a special envelope would be needed for mailing.


Once I had the card assembled I decided I wanted an insert for writing a message.  I used plain white card stock and the smaller of the two frame dies for this piece.  You can see this in the next pic as well as see how the card was cut initially as one piece on the fold.


I showed the finished card to my dd who really liked it.  (I should have saved it for her next birthday -- heehee!)  I hope it gives you some ideas on using your larger dies for making your card bases.


Papers used:  DCWV glitter cardstock matstack and Sizzix Little Sizzles Pastels
Adhesives:  Scotch ATG and Quick-Drying Tacky Glue, and Ranger Matte Accents

I look forward to seeing you again soon.  Thanks for visiting!!

'Til next time.....

Big HUGS!
CHRISTINE

Monday, July 29, 2013

Many Thanks

Good day to you, and I hope it's a beautiful one wherever you are!  Over at the Card A Day Blog we're having a week full of 'Designer's Choice' inspiration.  I was at a Stampin' Up card party recently, so I decided to feature one of the cards we made there.  The supplies are all current items from Stampin' Up.  I'm afraid I didn't get the names of everything, but the items shouldn't be difficult to find in their catalog (print or online).

One of the things I really like about this card, aside from the sweet colors, is the fact that it's great for using scraps.  Of course, you can use any color combinations that please you, or even keep it somewhat monotone.  Almost anything would work.


This card uses a standard A2 base which, in this case is a gray cardstock.  The coral-colored mat is cut at 3 1/4", with the white embossed piece cut at 3".  The colored scalloped circles are about  1/4", and the white stamped circles are 1".  The assembled circle pieces are affixed with foam tape.


I used a 'thank you' sentiment, but you can add any small sentiment to the small circle.  You could also put the sentiment piece in a different position on the front.  That would be a fun idea if you're making a set of these, with different sentiments, as a gift.


The final touch is that single rhinestone just below the sentiment.  Nothing splashy, just sweet.


I think this is a great design for using some of those smaller stamps you weren't quite sure how you would use.  So pull out those small stamps and punches, and have some fun!!

Thanks for stopping by today!  'Til next time.....

Big HUGS!
CHRISTINE