Followers

Showing posts with label Crop-A-Dile Corner Chomper. Show all posts

Wednesday, November 13, 2013

Shining Star

Welcome!!  For my post this week for the Card A Day Blog I've designed a super quick and easy Christmas card.  Our theme this week is 'Christmas Ornaments.'  Just to be very clear, we're not making actual ornaments, although the card could have an element that can be removed and used as an ornament.  We are definitely featuring cards that include ornaments.  It could be an ornament-shaped card or it can be any shape card featuring one or more ornaments in the design, be they stamped, die cut, sticker or whatever.  So, here is my offering:


I was going through my collection of dies looking for my wreaths and ornaments.  That was my original idea.  I came upon this wintery frame, and knew immediately what my card would look like.  The frame has embossed snowflakes in the design as well as the snowflake-looking cuts around the outside.


I decided to use a pearly white cardstock for the frame, and mount it on a navy blue background.  I used a frosty white ink and an opaque white pen to create a snowy look.  The star ornament was cut from a scrap of sparkly holographic wrapping paper which was first glued to cardstock for stability.


I think the embossing on the frame shows up pretty well in the photos, but not so well in the star which is a star within a star.  I used a bright cherry red embroidery floss to attach the ornament to the frame, tied a double bow and then affixed everything with foam tape.  Here are some angled pics to show the dimension.


 I did consider leaving the star free-floating, but I didn't intend for it to be removed so I used the foam tape so keep it stable and show off the bow a bit better.  And that's it!  Really quick.  I haven't done the inside yet, thinking I would wait until I know who will receive the card, but I do believe the greeting will be done directly on the dark card base using white embossing powder.


One of the nice things about this card is that even though there is dimension, it is still very flat for mailing.  The remaining details are few:

           Paper:  Gina K Designs "In the Navy"
           Ink:  Color Box "Frost White" pigment
           Pen:  Inkssentials "Opaque White"

Thanks, as always, for stopping by today.  'Til next time.....

Big HUGS!!
CHRISTINE

Saturday, November 2, 2013

A Christmas Bouquet

Welcome!!  I'm so happy you've come to visit.  As today's designer for the Card A Day Blog I have a fun gift card holder to show you for our theme of Christmas Gift Cards.  I had seen some variations on this card style some time ago, so I knew right away what my design would be.  Now, if you have a good imagination you might see some poinsettias, but if you're like me you'll see a pretty pot filled with lovely Christmas-y red flowers.

Let's start with the empty flower pot.  I wanted my card to fit into a standard A2 sized envelope so I had a bit of figuring to do.  I cut the single sided patterned card stock at 8 1/4" x 4 1/2".  It could have been wider, but I wanted the card to look balanced.  Any wider would just look strange.  I scored at 1 1/8" from either end and right in the center at 4 1/8".  I folded the piece in half, then tapered the two sides, leaving tabs on the front to attach the front and back together.  The two scored ends are folded to the outside creating the rim of the flower pot.  I taped the ends down lightly; then secured them with a pretty red ribbon.  You could also cover the white with different paper as desired.


For the actual card holder, I used a coordinating piece of card cut at 4" x 3 3/4" with the design side to the back, and the top corners rounded.  I used an old gift card to measure for the corners that would hold the new gift card, and made the corners from a scrap of green card.  I used the same green for the die cut leaves and several red scraps to die cut the flowers.


I layered the flowers using liquid glue, then affixed them with thin foam tape.  I added the leaves, some pearls for the centers, and, just for fun, a little white dove.  I was careful when placing the flowers not to let them overlap the top edge too much (needing the keep to the 4 1/4" card size), and to be sure the card went easily into the base.  Here's a photo with the gift card inserted:


You can see the 'flower pot' next to the insert.  Here is a closer look at the flowers:


All you do is insert the gift card and slip that piece into the base 'flower pot'.  A greeting or signature can be written on the card before the gift card is inserted.


So that's it.  You can easily adjust the sizes if you want a bigger bunch of flowers, as well as changing up your papers and colors for any season.  By the way, this was another card created entirely from scraps!  This time I didn't even plan it that way; the right sized pieces just happened to be right where I needed them.

I hope you'll have lots of fun making your gift card holders, and thank you so very much for stopping by today!!

'Til next time.....

Big HUGS!
CHRISTINE


Monday, October 7, 2013

Christmas Joy - Fold

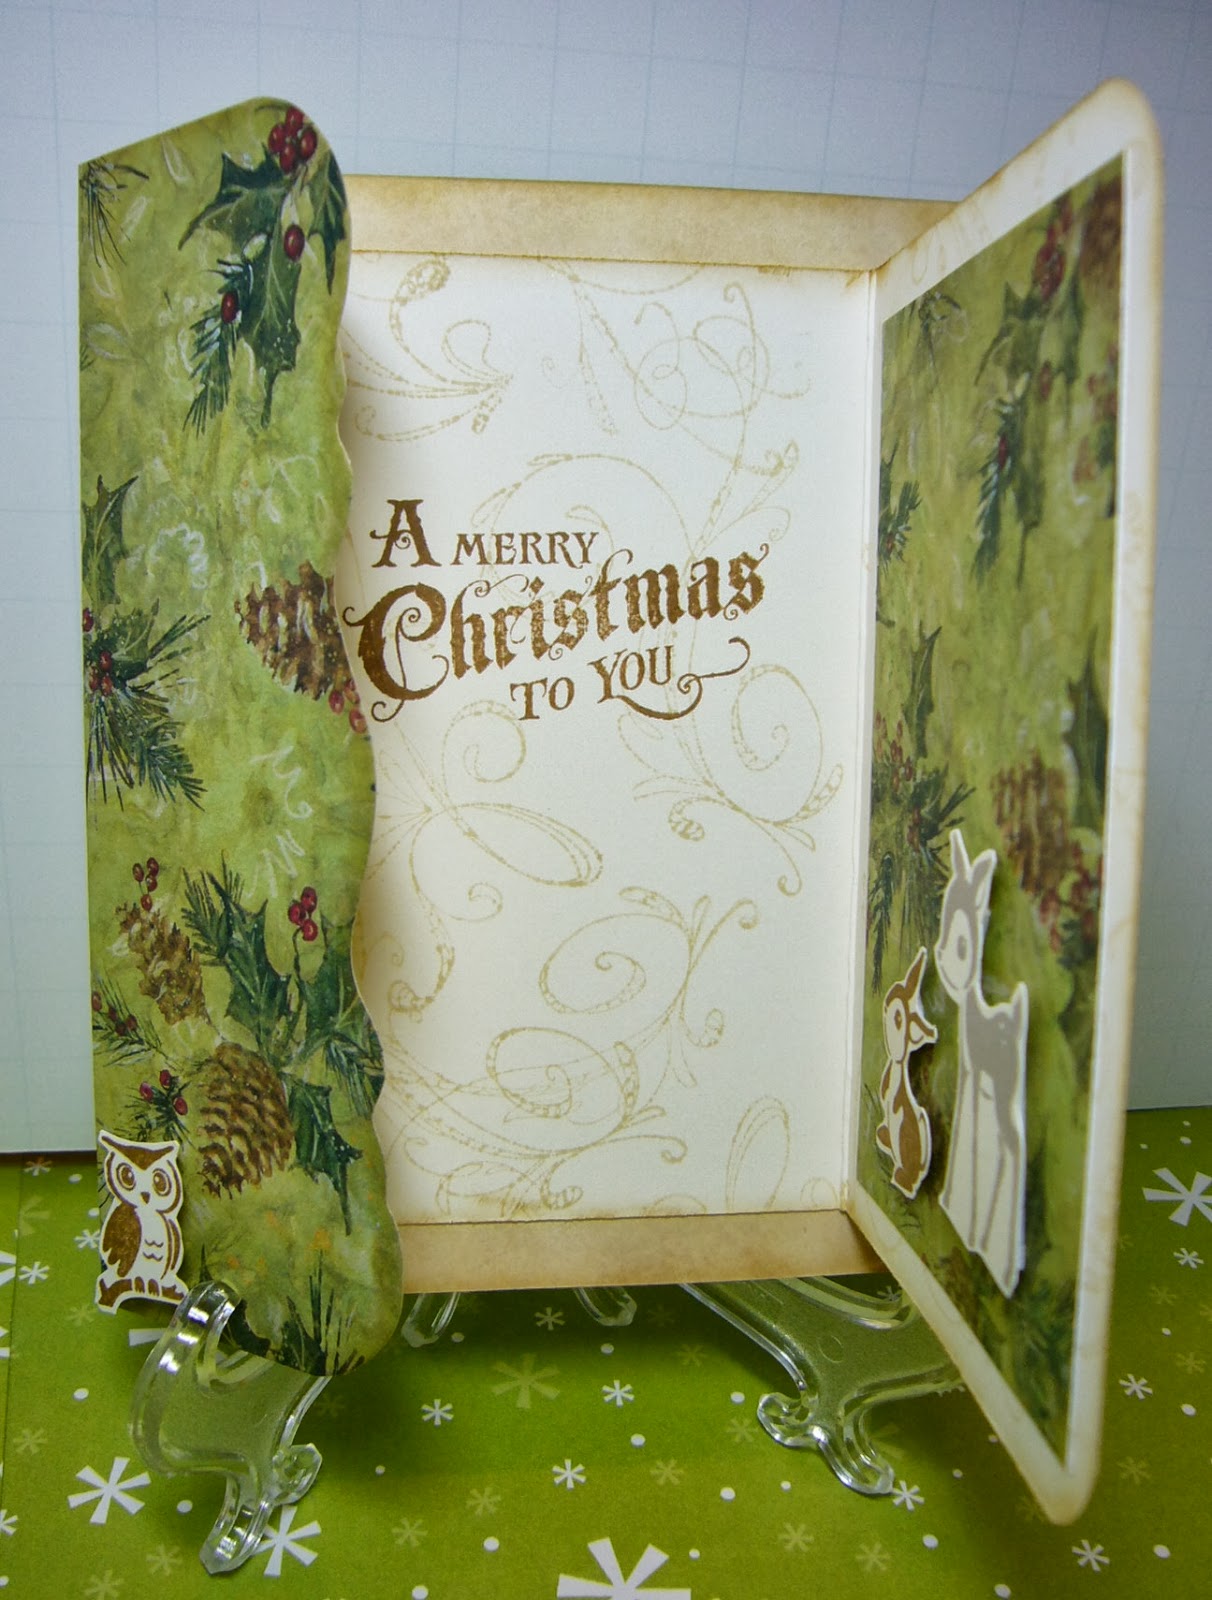
Happy Monday!! (Or whatever day it is that you're seeing this.) I'm here with you today with my second Christmas card of the year.  This week at the Card A Day Blog we are using the inspiration of "Christmas and Animals."  I decided to use another fancy fold for my card, known as a 'joy-fold.'  I couldn't find anything to explain where the name originated, but it's a nice design.  There are lots of videos on YouTube showing how to make this style of card.  So I won't go into too much detail, but I think my photos will show you how easy this design is to make.  Then you can check out some of the videos for variations.

I wanted my card to fit the standard A2 sized envelope.  In this case I started with a card base cut at 5 1/2" x 6 1/4."  My paper was from a card stack with die cut edges and printed on both sides.  This was important because both sides of the paper will show.  The 5 1/2" measurement would be the height of my card.  I scored at 2" from the die cut edge to make the card width 4 1/4."  Okay, here is a photo:

 
 I needed a second piece of card stock, and used a plain off-white on which I stamped a swirl background.  This piece was cut at 4 3/4" high x 6 1/2" wide and scored at 3 1/4" along the width.  Next I prepared the animals and the tree.  I stamped the three animals on the same off-white card, and cut them out by hand.  Then I used my Cuttlebug to die cut the tree using the design card.  I used a fine point glue pen to affix the tree and added some sparkle with a glitter pen. You can see the glitter in some of the photos, especially if you click on them to enlarge.


The tree was added to the front of the smaller card, and a piece of the design card was layered on the inside.  I also stamped the sentiment on the inside before affixing the two card pieces together.
 
 
Before assembling the card I inked the edges of both pieces and rounded the corners of the smaller piece to coordinate with the die cut edge.  You can see the way the two pieces are layered in the next two pictures.  The fold of the base is to the left, while the fold of the liner with the greeting is to the right.


When the card is closed the left flap is closed first, with the right side closing over the left.  The card is held in the closed position by the sweet little owl who stands guard by the tree.  The owl is affixed with two layers of foam tape.  The bunny and the deer on the inside are affixed with a single layer of the foam tape.
 I hope you've enjoyed my card today.  Here is a final photo and then your details:
 
 
Supplies:
          Papers:  K & Company "Glad Tidings" by Susan Winget, Stampin' Up "Very Vanilla"
          Inks:  Ranger Distress Inks in "Antique Linen," "Vintage Photo" and "Pumice Stone"
          Stamps:  Inkadinkadoo "Sketchy Flourishes" and "Warm Holiday Wishes," Stampin' Up "Forest Friends" and WaltzingMouse Stamps "Complements of the Season"
          Die:  Memory Box "Snowflake Tree"
          Misc:  Zig 2-Way Glue fine point, Scotch ATG, Sakura "Clear Star" glitter pen, Crop-a-Dile Corner Chomper
 
Thank you so much for taking time out of your day to visit.  I hope you have a wonderful week!!
 
'Til next time.....
 
Big HUGS!!
CHRISTINE

Thursday, October 3, 2013

Mash-Up for Christmas

Well, it's that time again.....starting those Christmas and other cards for the season.  I'm up on the Card A Day Blog today, and we're starting our Christmas card inspirations.  Of course, we don't stop with Christmas.  We include pretty much all the holidays of the season.  So be sure to visit regularly if you're looking for ideas for your cards.

I called my card a "mash-up" because that's really what it is.  I pulled together an assortment of scraps and bits of ribbon and extra pieces from earlier projects to make this one.  It's not the card I thought I was going to make, but I'll do that one another day.  For now, here is today's card:


I was inspired to make this card while I was straightening up some of my supplies, and my eyes stopped on some rosettes that were still laying about instead of being put away a long time ago.  So I chose the rosette that I wanted along with a topper snowflake and paired it with a strip leftover from cutting all the rosettes.  The rosette and snowflake had already been coated with gold glitter spray which helped me decide the rest of my color scheme.


I tore a page out of an old book that I use for projects, crumpled it, stamped it with snowflakes that I embossed with gold powder and rubbed on some metallic gold paste to bring out the distressing.  I used the same gold paste on a piece of textured packing paper, and layered both pieces on the card base.


I layered two pieces of ribbon with the patterned paper scrap.  Then added that piece to the card after affixing the hand made paper sentiment strip.  I also added two leftover bits of the gold ribbon as embellishment to the rosette.


I needed to bring some of the design to the inside, so I used another piece of the torn-out book page, crumpled it and stamped and embossed some of the snowflakes as well as the greeting.


The last step was rounding just one corner of my card.  And that's it!  As I said, I had lots of fun putting this one together.  Sometimes it's good just to let go and play.  You just never know what you might come up with.


Supplies:
     Stamps:  Stampin 'Up "Snow Swirled" and "A Christmas Carol" sets; WaltzingMouse Stamps "Complements of the Season" set
     Inks:  Versamark and Craf-T Products Metallic Rub-Ons "Gold"
     Embossing Powder:  Stampendous "Detail Gold"
     Extras:  Aleene's Fast Grab Tacky Glue, Scotch ATG, Crop-A-Dile Corner Chomper

Thank you so very much for visiting today.  Your visits make me happy, and I welcome and appreciate your comments as well.  Feel free to leave questions in the comment section. too.

'Til next time.....

Big HUGS!
CHRISTINE

Thursday, September 26, 2013

Fancy Fold Halloween Card

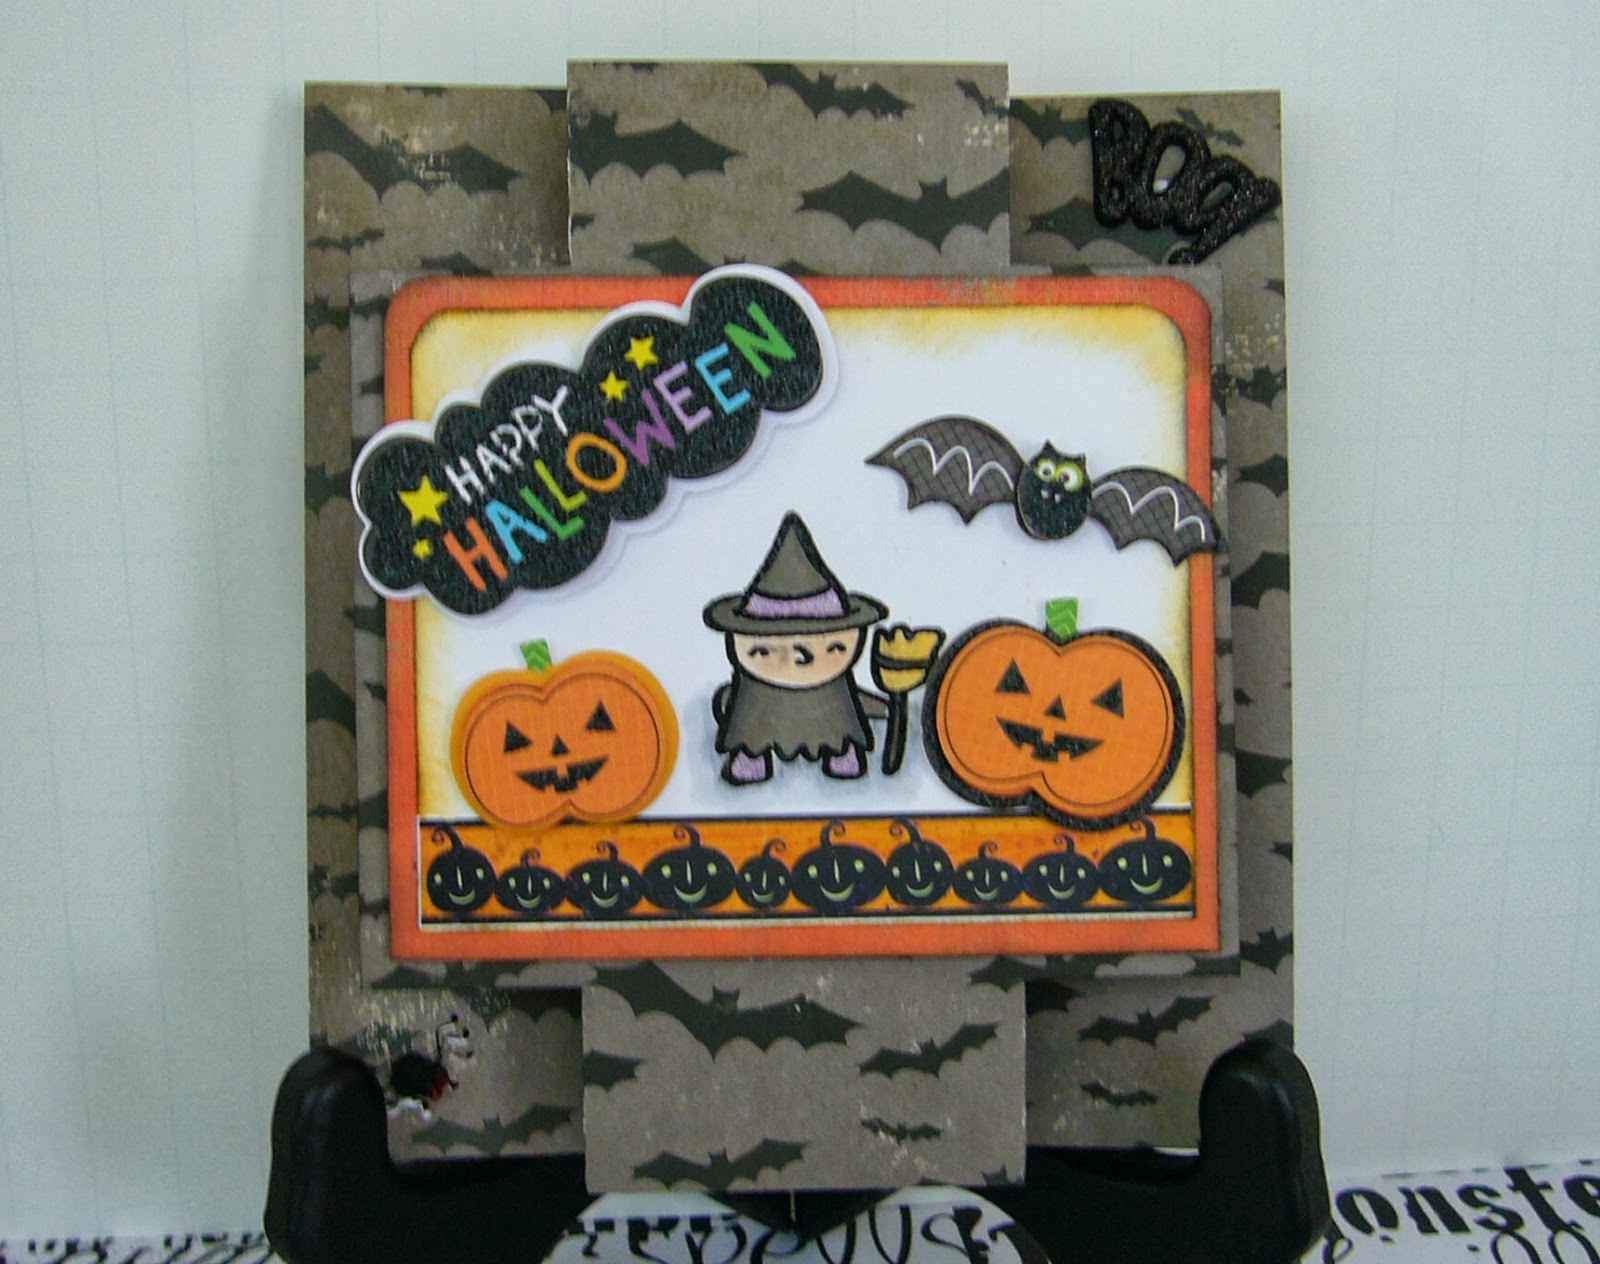
Hi everyone!  It's Halloween time over at the Card A Day Blog, and I have a cute fancy-fold card to show you.  My inspiration for this card came from Splitcoaststampers, but I have modified it slightly and changed the sizing.  I'll give you a look first, then go into the details.


I wanted my card to fit the standard A2 sized envelope, so I started with a card base cut at 5 1/2" x 8 1/2".  This card is actually a modified tri-shutter style, but with the different cuts and folds it features a centerpiece.  Here are the measurements:  make a cut 2 1/8" from each short side starting at 1" from the top and ending 1" from the bottom.  Turn the card and cut 1 1/16" starting at the previous cut and going in toward the center of the card.  Do this on all four corners. 
 
 
This photo of the back of my card should give you an idea of what you will have when you fold.  It works best to score your card (top and bottom) at the 2 1/8 and 3 3/16 points.  The 2 1/8 scores will make 'valley folds' and the 3 3/16 scores will make 'mountain folds.'This will give you the centerpiece of your card which should now measure 3 1/2" x 4 1/4".


In the sample I saw on SCS, the designer cut out two rectangles and then added a centerpiece.  I elected to simply cut around three sides and leave the center intact.

Next I built the centerpiece using an orange dp as a mat and a piece of white cardstock for my background.


I stamped and colored the little witch, the bottom border is a rub-on, and all the rest are stickers.  I used my 1/4" corner rounder for the top of the two layers and did some ink distressing around the edges.


You can see in the previous three photos that the stickers, themselves, are multi-layered.  Also, they are affixed with foam tape as is the full front piece.

This card can stand alone very nicely, as you will see in the next photo, or use an easel to feature it as I did in most of my photos.


I hope you've enjoyed my fun little card.  It was actually fairly quick to make; especially since I used ready made embellishments.  If you have questions, please leave them in the comments with a way to contact you.  I will answer as quickly as I can.

Here are some details for you:
     Paper:  Making Memories "Spook Alley" pack-card base
     Stamp:  Pink By Design "Guess Who" set
     Inks:  Ranger Distress "Spiced Marmalade" and "Black Soot" and Versamark
     Embossing Powder:  Stampendous "Detail Black"
     Embellishments:  Recollections Layered Accents and Rub-On, Jolee's boutique Spider, Recollections BOO!

Thanks for visiting!  'Til next time...

Big HUGS!
CHRISTINE

Thursday, July 11, 2013

CAS, Color and Sketch!

Well, here I am back again with another blue card.  But, then again, who doesn't love BLUE?  This time it's for a particular challenge I'm entering.  Actually, I've combined two challenges; one that is clean and simple with a color combo, and the other with a sketch.   The CAS/Color is from the new challenge blog, House of Cards, while the Sketch is from the Repeat Impressions Blog.  Here are photos of the two challenges:

http://design-seeds.com/palettes/FreshCherry.png 20130709-203918.jpg

In the color part of the challenge, at least three of the colors must be used.  And here is my card:


Using the sketch, I took the three blues, a silhouette stamp and a sentiment to keep the card very simple.  The sentiment is very light, so I have a close-up for you.  It's much more readable in person.


Both stamps that I used came from the Raisin Boat "Stunning Silhouettes" set.  I used Versamark ink and Ranger clear embossing powder to get the light, but slightly raised and shiny silhouette effect.


Lastly, I cut the sentiment in a banner cut, layered it, and affixed it with foam tape for just a little bit of dimension on the card:


Most of the paper is from Recollections, and Surprise, Surprise, I used NO SCRAPS!!  I know, shocking, isn't it?

Thanks so very much for spending some time with me today!  Before you go, tell me in a comment what you're reading these days.  I love books and am always looking for suggestions!

'Til next time.....
Big HUGS!
CHRISTINE

Saturday, March 30, 2013

Digi Duck

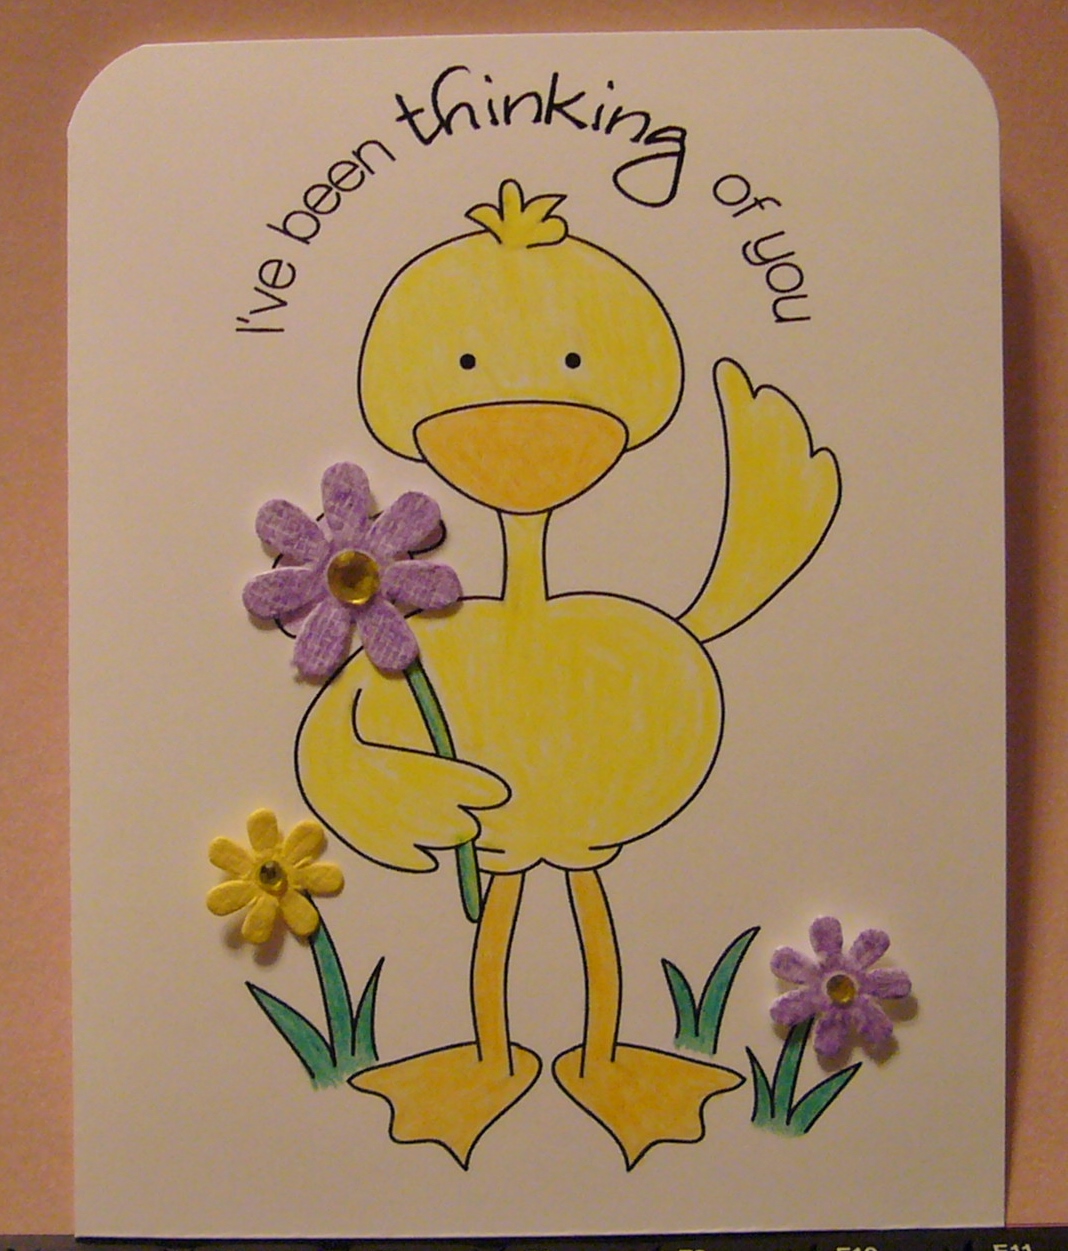
Greetings, everyone, and welcome to my little space.  I have, for you, what I think may be my most clean and simple card ever.  I am today's designer for the 'Thinking of You' theme at the Card A Day Blog, and I was looking through my collection of digital designs to see if I had something appropriate.  I found an adorable image that comes from Doodle Pantry, and while I was searching I found the perfect sentiment to go with it which is from the same designer.  I just love the little Howard Duck wandering through the garden full of Spring flowers to find just the right one for his loved one.

I brought in the main image as a jpeg to my workpage and sized it.  Then I added the sentiment as a png to fit around the top.  Since the png is a 'clear' image, I didn't need to worry about layering over the jpeg.  I really love the way it turned out.


After fitting the image in the correct area on the workpage to become the front of an A2 sized card, I printed it on a nice white cardstock, cut the page in half, and then colored the image with my Prismacolor pencils.  I also added a few Petaloo flowers, two of which were white ones that I colored with the pencils, for a finishing touch.  The flowers already had the rhinestones, so I didn't really want any more bling.  I finished the card by rounding the top corners, which I thought would work well with the arced sentiment.

I'm also entering this card in the Crafters Digital Art Center (CDAC)  Seasonal Fun Challenge which ends tomorrow!  Lots of fun new challenges are coming to CDAC starting on April lst.  If you love working with digital art you will love CDAC!!

As always, thank you for stopping by, and Happy Easter!

Hugs,
CHRISTINE

Thursday, March 21, 2013

Home Sweet Home

Hello to you this fine Spring day!!  Well, for some of us that would be wishful thinking, but it has been teasing us a bit lately.  I have for you a new card today on CADB.  Our theme, this week, is 'Congratulations,' and my card celebrates someone in their new home.  I started with a sweet digital image from Nana Vic's Digitals which I purchased only yesterday.  I hadn't decided on what direction to go with my card, and this image hit me in just the right way when I came upon it.

I colored the image with Prismacolor pencils, added some flowers from Petaloo, cut a swirl with my Cuttlebug, and stamped the sentiments, inside and outside.  The image was affixed with foam tape.


As you can see, I added some of the Petaloo flowers to the inside sentiment to bring some color to the inside.


I also rounded a few corners for just a little variety.

My card is also being entered in the Petaloo Flower Contest Challenge and the Digi Image Challenge at the Crafters Digital Art Center.  There's lots of fun going on there, so if you like digis, it's a great place to spend some time.

Thanks so much for visiting today!  Here are the deets:

     Stamps:  Digi from Nana Vic's Digitals, sentiments from Taylored Expressions "Treasure Life" set
     Flowers:  Petaloo Mulberry Paper Flowers "Mini Delphiniums" and Flora Doodles "Jeweled Florettes Baby's Coming"
     Pencils:  Prismacolor Premier
     Ink:  Memento "Rich Cocoa"
     Extra gems:  Darice Self-Stick
     Papers:  'generic' Kraft and White
     Foam tape:  3D-DOTS from eksuccess

Big HUGS,
CHRISTINE

Sunday, November 18, 2012

Festival of Lights

As designer of the day for the Card A Day Blog I had the pleasure of creating, for the first time ever, a card for Hanukkah.  This is the first time we've had a week featuring this well-known Jewish holiday at the CADB, and it's been a true learning experience for most of our participating designers.  I know that Hanukkah, or the Festival of Lights, celebrates the miracle of one days' worth of the special olive oil (that remained after the rest had been destroyed) keeping the candles lit in the Temple for a full eight days until a fresh supply could be made.  Not traditionally a religious holiday Hanukkah, falling during the same season as the Christmas holiday, has come to be celebrated in a similar fashion with celebrations, special foods and gift-giving.

My card features the Star of David and the menorah, or candelabrum, on which one candle is lit for each of the 8 days of the holiday.  The center, or highest, candle is the one used for lighting all the others.  Please remember I am speaking as a Christian who is not too well-versed on the traditions, and giving a much condensed explanation.  So, if you need to set me straight in any way, feel free to do so in a comment.  Here is your first look at my card:

 
 I started with a card base cut at 8 1/2" x 5 1/2" in a dark navy and folded in half to form an A2 sized card..  I added a lighter blue mat measuring 4" x 5 1/4" and then the card face, in white, cut at 3 3/4" x 5".  I used two stamps for the greeting, one a background frame stamped in blue and the second stamped with Versamark and embossed in silver.  I couldn't find a stamp of just the word 'Blessings' in my excessive collection (How crazy is that, right?!), so I used 'Autumn Blessing' and taped over the word autumn.  The menorah is a sticker, and the stars are die cuts, the larger one being affixed with foam dots for dimension. 
 
Before the layers were affixed I rounded opposing corners of each layer for a little interest.  I used my tape runner for the blue layer and more foam dots for the white layer.  The rhinestones were added for a bit of sparkle.  Here is another photo where you might be able to see some of the dimension:

 
 I added a white liner to the inside, and created my own sentiment using MS Word.  I thought the bright white pieces were a little too stark, so I inked all their edges letting some of the ink stray toward the center.  Finally, I added two more candle stickers to dress it up.


 I'll end with one more slightly closer shot of the card front, and I'll be looking forward to your comments.


Here are the details:
     Stamps:  Clear Stamps "Faithful Friend" set, TCP Studio "Autumn Harvest" set
     Inks:  Versamark, Stampin' Up "Bashful Blue"
     Papers:  Gina K. Designs "In the Navy", Recollections medium blue, and Georgia Pacific white
     Hanukkah images:  Creative Memories "Judaic Combination Pack"
     Embossing Powder:  Stampendous Metallic Detail Silver


So happy you decided to stop by!  Sending lots of hugs!!!
CHRISTINE

Monday, April 9, 2012

Here's to Grandmom

Hi everyone!  I do hope you and your family enjoyed a beautiful Easter celebration.  Our Easter service was so joyful, and filled with glorious music.  I'm here, today, to bring you a Mother's Day inspiration for the Card A Day Blog.  I really enjoyed making this card, using images from one of the Crafter's Digital Art Center Progressive Challenges.  The girl in the image reminds me of my daughter, so I decided to make this card for her to give to her grandmother.  Here's the first peek:


The girl is a digi image from Back To Paper.  I colored her with copics, and paper-pieced her dress using a matching blue marker to color the trim.  The flowers are another digi, this time from Glitterbabe.  I printed the flower in the yellow paper in three sizes and cut them out for dimension.  The stems are just cut from a scrap.

The card stock I used is a nice weight, and I wasn't expecting the color to bleed through, but it did!  Since I needed to cover the bleed on the inside, I printed the sentiment directly onto a matching blue card stock and used it as a liner.


And a closer view so you can see the fonts used:


Of course, I had to get daughter's approval every step of the way.  She chose the outside sentiment, which comes from Sarah Hamer of 'My Pink Cricut.'  Here is the full front view:


As you can see, I rounded the corners.  I cut the liner just a bit smaller and rounded those corners to match.  And of course Grandmom needs a little bling, so rhinestones were added to the flowers.

I hope you enjoyed your visit today!  Think about joining the CADB challenges.  Please do remember to keep your creative genius happy and well-fed!!

CHRISTINE