Hello, out there! I have a new card for you today for the theme of "Thinking of You" at the Card A Day Blog . This card has some layering, but I wanted to keep it nice and flat for mailing. So, there's no foam tape and no fancy shaping on the flowers. All of which makes it nice and simple. Also, I used ALL leftovers - again.
I started out with a butterfly stamp. I had two from which to choose, so I stamped and colored both of them before deciding which one to use. My choice of colors on the butterfly determined what my card base and all the other elements would be.
I stamped the butterfly with Memento 'Tuxedo Black' on an old scrap of some kind of art paper. My daughter had a painting, done by the mom of a friend, that had a huge border which I cut 'for future use.' After testing the paper, I determined that it wouldn't work too well for watercoloring (which is what I thought I was going to do), so I used some Memento and Tombow markers to make my butterfly bright and cheery.
I knew I wanted to use flowers with my butterfly, so once my coloring was done, I went into my stash of flowers and chose some that I had punched quite some time ago for another project which just happened to be in the right colors. (I just love when that happens - don't you?) I also wanted something to layer behind my focal piece, and I found a punched border that was just right. I used Tim Holtz 'Antique Linen' Distress Ink to give the piece a similar aged look.
I layered the flowers, and added glitter glue for their centers. I also used the Stickles 'Cotton Candy' to add a little sparkle to parts of the butterfly. Unfortunately, the sparkle isn't showing up much in the photos, but it is a nice touch.
I chose - well, actually my daughter chose the sentiment from a selection I showed her. I used a piece of Stampin' Up 'Very Vanilla' to line the inside of the card, and stamped the greeting with the same Memento ink.
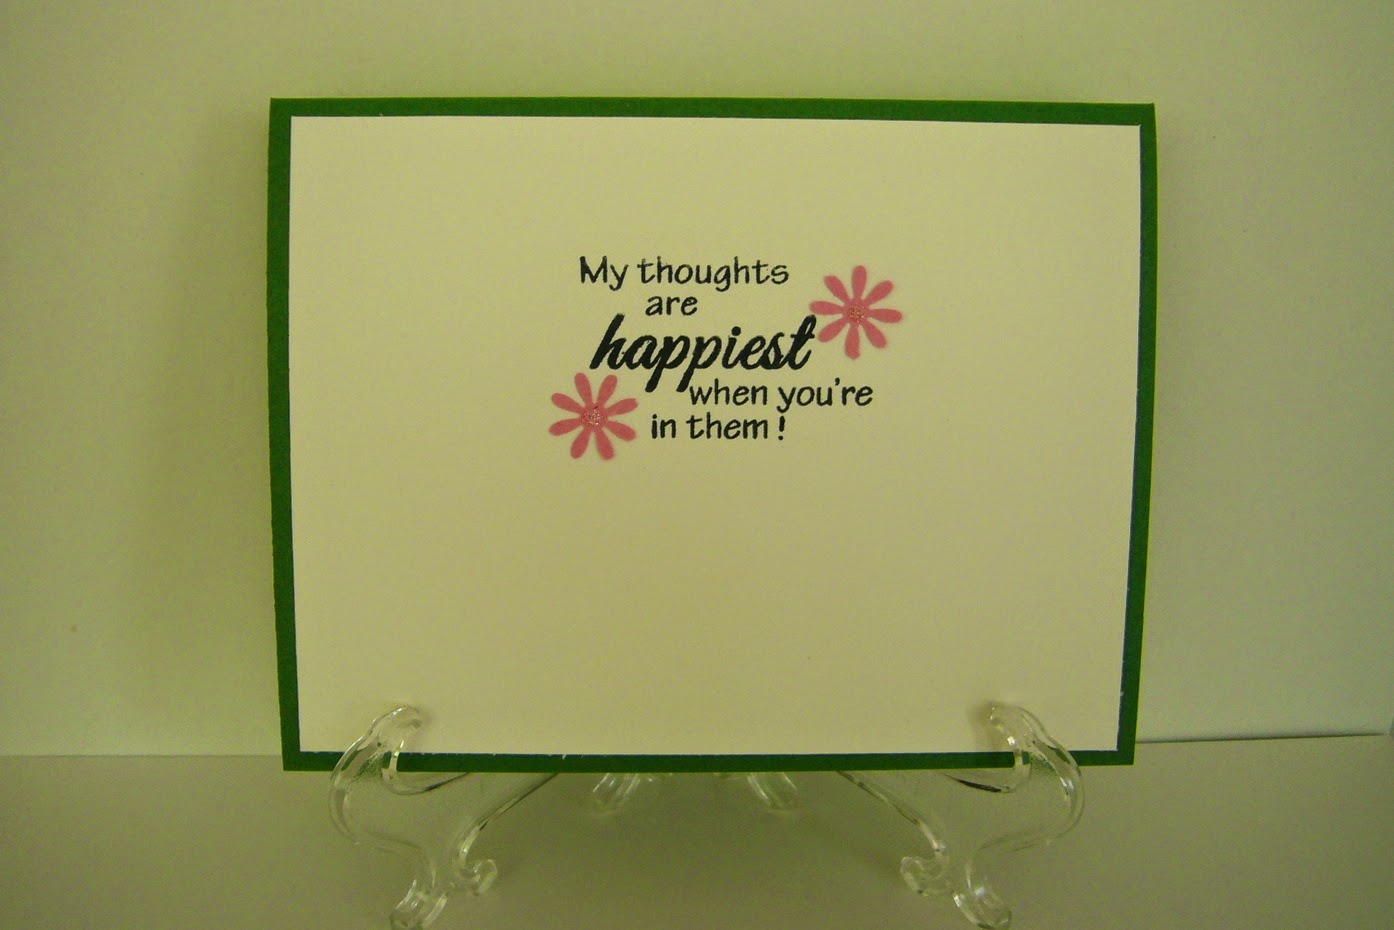
I thought it would be a nice touch to bring some color inside with a couple of the tiny flowers.
And that's it! I hope you've enjoyed your visit today. I also hope you're enjoying a truly wonderful day. Come back SOON!!
Other details:
Stamps: 'Dot Butterfly' from Sweet Stamps and sentiment from Pink by Design
Also used studio G glitter glue in yellow.
Various flower punches. You can use whatever fits the size for your project.
Card base: PapertreyInk (I think)
'Til next time...
BIG Hugs!!!
CHRISTINE
This blog was created for the display and exchange of craft ideas and information, especially on cardmaking, but also including such lovely activities as scrapbooking, knitting, crocheting and sewing.
Followers
Showing posts with label Pink by Design. Show all posts
Saturday, May 10, 2014
Wednesday, April 23, 2014
Love for MOM
Hi everyone! Sorry I've been missing for a little while; life just got in the way a bit. BUT now I'm back with a lovely little Mother's Day card for this weeks' Card A Day Blog theme. I had some great fun with Washi Tape on this one, as well as a leftover flower and a butterfly from earlier projects.
I started by pulling several reds from my washi collection and laid a strip of each on a backing paper. I cut the bottom into a banner 'v' and mounted it on a layer of white with double-sided tape and then on a layer of red with foam tape. I then added that piece to the card base with the top edges flush to the top of the base.
I stamped the greeting with black ink on white, and then die cut it for a nice shape. I used the next size nesting die to cut a backing layer in red. I affixed these pieces together, and then used foam tape for layered mounting. I colored the flower pieces and lightly colored the butterfly both with Pan Pastels, and gave them some rhinestones for a bit of sparkle.
I wanted to bring just a touch of red to the inside of the card, so I applied a narrow strip to the inside before stamping the sentiment, also in black. Sorry it looks a little off-kilter; card wouldn't lay flat for the photo.
And that's it; really quite simple.
I hope you've enjoyed my card today; always love a comment! And don't forget our giveaway at Beccy's Place. I'll be back tomorrow with another card I created using Beccy's designs -- commenting there, as long as you're a follower of my blog, gives you another chance to win.
Thanks for visiting. I hope the rest of your day is simply fabulous!!!
'Til next time.....
BIG Hugs!!!
CHRISTINE
I started by pulling several reds from my washi collection and laid a strip of each on a backing paper. I cut the bottom into a banner 'v' and mounted it on a layer of white with double-sided tape and then on a layer of red with foam tape. I then added that piece to the card base with the top edges flush to the top of the base.
I stamped the greeting with black ink on white, and then die cut it for a nice shape. I used the next size nesting die to cut a backing layer in red. I affixed these pieces together, and then used foam tape for layered mounting. I colored the flower pieces and lightly colored the butterfly both with Pan Pastels, and gave them some rhinestones for a bit of sparkle.
I wanted to bring just a touch of red to the inside of the card, so I applied a narrow strip to the inside before stamping the sentiment, also in black. Sorry it looks a little off-kilter; card wouldn't lay flat for the photo.
And that's it; really quite simple.
I hope you've enjoyed my card today; always love a comment! And don't forget our giveaway at Beccy's Place. I'll be back tomorrow with another card I created using Beccy's designs -- commenting there, as long as you're a follower of my blog, gives you another chance to win.
Thanks for visiting. I hope the rest of your day is simply fabulous!!!
'Til next time.....
BIG Hugs!!!
CHRISTINE
Thursday, September 26, 2013
Fancy Fold Halloween Card
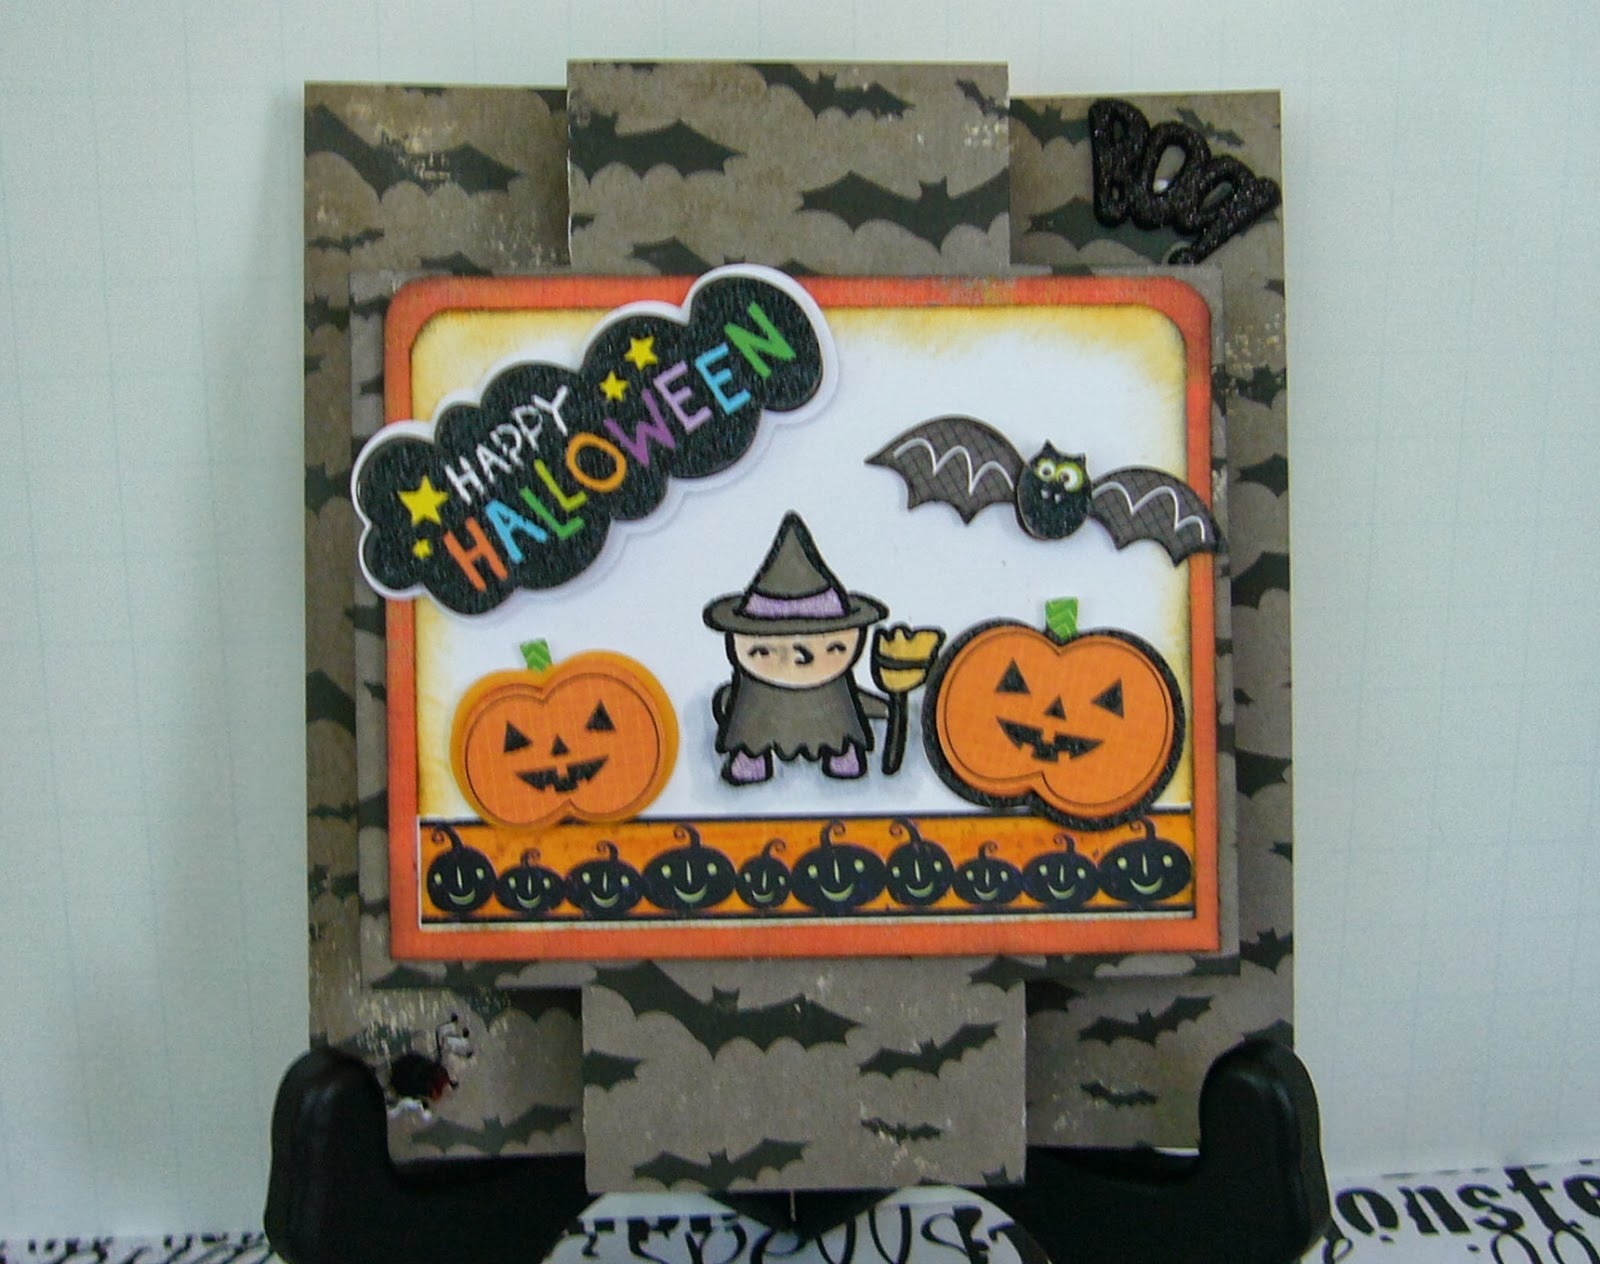
Hi everyone! It's Halloween time over at the Card A Day Blog, and I have a cute fancy-fold card to show you. My inspiration for this card came from Splitcoaststampers, but I have modified it slightly and changed the sizing. I'll give you a look first, then go into the details.
This photo of the back of my card should give you an idea of what you will have when you fold. It works best to score your card (top and bottom) at the 2 1/8 and 3 3/16 points. The 2 1/8 scores will make 'valley folds' and the 3 3/16 scores will make 'mountain folds.'This will give you the centerpiece of your card which should now measure 3 1/2" x 4 1/4".
In the sample I saw on SCS, the designer cut out two rectangles and then added a centerpiece. I elected to simply cut around three sides and leave the center intact.
Next I built the centerpiece using an orange dp as a mat and a piece of white cardstock for my background.
I stamped and colored the little witch, the bottom border is a rub-on, and all the rest are stickers. I used my 1/4" corner rounder for the top of the two layers and did some ink distressing around the edges.
You can see in the previous three photos that the stickers, themselves, are multi-layered. Also, they are affixed with foam tape as is the full front piece.
This card can stand alone very nicely, as you will see in the next photo, or use an easel to feature it as I did in most of my photos.
I hope you've enjoyed my fun little card. It was actually fairly quick to make; especially since I used ready made embellishments. If you have questions, please leave them in the comments with a way to contact you. I will answer as quickly as I can.
Here are some details for you:
Paper: Making Memories "Spook Alley" pack-card base
Stamp: Pink By Design "Guess Who" set
Inks: Ranger Distress "Spiced Marmalade" and "Black Soot" and Versamark
Embossing Powder: Stampendous "Detail Black"
Embellishments: Recollections Layered Accents and Rub-On, Jolee's boutique Spider, Recollections BOO!
Thanks for visiting! 'Til next time...
Big HUGS!
CHRISTINE
I wanted my card to fit the standard A2 sized envelope, so I started with a card base cut at 5 1/2" x 8 1/2". This card is actually a modified tri-shutter style, but with the different cuts and folds it features a centerpiece. Here are the measurements: make a cut 2 1/8" from each short side starting at 1" from the top and ending 1" from the bottom. Turn the card and cut 1 1/16" starting at the previous cut and going in toward the center of the card. Do this on all four corners.
In the sample I saw on SCS, the designer cut out two rectangles and then added a centerpiece. I elected to simply cut around three sides and leave the center intact.
Next I built the centerpiece using an orange dp as a mat and a piece of white cardstock for my background.
I stamped and colored the little witch, the bottom border is a rub-on, and all the rest are stickers. I used my 1/4" corner rounder for the top of the two layers and did some ink distressing around the edges.
You can see in the previous three photos that the stickers, themselves, are multi-layered. Also, they are affixed with foam tape as is the full front piece.
This card can stand alone very nicely, as you will see in the next photo, or use an easel to feature it as I did in most of my photos.
I hope you've enjoyed my fun little card. It was actually fairly quick to make; especially since I used ready made embellishments. If you have questions, please leave them in the comments with a way to contact you. I will answer as quickly as I can.
Here are some details for you:
Paper: Making Memories "Spook Alley" pack-card base
Stamp: Pink By Design "Guess Who" set
Inks: Ranger Distress "Spiced Marmalade" and "Black Soot" and Versamark
Embossing Powder: Stampendous "Detail Black"
Embellishments: Recollections Layered Accents and Rub-On, Jolee's boutique Spider, Recollections BOO!
Thanks for visiting! 'Til next time...
Big HUGS!
CHRISTINE
Saturday, July 20, 2013
In the Navy
Greetings! Today I have a special request card to show you. My dd has some friends in the military, and she wanted to send some goodies to one of them who is overseas in a war zone. But she needed a card. DD told me some ideas she had, and I showed her supplies that were on hand for her use, and together we came up with a design that she was quite happy to send to her friend.
I started with a (you guessed it) Navy Blue card base. It's a very dark blue, which comes across nearly black in the photos:
I used a Cuttlebug folder to emboss the stars in the background layer, but I added a frame layer to provide a blank space for the featured sticker. I considered brushing on some color to highlight the stars, but elected not to do that because the embossing shows up beautifully in person. The eagle and flag image was stamped with Versamark and heat embossed with a powder color which picked up color from the sticker below.


I cut out the stamped/embossed eagle and used foam tape to affix it to the background. The sticker itself is three layers which provided enough dimension on its own, so I affixed it directly onto the background. I have several sentiment stamp sets which can be used for patriotic-type cards such as this one. Here is the sentiment my daughter chose:
DD wanted to keep the clean look of the card, so instead of handwriting a message directly inside, she chose to compose a letter to insert on a separate page.
I hope you've enjoyed this simple and elegant card for my dd's Navy buddy. It certainly was a pleasure and an honor to make it for him.
The details:
Stamps: Pink by Design "Our Troops" and Inkadinkadoo "Patriotic Eagle"
Embossing folder: Cuttlebug "Stars"
Dimensional Sticker: K & Company "Navy"
Ink: Versamark
Paper: Gina K Designs heavy base weight "In the Navy," and Georgia Pacific white
Embossing Powder: Sweet Stamps "Fine Detail Copper"
Miscellaneous: Stamp On It "Frame-Its Kit," foam tape, Scotch ATG
'Til next time.....
Big HUGS!
CHRISTINE
I started with a (you guessed it) Navy Blue card base. It's a very dark blue, which comes across nearly black in the photos:
I used a Cuttlebug folder to emboss the stars in the background layer, but I added a frame layer to provide a blank space for the featured sticker. I considered brushing on some color to highlight the stars, but elected not to do that because the embossing shows up beautifully in person. The eagle and flag image was stamped with Versamark and heat embossed with a powder color which picked up color from the sticker below.
I cut out the stamped/embossed eagle and used foam tape to affix it to the background. The sticker itself is three layers which provided enough dimension on its own, so I affixed it directly onto the background. I have several sentiment stamp sets which can be used for patriotic-type cards such as this one. Here is the sentiment my daughter chose:
DD wanted to keep the clean look of the card, so instead of handwriting a message directly inside, she chose to compose a letter to insert on a separate page.
I hope you've enjoyed this simple and elegant card for my dd's Navy buddy. It certainly was a pleasure and an honor to make it for him.
The details:
Stamps: Pink by Design "Our Troops" and Inkadinkadoo "Patriotic Eagle"
Embossing folder: Cuttlebug "Stars"
Dimensional Sticker: K & Company "Navy"
Ink: Versamark
Paper: Gina K Designs heavy base weight "In the Navy," and Georgia Pacific white
Embossing Powder: Sweet Stamps "Fine Detail Copper"
Miscellaneous: Stamp On It "Frame-Its Kit," foam tape, Scotch ATG
'Til next time.....
Big HUGS!
CHRISTINE
Sunday, July 7, 2013
True Blue
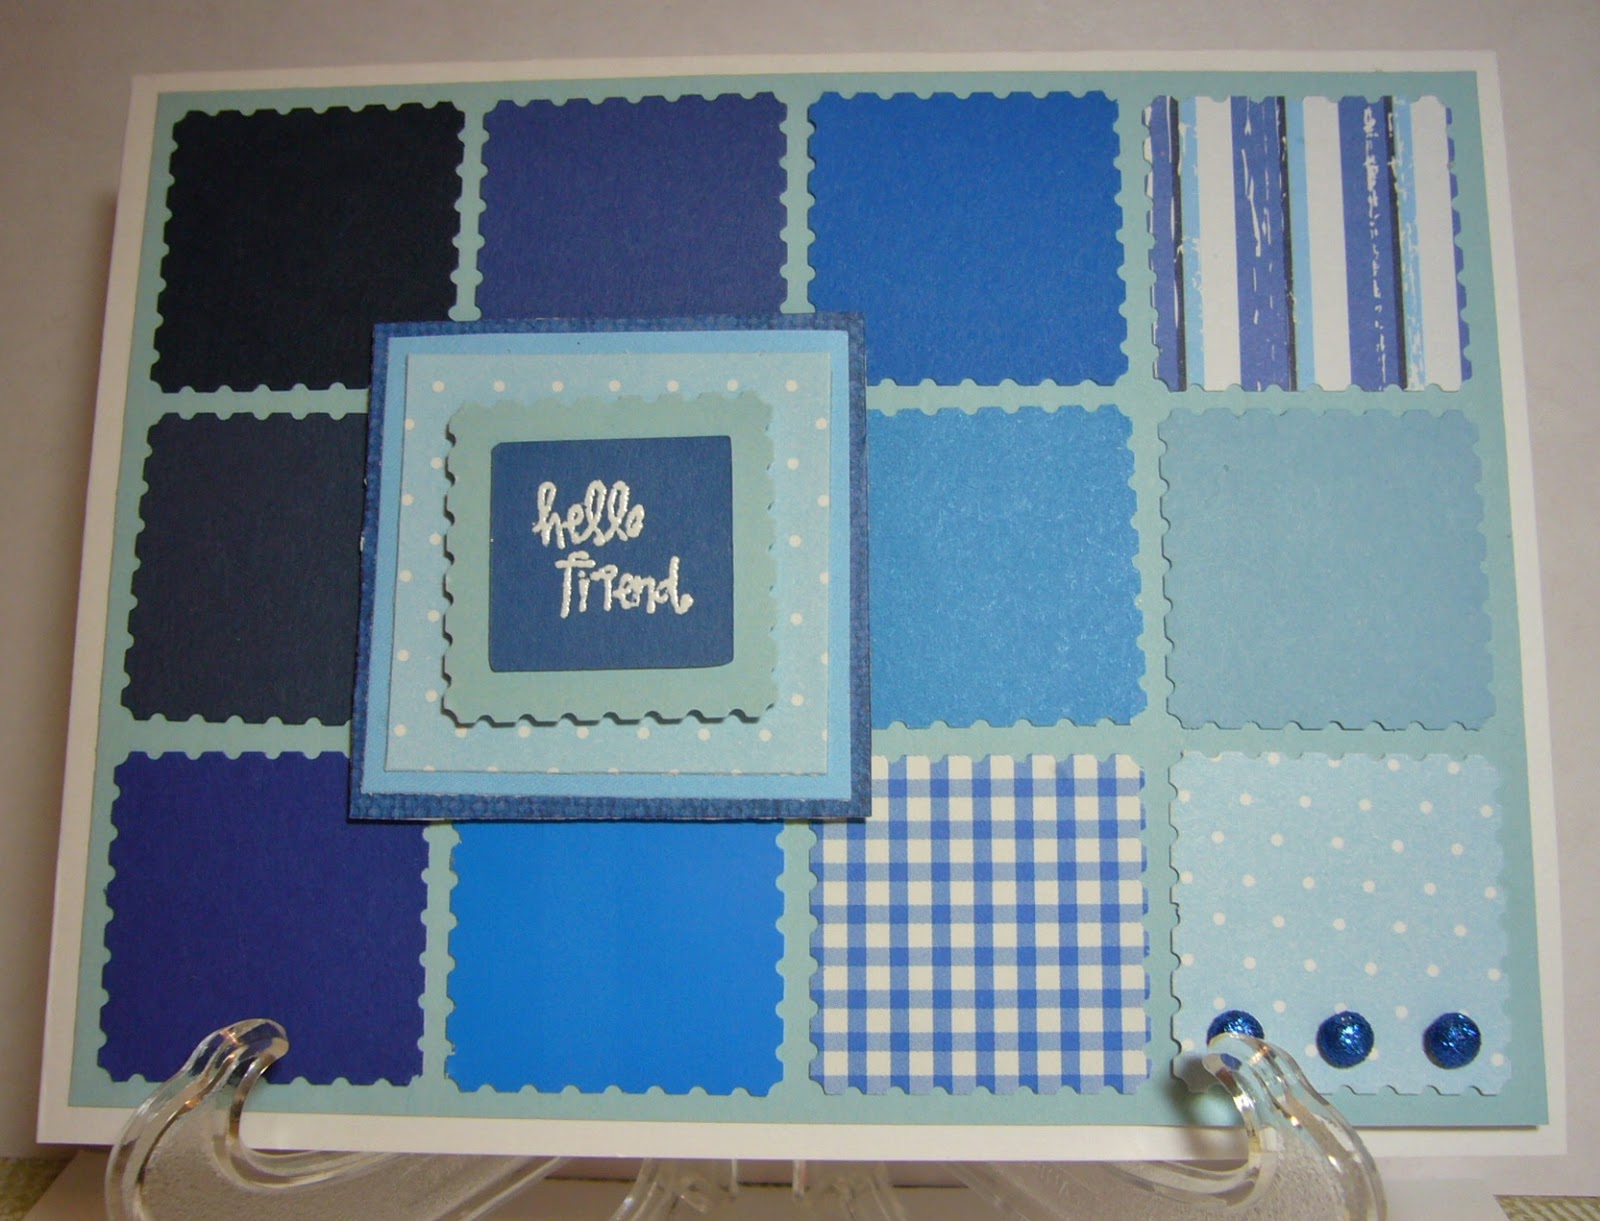
It's a good thing my hubby was looking at the calendar yesterday because I totally forgot it was my turn for a design at the Card A Day Blog! And, being on Sunday means I get to start the new theme. This week we're presenting "Monochromatic" cards for your viewing pleasure and inspiration. I have another of my 'scrap specials' for you, all in blues because that's what my daughter requested. The design of my card was actually 'borrowed' from a recent Stampin' Up stamp camp held by a neighbor. And here it is:
As you can see, this card uses lots of small bits of paper, so it's an absolute natural for using up those scraps. I did my best to get a sort of ombre effect with my papers; darkest in upper left corner to lightest in lower right corner. I used a postage stamp punch for most of the pieces, but several of the focal piece bits were simply cut square.
The card base is standard A2 size at 4 1/4 x 5 1/2. The layered piece is 4 x 5 1/4. The focal piece starts at 2" square with the rest of the pieces each just a bit smaller.
As I hope you can see, the focal piece has been affixed in two separate layers with foam tape. The sweet little brads offer just a bit of glitter to the card.
This little card really is a blast to make. You can have lots of fun choosing colors and a theme because, of course, this card can be adapted to many occasions. I can just imagine it done in colors for Christmas or Halloween with just the right central image. And it would look gorgeous in shades of brown and tans for fall. I do hope you'll enjoy designing your own!
Also linking to: Repeat Impressions DCC73 ~ Monochrome
Here are the specs:
Brads: American Crafts Mini Glitter Brads
Paper: Card base Georgia Pacific
Ink: Versamark
Embossing Powder: JudiKins Opaque White
Punch: Stampin' Up "Postage stamp"
Stamp: Pink By Design
'Til we meet again.....
Big HUGS!!
CHRISTINE
As you can see, this card uses lots of small bits of paper, so it's an absolute natural for using up those scraps. I did my best to get a sort of ombre effect with my papers; darkest in upper left corner to lightest in lower right corner. I used a postage stamp punch for most of the pieces, but several of the focal piece bits were simply cut square.
The card base is standard A2 size at 4 1/4 x 5 1/2. The layered piece is 4 x 5 1/4. The focal piece starts at 2" square with the rest of the pieces each just a bit smaller.
As I hope you can see, the focal piece has been affixed in two separate layers with foam tape. The sweet little brads offer just a bit of glitter to the card.
This little card really is a blast to make. You can have lots of fun choosing colors and a theme because, of course, this card can be adapted to many occasions. I can just imagine it done in colors for Christmas or Halloween with just the right central image. And it would look gorgeous in shades of brown and tans for fall. I do hope you'll enjoy designing your own!
Also linking to: Repeat Impressions DCC73 ~ Monochrome
Here are the specs:
Brads: American Crafts Mini Glitter Brads
Paper: Card base Georgia Pacific
Ink: Versamark
Embossing Powder: JudiKins Opaque White
Punch: Stampin' Up "Postage stamp"
Stamp: Pink By Design
'Til we meet again.....
Big HUGS!!
CHRISTINE
Sunday, June 9, 2013
Stars and Stripes
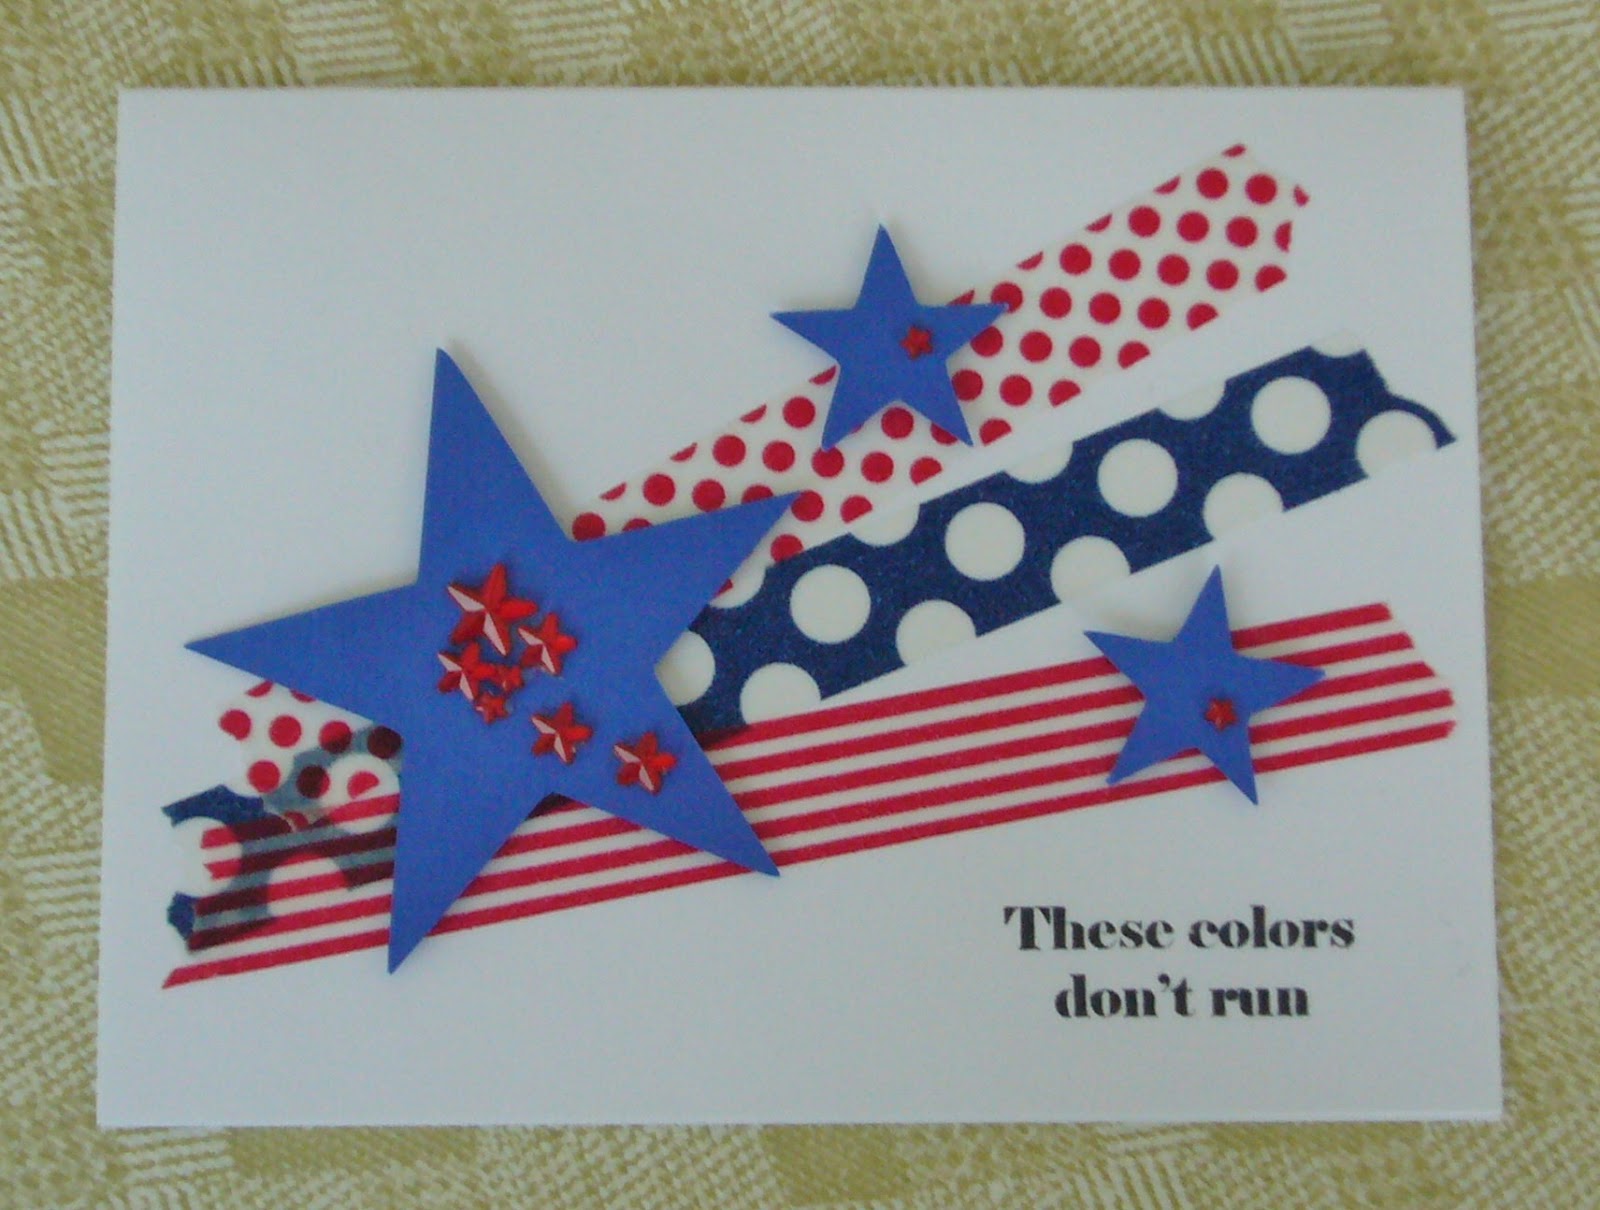
Yes, it is crazy, isn't it? Two days in a row! Just don't get used to it; I'm really not that prolific. But I do have a card for you to bring in the new theme at the Card A Day Blog. With Independence Day in the USA right around the corner, we are beginning our inspiration for 'Country's Birthday.' My card does, indeed, celebrate the birth of the United States, and was a snap to put together. A scrap of blue, a few strips of Washi Tape and a stamp with some ink, all added to a base, that's it. Simple, Fun, Striking and Patriotic!
Oops, I forgot to mention the bling, which looks a little dull in the pics (sorry), but really does look nice in person. The card started with a bright white A2 sized base. The flared stripes are just three torn pieces of washi, and the stars were cut on my Cricut from a scrap of blue card.
I think you can see in this photo that the blue stars were affixed with foam tape. Doing that and using the red blingy stars (Mark Richards Crystal Stickers) give a little dimension to the card. The sentiment, from Pink By Design, was stamped with Versamark Black Onyx ink.
Didn't I tell you it was a quick one!?! And just because it was so quick, I have another really fast card to show you. This one harkens back to a card I made just about a year ago which you can see here. I had saved the cut-out pieces to use them 'some day.' Well, this was the day. The leftover cuts simply needed a base, a couple of stars and a sentiment. Here are the pics:
These two cards are great for Flag Day (June 14), Independence Day July 4) and Operation Write Home. I hope I've given you a little inspiration for your country's birthday, whenever it is.
That's it for me today. See you again very soon, I hope!!
Big HUGS!
CHRISTINE
Oops, I forgot to mention the bling, which looks a little dull in the pics (sorry), but really does look nice in person. The card started with a bright white A2 sized base. The flared stripes are just three torn pieces of washi, and the stars were cut on my Cricut from a scrap of blue card.
I think you can see in this photo that the blue stars were affixed with foam tape. Doing that and using the red blingy stars (Mark Richards Crystal Stickers) give a little dimension to the card. The sentiment, from Pink By Design, was stamped with Versamark Black Onyx ink.
Didn't I tell you it was a quick one!?! And just because it was so quick, I have another really fast card to show you. This one harkens back to a card I made just about a year ago which you can see here. I had saved the cut-out pieces to use them 'some day.' Well, this was the day. The leftover cuts simply needed a base, a couple of stars and a sentiment. Here are the pics:
These two cards are great for Flag Day (June 14), Independence Day July 4) and Operation Write Home. I hope I've given you a little inspiration for your country's birthday, whenever it is.
That's it for me today. See you again very soon, I hope!!
Big HUGS!
CHRISTINE
Saturday, April 20, 2013
Celebrate MOTHER Every Day
It feels like such a long time since I was last with you, but I've been a bit under the weather for most of the past two weeks. I'm feeling better, not great, but definitely better, and I have a card to show you which was made for the Card A Day Blog theme, Mother's Day. I like to think of every day as Mother's Day. Where would any of us be without our moms, after all? My mom has been gone a long time, but not a day goes by that I don't think about her.
The image stamp that I used for my card is one that I've had for quite awhile. It's a silhouette stamp, and I was never sure how I wanted to use it, but while I was looking through my stamps for an idea for my card, this stamp practically jumped out at me. I knew I wanted flowers, and I knew I wanted a child or children, and I wanted something playful. Well, here it is:
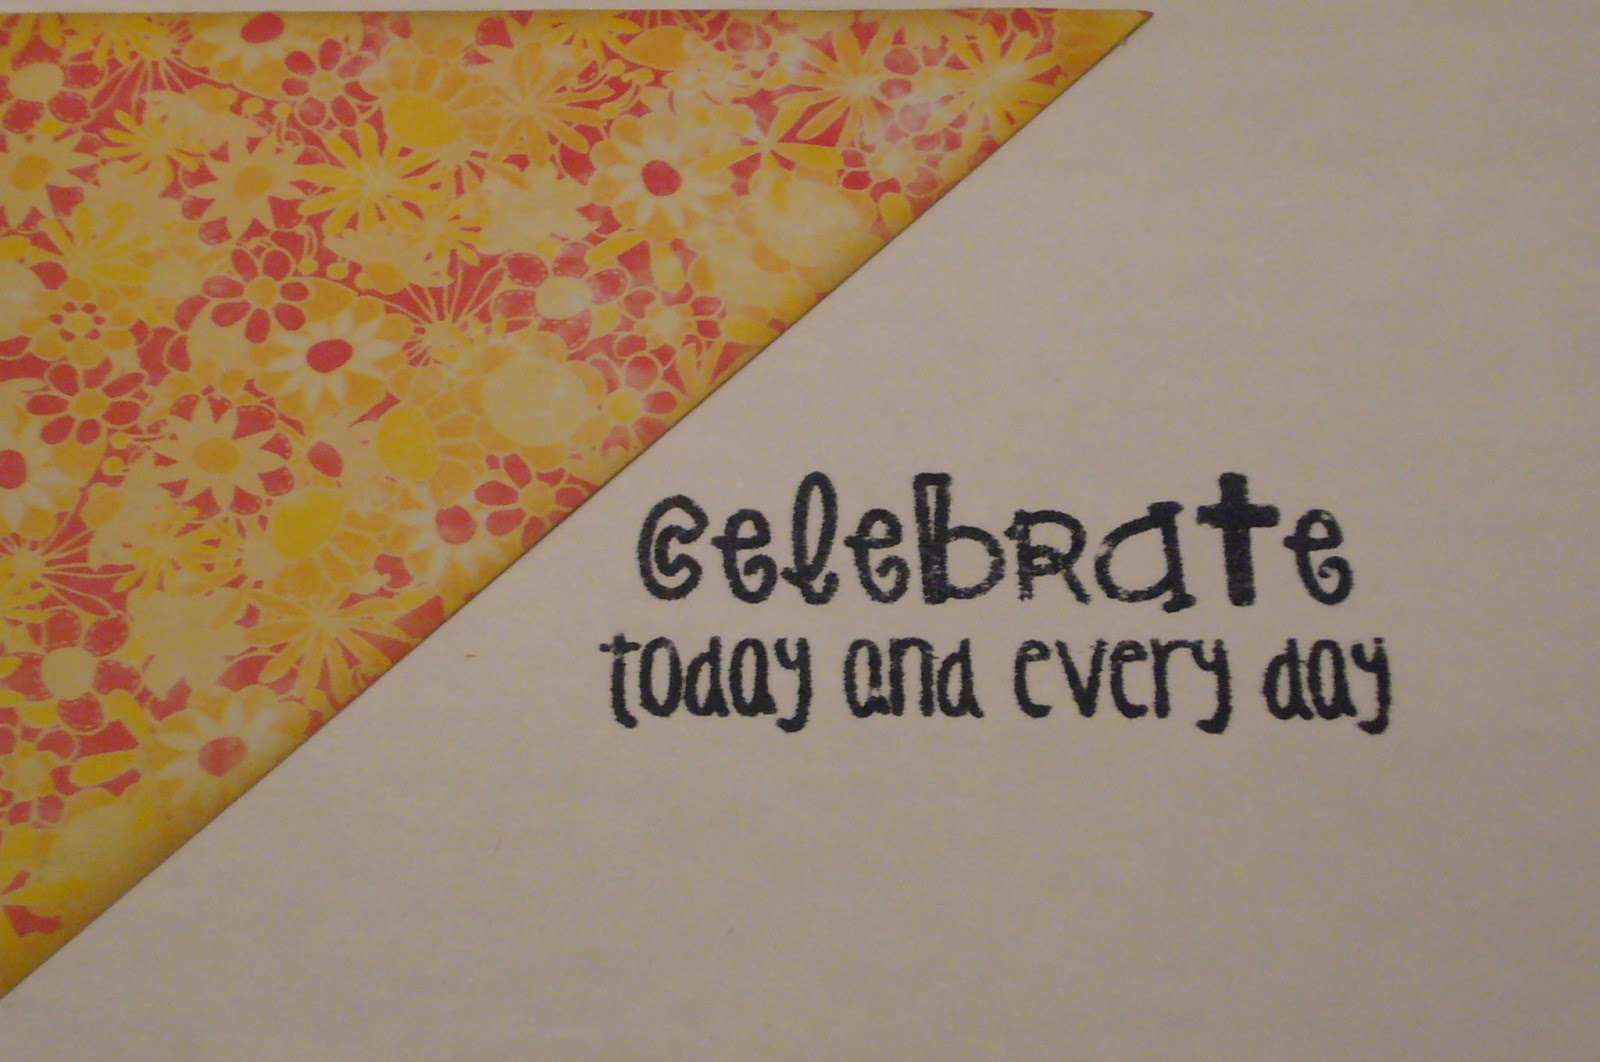
I decided to bring a little color to the inside of my card by adding another triangle of the dp in one corner before stamping the sentiment.
And there you have it, a really quick and easy card that you can put together for your mother or adapt the design for any other occasion.
Thanks for coming to visit!! Here are your deets:
Papers: Recollections black and yellow, Georgia Pacific white, Generations Stackers Primary Color Collection
Stamps: Hero Arts 'Dancing With Flowers', Pink By Design (no title, but it might be 'hello, life'), My Pink Stamper 'family & friends'
Inks: ColorBox 'Frost White', Memento 'Tuxedo Black', Tim Holtz Distress 'Antique Linen' (used for a bit of inking on the dp)
I am also entering this card in the Creative Digital Arts Center Anything Goes progressive challenge. Lots of fun happening at CDAC, so come on by and check us out!!
Big HUGS,
CHRISTINE
The image stamp that I used for my card is one that I've had for quite awhile. It's a silhouette stamp, and I was never sure how I wanted to use it, but while I was looking through my stamps for an idea for my card, this stamp practically jumped out at me. I knew I wanted flowers, and I knew I wanted a child or children, and I wanted something playful. Well, here it is:
I decided that, rather than use the silhouette in the regular black on white that we are so accustomed to seeing, I would stamp my silhouette in reverse, that is, white on black. It's a little unexpected, and I thought it would be a bit more fun. I layered it with foam tape on a piece of yellow card leaving a narrow border. On a white card base, 4 1/4x5 1/2, I applied three pieces of a bright floral dp. I used a wide strip in the center, and triangles on the sides. I then affixed the matted image with more foam tape for extra dimension. My last addition to the front was a simple tag stamped with the word, mother.
I decided to bring a little color to the inside of my card by adding another triangle of the dp in one corner before stamping the sentiment.
And there you have it, a really quick and easy card that you can put together for your mother or adapt the design for any other occasion.
Thanks for coming to visit!! Here are your deets:
Papers: Recollections black and yellow, Georgia Pacific white, Generations Stackers Primary Color Collection
Stamps: Hero Arts 'Dancing With Flowers', Pink By Design (no title, but it might be 'hello, life'), My Pink Stamper 'family & friends'
Inks: ColorBox 'Frost White', Memento 'Tuxedo Black', Tim Holtz Distress 'Antique Linen' (used for a bit of inking on the dp)
I am also entering this card in the Creative Digital Arts Center Anything Goes progressive challenge. Lots of fun happening at CDAC, so come on by and check us out!!
Big HUGS,
CHRISTINE
Wednesday, April 3, 2013
Teacher Appreciation
Hi everyone! I'm so excited to bring you my card today. I really loved most of my teachers, and the theme this week on the Card A Day Blog is "Teacher Appreciation." We've had quite a few teachers in our family, both mine and my husband's, and I know how much they've given of themselves to do the best for their students. So here is my little salute to all our teachers:
I was searching my library of images looking for something entirely unrelated to this project, and this terrific digital image of a teacher at her desk jumped out at me because my subconscious was actually working for me at the time and screamed, "You need to use this for CADB!" Quite coincidentally, we have a whole new group of challenges which began April 1st and will run until June 30th over at the Crafter's Digital Art Center. Here are the links to all the challenges:

I was searching my library of images looking for something entirely unrelated to this project, and this terrific digital image of a teacher at her desk jumped out at me because my subconscious was actually working for me at the time and screamed, "You need to use this for CADB!" Quite coincidentally, we have a whole new group of challenges which began April 1st and will run until June 30th over at the Crafter's Digital Art Center. Here are the links to all the challenges:

My card will be entered in the "Anything Goes Challenge."
Guess I went off on a little tangent there, didn't I? Back to my card. The cute image comes from Guylou's Inimitability Digistamps. I've had the image for awhile, and it worked just perfectly for this card. I've been wanting to use chalks for coloring recently, so that's what I did here, and that is also why the colors are so soft. I put together the '#1 Teacher' using some Martha Stewart alphabet stamps, and affixed the matted image to the card base with foam tape just to give my card a bit of dimension.
The inside sentiment has become one of my favorites. It is from a set called 'Our Heroes' made by Pink by Design. This set was made primarily for policemen and firefighters, but this sentiment works so well for teachers also. Here it is:
In case you're not seeing it very clearly the sentiment reads: "Not all heroes wear tights & a cape." Love it!!
I hope I've given you a little inspiration for cards to give those special teachers you've known. (My compliments to you, Carole.)
Here are the other little details:
Paper: Recollections (green), Georgia Pacific (white)
Ink: Stampin' Up Wisteria Wonder
Dimensions: 5 1/4 x 5 3/4
Thanks so much for your visit today. I do so appreciate that you took the time.
HUGS,
CHRISTINE
Wednesday, July 18, 2012
Mama Needs a NEW Pair of Shoes
Hello and Welcome!! I hope you are enjoying the weather in your neck-of-the-woods. As today's designer for the Card A Day Blog, I was very happy to have to stay inside to make my card. We've been having plenty of hot, hot days this summer, and I just don't do well in extreme temps anymore.
This week's theme at CADB is 'NEW'; new job, new home, new whatever. When I started thinking about my card I was hoping to come up with something just a little bit different. I thought about new hat and new dress, but then I remembered some fun stamps I've had for awhile of shoes. That's the idea that really grabbed me. Upon looking at the stamps again, I found the ideal sentiment for this week's theme. You'll see what I mean. Here's your first look:
These first two pictures give you a close look at just two of the shoe stamps I used. I wanted different colors to match all my outfits (heehee) so I used colors from the background dp.
I had been playing with some of my punches recently, and that left me with some miscellaneous punched elements. I happened to have one that was the perfect fit for tiling my shoes. Let's take a peek:
Here you can see the multicolored background with solid-colored framing that matches the card base. In the next shot you get a better idea of the whole card front.
I mentioned that the stamp set I used had a perfect sentiment. Here it is:
This card would be perfect for someone who just needs a little pick-me-up. Here is your straight-on front view:
The sentiment and the focal shoe were both heat embossed with Stampendous 'Detail Black'and mounted with foam tape for just a tiny bit of extra dimension. This card measures 5" x 7".
Nitty-Gritty:
Stamps: Pink by Design 'Shoe Addict' and 'Designer Shoes' sets
Paper: K&Company (dp) and Recollections (card base), stash white
Punch: Martha Stewart corner and edge (sorry, I don't have the name.)
Ink: Versamark, Memento 'New Sprout', Memories Direct 'Pink', Stampin' Up 'Wisteria Wonder' and 'Bashful Blue'
FYI for anyone who might be visiting for the first time: We have new themes weekly and challenges - with prizes - every month at the CADB. Hope you'll stop by and play along!
Remember to always keep your creative genius happy and well-fed!!
CHRISTINE
This week's theme at CADB is 'NEW'; new job, new home, new whatever. When I started thinking about my card I was hoping to come up with something just a little bit different. I thought about new hat and new dress, but then I remembered some fun stamps I've had for awhile of shoes. That's the idea that really grabbed me. Upon looking at the stamps again, I found the ideal sentiment for this week's theme. You'll see what I mean. Here's your first look:
These first two pictures give you a close look at just two of the shoe stamps I used. I wanted different colors to match all my outfits (heehee) so I used colors from the background dp.
I had been playing with some of my punches recently, and that left me with some miscellaneous punched elements. I happened to have one that was the perfect fit for tiling my shoes. Let's take a peek:
Here you can see the multicolored background with solid-colored framing that matches the card base. In the next shot you get a better idea of the whole card front.
I mentioned that the stamp set I used had a perfect sentiment. Here it is:
This card would be perfect for someone who just needs a little pick-me-up. Here is your straight-on front view:
The sentiment and the focal shoe were both heat embossed with Stampendous 'Detail Black'and mounted with foam tape for just a tiny bit of extra dimension. This card measures 5" x 7".
Nitty-Gritty:
Stamps: Pink by Design 'Shoe Addict' and 'Designer Shoes' sets
Paper: K&Company (dp) and Recollections (card base), stash white
Punch: Martha Stewart corner and edge (sorry, I don't have the name.)
Ink: Versamark, Memento 'New Sprout', Memories Direct 'Pink', Stampin' Up 'Wisteria Wonder' and 'Bashful Blue'
FYI for anyone who might be visiting for the first time: We have new themes weekly and challenges - with prizes - every month at the CADB. Hope you'll stop by and play along!
Remember to always keep your creative genius happy and well-fed!!
CHRISTINE
Thursday, June 14, 2012
FLAG DAY SALUTE!
Hi everyone! Sorry I've been away for awhile -- bit of an injury kept me from doing much with my hands. But I'm much better, now, and happy to be bringing you this card which celebrates Flag Day and honors our military heroes.
I am designer today for the Card A Day Blog where our theme of the week is "Red, White and Blue." It was a happy coincidence that I had signed up for this date (or maybe it was my subconscience telling me to do it). Either way, I hope you enjoy this simple patriotic card.
I started with an A2-sized card base in kraft. I chose that color to symbolize earth; not the Earth, just earth. I used a nice blue mat which I embossed in my Cuttlebug using a stars folder. I wanted to incorporate the U.S. flag in my card, and I chose a Cricut cartridge with various flag designs. I love the flag motif in the shape of the U.S.
I am designer today for the Card A Day Blog where our theme of the week is "Red, White and Blue." It was a happy coincidence that I had signed up for this date (or maybe it was my subconscience telling me to do it). Either way, I hope you enjoy this simple patriotic card.
I started with an A2-sized card base in kraft. I chose that color to symbolize earth; not the Earth, just earth. I used a nice blue mat which I embossed in my Cuttlebug using a stars folder. I wanted to incorporate the U.S. flag in my card, and I chose a Cricut cartridge with various flag designs. I love the flag motif in the shape of the U.S.
I hope you can see the embossed stars on the blue background (click on the picture to enlarge it). I had a closer pic, but it was not quite in focus. The sentiment is from the Pink by Design set called "Our Troops." It's a must-have set for any cardmaker with someone in the military or for OWH.
My inside sentiment is from the same set. I wanted just a bit of the color brought to the inside, so I used a white mat, stamped the sentiment in red, and added a blue paper strip to break up the white.
Thanks for visiting today. Display your flags proudly!!
Here are the supplies used:
Cricut Cartridge: Stand and Salute
Ink: Stampin'Up Classic 'Real Red'
Stamps: Pink By Design 'Our Troops'
Embossing Folder: Cuttlebug 'Stars'
Brads: American Crafts 'Elements' Mini Glitter Brads Primaries
Glues: Tombo Mono Adhesive, Zig 2-Way
Remember, always keep your creative genius happy and well-fed!
CHRISTINE
Monday, April 9, 2012
Here's to Grandmom
Hi everyone! I do hope you and your family enjoyed a beautiful Easter celebration. Our Easter service was so joyful, and filled with glorious music. I'm here, today, to bring you a Mother's Day inspiration for the Card A Day Blog. I really enjoyed making this card, using images from one of the Crafter's Digital Art Center Progressive Challenges. The girl in the image reminds me of my daughter, so I decided to make this card for her to give to her grandmother. Here's the first peek:
The girl is a digi image from Back To Paper. I colored her with copics, and paper-pieced her dress using a matching blue marker to color the trim. The flowers are another digi, this time from Glitterbabe. I printed the flower in the yellow paper in three sizes and cut them out for dimension. The stems are just cut from a scrap.
The card stock I used is a nice weight, and I wasn't expecting the color to bleed through, but it did! Since I needed to cover the bleed on the inside, I printed the sentiment directly onto a matching blue card stock and used it as a liner.
And a closer view so you can see the fonts used:
Of course, I had to get daughter's approval every step of the way. She chose the outside sentiment, which comes from Sarah Hamer of 'My Pink Cricut.' Here is the full front view:
As you can see, I rounded the corners. I cut the liner just a bit smaller and rounded those corners to match. And of course Grandmom needs a little bling, so rhinestones were added to the flowers.
I hope you enjoyed your visit today! Think about joining the CADB challenges. Please do remember to keep your creative genius happy and well-fed!!
CHRISTINE
The girl is a digi image from Back To Paper. I colored her with copics, and paper-pieced her dress using a matching blue marker to color the trim. The flowers are another digi, this time from Glitterbabe. I printed the flower in the yellow paper in three sizes and cut them out for dimension. The stems are just cut from a scrap.
The card stock I used is a nice weight, and I wasn't expecting the color to bleed through, but it did! Since I needed to cover the bleed on the inside, I printed the sentiment directly onto a matching blue card stock and used it as a liner.
And a closer view so you can see the fonts used:
Of course, I had to get daughter's approval every step of the way. She chose the outside sentiment, which comes from Sarah Hamer of 'My Pink Cricut.' Here is the full front view:
As you can see, I rounded the corners. I cut the liner just a bit smaller and rounded those corners to match. And of course Grandmom needs a little bling, so rhinestones were added to the flowers.
I hope you enjoyed your visit today! Think about joining the CADB challenges. Please do remember to keep your creative genius happy and well-fed!!
CHRISTINE
Subscribe to:
Posts (Atom)