Followers

Showing posts with label Stampendous. Show all posts

Wednesday, May 14, 2014

Happy Anniversary

Hi!  My card for today was a special request from my church choir to be given to our pastor who is soon to celebrate his 40th anniversary in the priesthood.  I think it is a very classy masculine card, whose focal point can be changed to suit many occasions.  This card also fits in with our Card A Day Blog theme of 'Use a Sketch.'

I went a little out of my comfort zone with this one by using a 5" x 5" card base rather than my more typical A2 size.  After choosing a sketch, I decided the square shape would be the better choice.  Here is my chosen sketch from Card Positioning Systems:


I wanted a religious image for my card, so I chose a Spellbinders Cross die and cut my focal image from a scrap of a really pretty textured slightly silvery paper.  The paper has a very subtle embossed design.  The same paper was used for the cross strips in the layering.


As soon as I chose the sketch I knew what my embellishments would be, 'Designer Brads' from the Paper Studio.

The card base, as well as two of the smaller layers, was cut from Stampin' Up 'Very Vanilla" stock, and the black layering pieces came from Recollections.


I needed to keep the inside very simple to accommodate lots of well-wishes and signatures.  I decided to use a large stamp, 'Baroque Cross' from Stampendous inked with VersaMark Dazzle Watermark pad in 'Frost.'  It's another very subtle effect, leaving a light shimmery image on top of which I stamped the 'Happy Anniversary' from Hero Arts.


Just for fun I added  'Uniquely Handmade' (from Stampabilities) to the back using Tim Holtz Distress Ink in 'Antique Linen.'


All I have left to do is make an envelope.  Now you know why I usually create the A2-sized cards - I don't need to make the envelopes!  (tee-hee)


That's it for today, my lovely friends.  Thanks for visiting!

'Til next time.....
BIG Hugs!!!
CHRISTINE

Thursday, April 3, 2014

In Sympathy

Welcome, friends.  We have a week of those sometimes difficult-to-make Sympathy cards as our inspiration for you at the Card A Day Blog.  I have been enjoying using lots of my dies for my cards recently, and my card today is another example of that.

I used four different die sets, beginning with the medallion.  My initial thought was to have a sympathy sentiment in the center, but that changed when I came across my Inkadinkado inchie set of cross stamps.  I used a scrap of slightly shimmery gold paper to cut the medallion, then stamped the cross on a bit of 'Very Vanilla' Stampin' Up card and heat embossed it with Stammpendous 'Detail Gold' powder.

 
I used the same off-white paper as the circle to die cut the background and the flower.  I used Ranger Distress 'Antique Linen' ink to frame the cross, as well as to edge the flower.  I then shaped the flower petals with a stylus and assembled the pieces using a gold glitter brad from American Crafts.
 
 
Next I die cut the leaves from some coordinating scraps of green papers and formed them with the stylus as well.


When I was ready for assembly, I ran the background through my Xyron sticker maker and affixed it to the green card which was cut at 5 1/2" x 4 1/4."  I used Matte Accents to attach the leaves and a Glue Dot to add the flower.  I layered the circle and the medallion both with foam tape before affixing them to complete the card.


I think this is a very elegant and tasteful card to present to a bereaved family member or friend.  I hope it has been a good inspiration for you, and I thank you for your visit today.
 
I'll be back in a couple of days with my first card for my Guest Designer spot at Beccy's Place.  We just might have some goodies in store so I do hope you'll come back and take a peek.
 
'Til next time.....
 
BIG Hugs!!!
CHRISTINE

Wednesday, March 26, 2014

He Is Risen

It's less than one month until Easter, and  the Card A Day Blog is celebrating with a week of Easter card inspiration.  My contribution to this theme is a clean and simple card with some lacy elegance.  I made this card using a few dies, some larger scraps and a few gems.  I didn't quite get away with no stamping, but I kept it to a bare minimum.

The card started with a fun fold that I've used once before, but this time I used it in reverse.  You can see the other example here.  So, the first step was cutting and folding the base.  Here are two photos of the card from the back where you can clearly see the cuts.


Next, I did the die cuts using  some scraps of gold card stock.  I just love the lace cross and trim.  I used my Xyron sticker makers to affix adhesive to the lacy pieces.  Such a quick and easy way to get those pieces adhered to the base.


I used a pretty gold embossing powder for the sentiment, and then cut that piece with a lacy scallops die before affixing it to the gold lace-edged die cut label using foam tape.  I added foam tape to just half of the gold label, and adhered it to the left front of the card base.


Once I had everything assembled, the card didn't look quite finished.  I took care of that by adding some gems to the cross and label.  That did it!  Quick, yet classy, and a good style for doing multiples.  Also, it fits into a standard A2 envelope.


I hope you have a wonderful day, and thanks so very much for spending part of it with me!

BIG Hugs!!!
CHRISTINE

Friday, October 18, 2013

Vrolijk Kersfeest!

"Christmas Around the World" is the theme this week over at the CARD A DAY BLOG, and I wonder if you can guess, by the title of my post, just where in the world is being highlighted by my card.  Well, it's really quite simple.  I haven't made an iris fold design in quite awhile, so I wanted to make my card using iris folding.  I didn't remember where iris folding had its origins, and decided to do a little research before starting my project.  It turns out that the technique of iris folding began in the 1700s in Holland, so that gave me my inspiration country.

The Dutch celebrate Christmas in much the same way as we do in the U.S., but they have separate celebration days for gift-giving and for the religious ceremonies and church-going.  Here is a brief description from Love to Know--Christmas:


"In the Netherlands, holiday traditions include Sinterklaas Avond, the midwinter hoornblaazen, and special celebrations on Christmas Day.

Sinterklaas Avond

Sinterklaas Avond - St. Nicholas Eve - is celebrated annually on December 5 and is considered the eve of Santa Claus's birthday. On this eve, Sinterklaas journeys to the homes of every child in the Netherlands and leaves small gifts and treats for them to enjoy. Sinterklaas is the Dutch equivalent of Santa Claus, but he looks quite different from the jolly man depicted in western culture. Sinterklaas is tall and slender, and he wears dark red robes and a hat similar to a bishop's attire. In many traditional images, he is elderly and has a long white beard.
Sinterklaas Avond celebrations actually begin several weeks before December 5, often as early as mid-November. Sinterklass is believed to live in Spain, and he arrives with great fanfare on a steamship at the start of the holiday season. Amsterdam and other port cities generally hold great celebrations to herald his arrival, including parades, ringing church bells, and children's parties.

Sinterklaas is accompanied by his assistant Black Peter (Zwarte Piet), who is dressed in 16th century Spanish attire to symbolize Spain's dominance over the Netherlands during that era. But Black Peter's face is covered with soot and he rides a mule, a stark contrast to the more joyous colors of Sinterklaas's red robes and white horse. It is Black Peter who goes down each home's chimney to leave gifts for the children, though in some legends he is also said to punish disobedient children.
Just as children in western cultures leave cookies for Santa Claus and may leave a treat for his reindeer, children in the Netherlands leave their shoes filled with hay, carrots, and sugar for Sinterklaas's horse. In the morning, the horse treats have been replaced with gifts for the children.

Midwinter Hoornblazen

Rural eastern areas of the country celebrate different Christmas traditions in the Netherlands. In addition to Sinterklaas Avond celebrations, this area is well known for the midwinter hoornblazen, or midwinter horn blowing. Handmade horns - three- or four-foot horns carved from birch or elder saplings - are blown over wells to announce Advent and herald the birth of Christ. The low tone produced from these horns resonating over the wells can be heard for several miles, and it is not unusual for several farms to seemingly call to one another with their horns. In some areas these horns may be blown each day of Advent, or they may be reserved for the first or last days of the spiritual celebration.

Christmas Day

December 25 is still a holiday in the Netherlands, but since most gift-giving is done on Sinterklaas Avond, this later part of the holiday season is generally more spiritual and involves more church services, concerts, and recitals showcasing religious material. This day is a time for family gatherings and delicious meals, including special breakfasts and formal dinners.

Christmas decorations in the Netherlands include rustic Christmas décor such as pine and holly boughs, simple lights, and candles. Many homes do have Christmas trees, and they may be decorated with all types of lights and ornaments or they may be simpler than western holiday decorations. Themed trees are especially popular. Another popular decoration is poinsettias (kerststers), which are often used as centerpieces, accents, and other holiday décor."


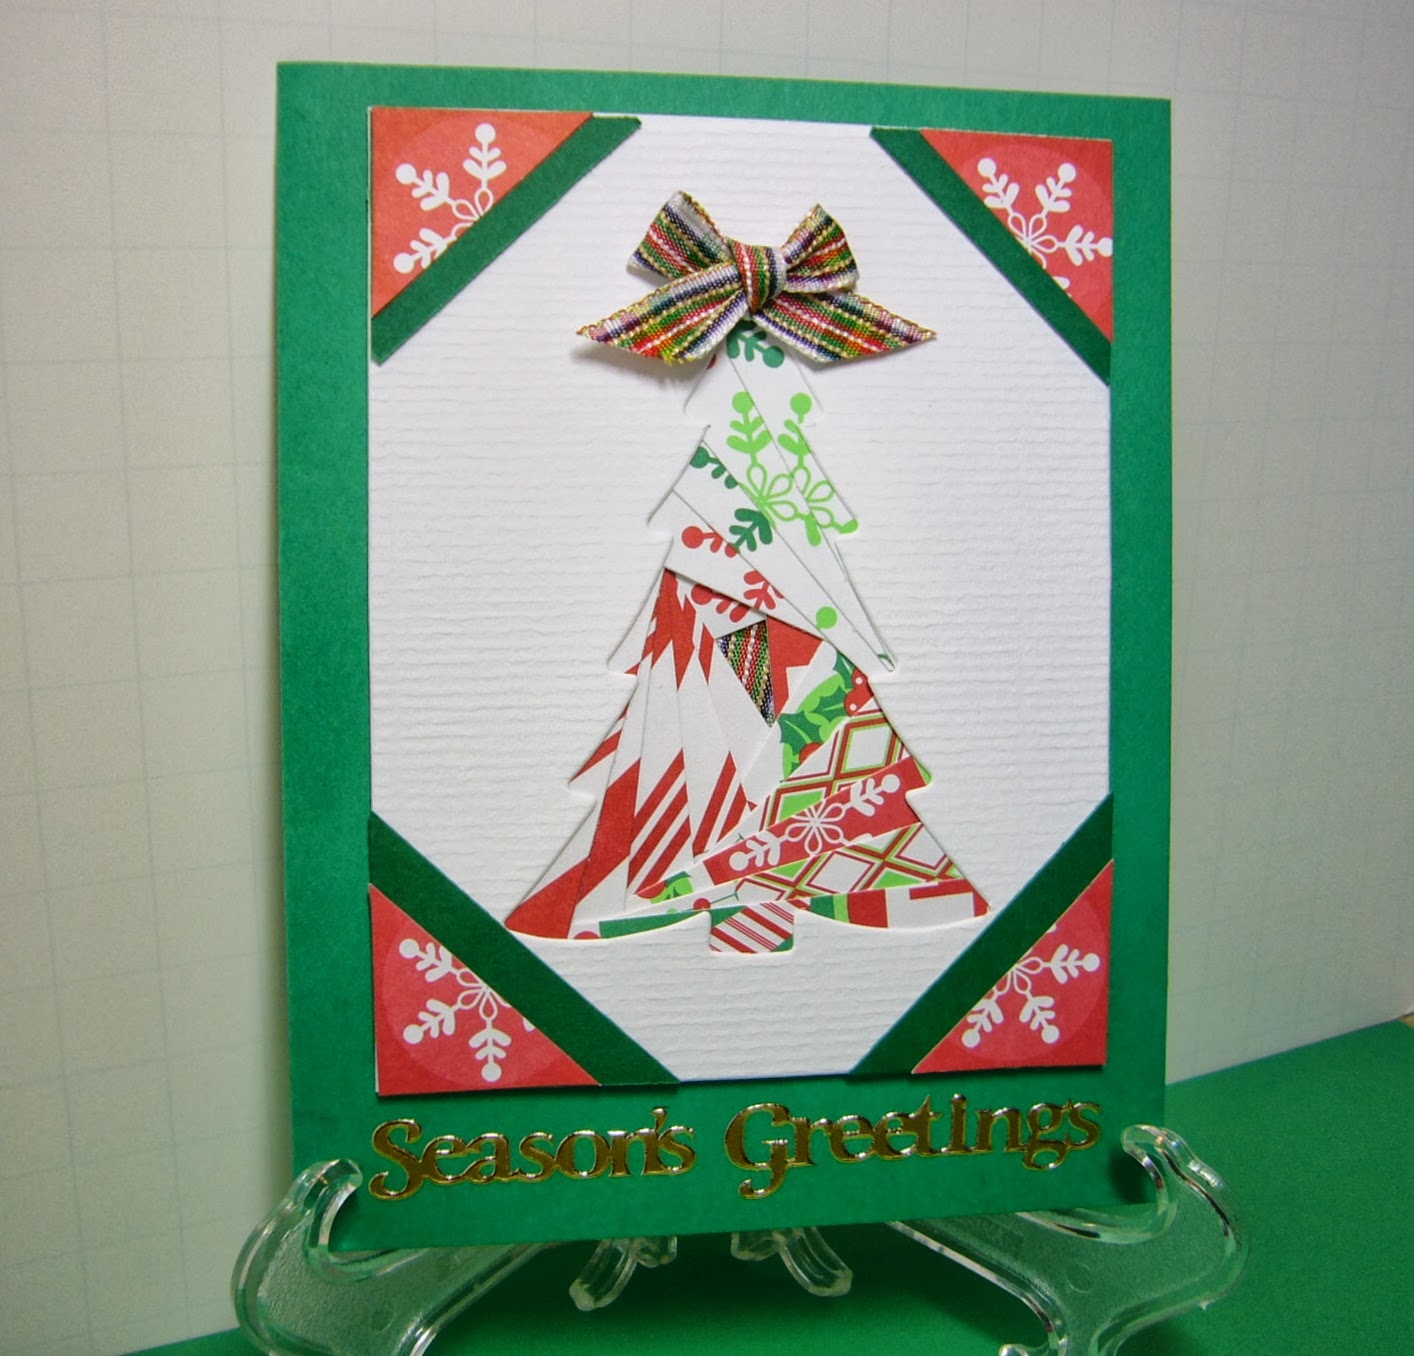
Well, now you know almost everything about Christmas in Holland (The Netherlands).  Since their tradition includes Christmas trees, I decided that my iris fold design would be in the form of a tree.  So without further delay, here is my card:

 
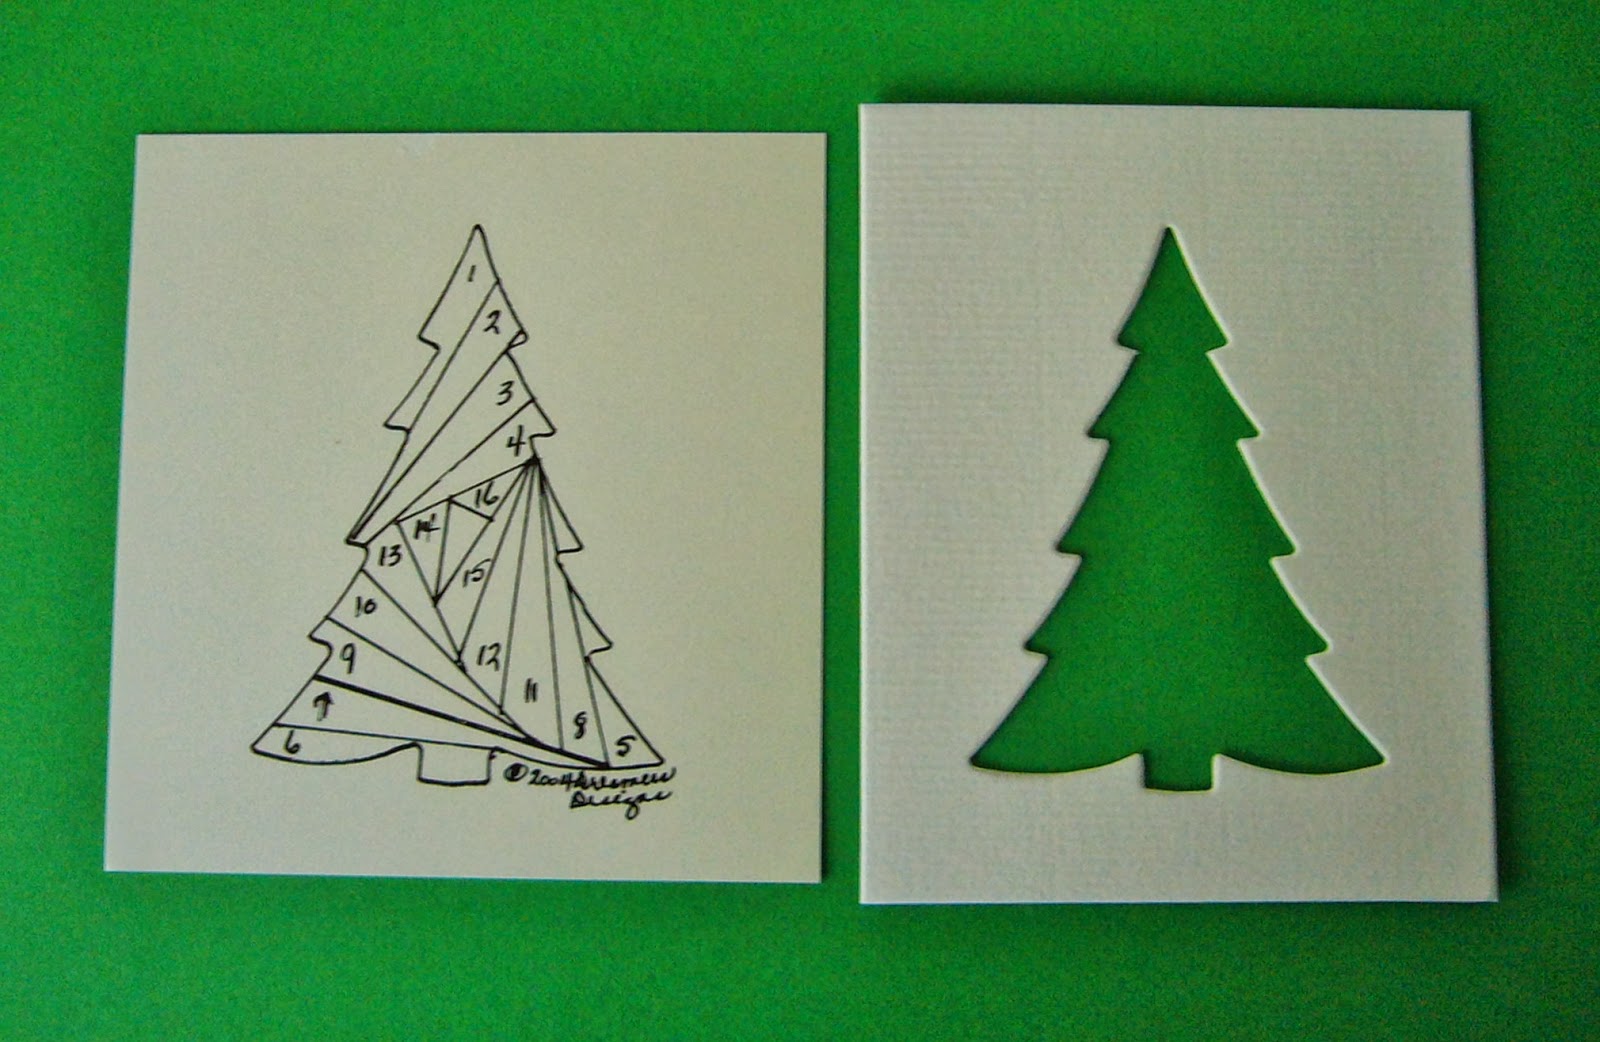
For anyone not familiar with the iris folding technique; it starts with a pattern (usually numbered) which indicates the placement of folded bits of paper to form a design.  The design has been cut from a piece of card, and the folded bits are taped or glued to the back of the design.  The "iris" appears when the card is turned to the front.  Here is a photo of my pattern and the cut design: 


When I was looking for my iris pattern among my Christmas supplies, I came upon a single card kit packet that I had gotten at a trade show or maybe in a class.  So I decided to use the kit as my base, and I pulled papers to coordinate.


I used three scraps to cut the strips for the iris design.  The piece of ribbon came in the kit, so I tied the small bow for the top of the tree, and used a scrap of the ribbon for the iris center.

The faux photo corners were cut from another piece from the kit (green) and bits from one of the papers used for the strips, and layered.  The sentiment came from a sticker pack.


Then the inside needed some color.  I used another of the scraps from the tree as a mat, stamped and embossed the greeting on a piece of white card and layered them.


Now, if you haven't already guessed the translation of my title, of course it's "Merry Christmas."  I don't personally know anyone who speaks Dutch, so I elected to use English on my card. 

Here are the supplies I can tell you about:
     Paper:  design scraps from Recollections
     Sticker:  Dazzles from Hot Off the Press
     Stamp:  Gina K Designs "Very Merry Christmas" set by Theresa Momber
     Embossing Ink and Powder:  Versamark ink, Stampendous "Detail Gold"

I used therm-o-web Sticky Dots to affix the bow and foam tape to adhere the centerpiece to the card front.


Thanks so much, as always, for visiting with me today.  I hope you've enjoyed your brief visit to Holland to learn just a bit about their Christmas traditions!

So 'til next time.....

Big HUGS!!
CHRISTINE

Thursday, October 3, 2013

Mash-Up for Christmas

Well, it's that time again.....starting those Christmas and other cards for the season.  I'm up on the Card A Day Blog today, and we're starting our Christmas card inspirations.  Of course, we don't stop with Christmas.  We include pretty much all the holidays of the season.  So be sure to visit regularly if you're looking for ideas for your cards.

I called my card a "mash-up" because that's really what it is.  I pulled together an assortment of scraps and bits of ribbon and extra pieces from earlier projects to make this one.  It's not the card I thought I was going to make, but I'll do that one another day.  For now, here is today's card:


I was inspired to make this card while I was straightening up some of my supplies, and my eyes stopped on some rosettes that were still laying about instead of being put away a long time ago.  So I chose the rosette that I wanted along with a topper snowflake and paired it with a strip leftover from cutting all the rosettes.  The rosette and snowflake had already been coated with gold glitter spray which helped me decide the rest of my color scheme.


I tore a page out of an old book that I use for projects, crumpled it, stamped it with snowflakes that I embossed with gold powder and rubbed on some metallic gold paste to bring out the distressing.  I used the same gold paste on a piece of textured packing paper, and layered both pieces on the card base.


I layered two pieces of ribbon with the patterned paper scrap.  Then added that piece to the card after affixing the hand made paper sentiment strip.  I also added two leftover bits of the gold ribbon as embellishment to the rosette.


I needed to bring some of the design to the inside, so I used another piece of the torn-out book page, crumpled it and stamped and embossed some of the snowflakes as well as the greeting.


The last step was rounding just one corner of my card.  And that's it!  As I said, I had lots of fun putting this one together.  Sometimes it's good just to let go and play.  You just never know what you might come up with.


Supplies:
     Stamps:  Stampin 'Up "Snow Swirled" and "A Christmas Carol" sets; WaltzingMouse Stamps "Complements of the Season" set
     Inks:  Versamark and Craf-T Products Metallic Rub-Ons "Gold"
     Embossing Powder:  Stampendous "Detail Gold"
     Extras:  Aleene's Fast Grab Tacky Glue, Scotch ATG, Crop-A-Dile Corner Chomper

Thank you so very much for visiting today.  Your visits make me happy, and I welcome and appreciate your comments as well.  Feel free to leave questions in the comment section. too.

'Til next time.....

Big HUGS!
CHRISTINE

Friday, September 6, 2013

Sit and Watch the Leaves Turn

Happy Friday everyone and WELCOME!!  Well, my ds's visit ended Wednesday, but before she left she started playing with an idea for my card for this weeks' "Autumn" theme on the CARD A DAY BLOG.  So today's card is another bit of sisterly collaboration.

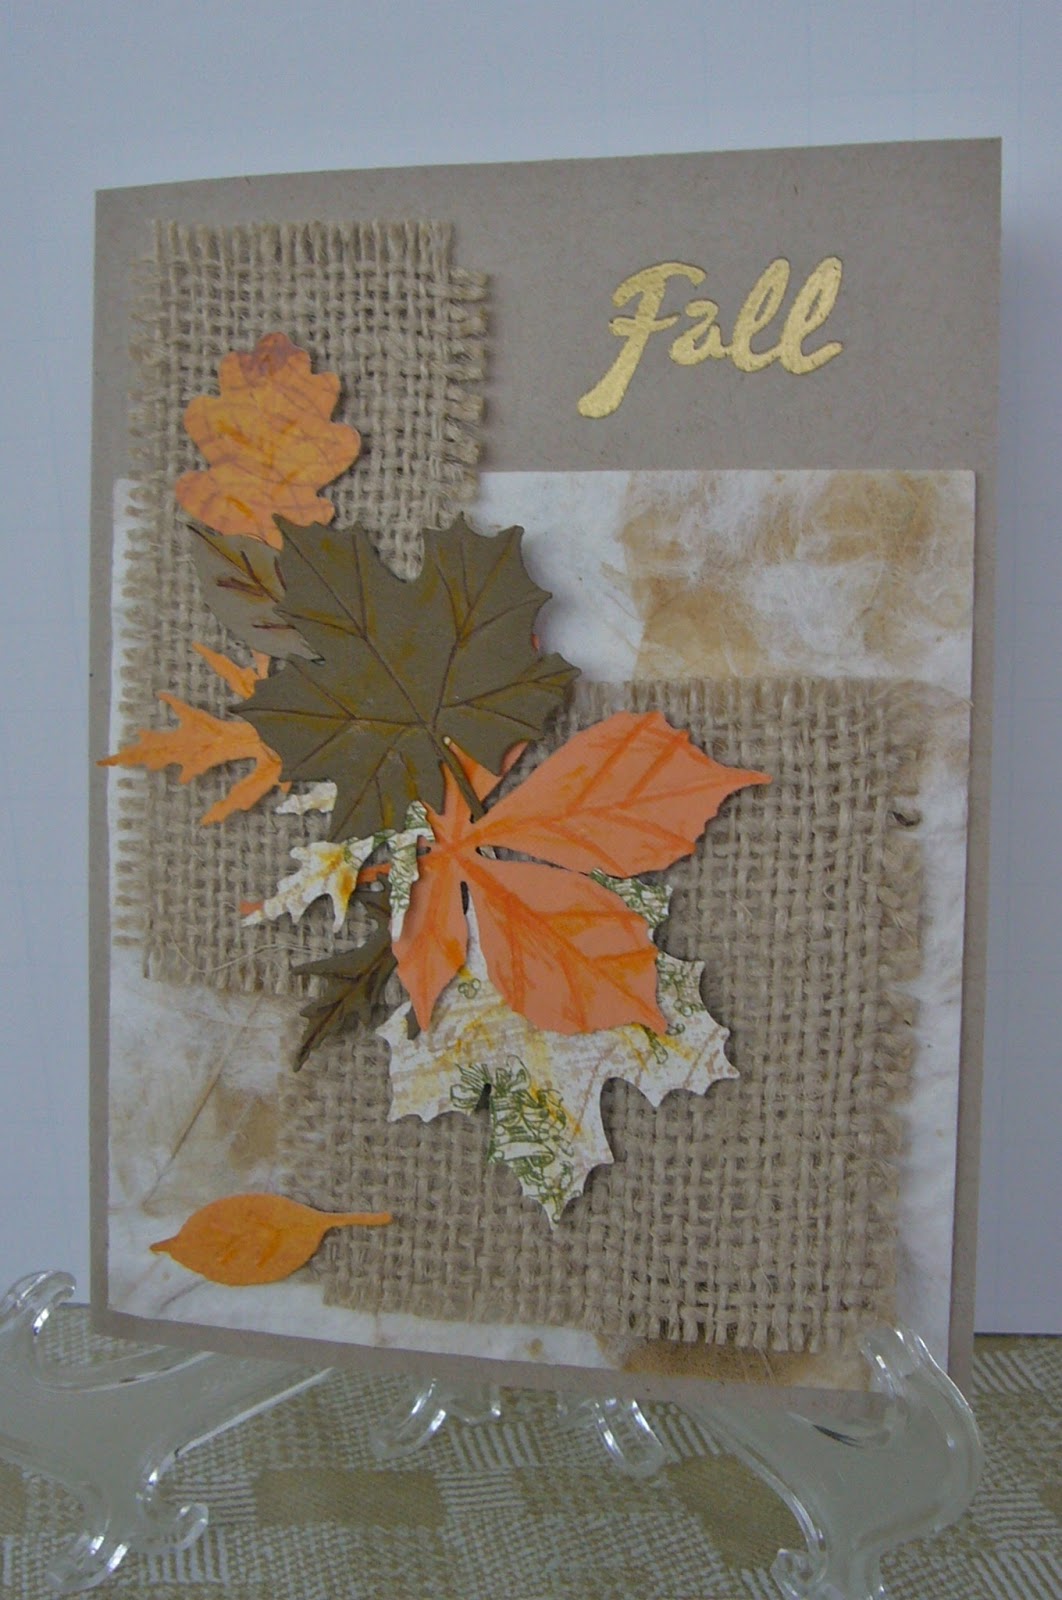
My sister's idea began with leaves and burlap.  She used a set of my dies to cut leaves from various scraps, and then cut some pieces of burlap to play with.  That's as far as she was able to get before she had to depart for home.   When I picked things up to work on the card I found a scrap of handmade paper that I thought would add nicely to the overall look.


I made a rough arrangement of the elements before I started to affix anything.  When I was happy with it I started adding drops of glue to begin setting everything in place.  The word 'Fall' was stamped with Versamark ink and embossed.


I hope you can see in these two pictures just how much dimension there is with the hand made paper, the burlap and all the leaves.

I used foam tape in just a few spots to keep things from flattening down.


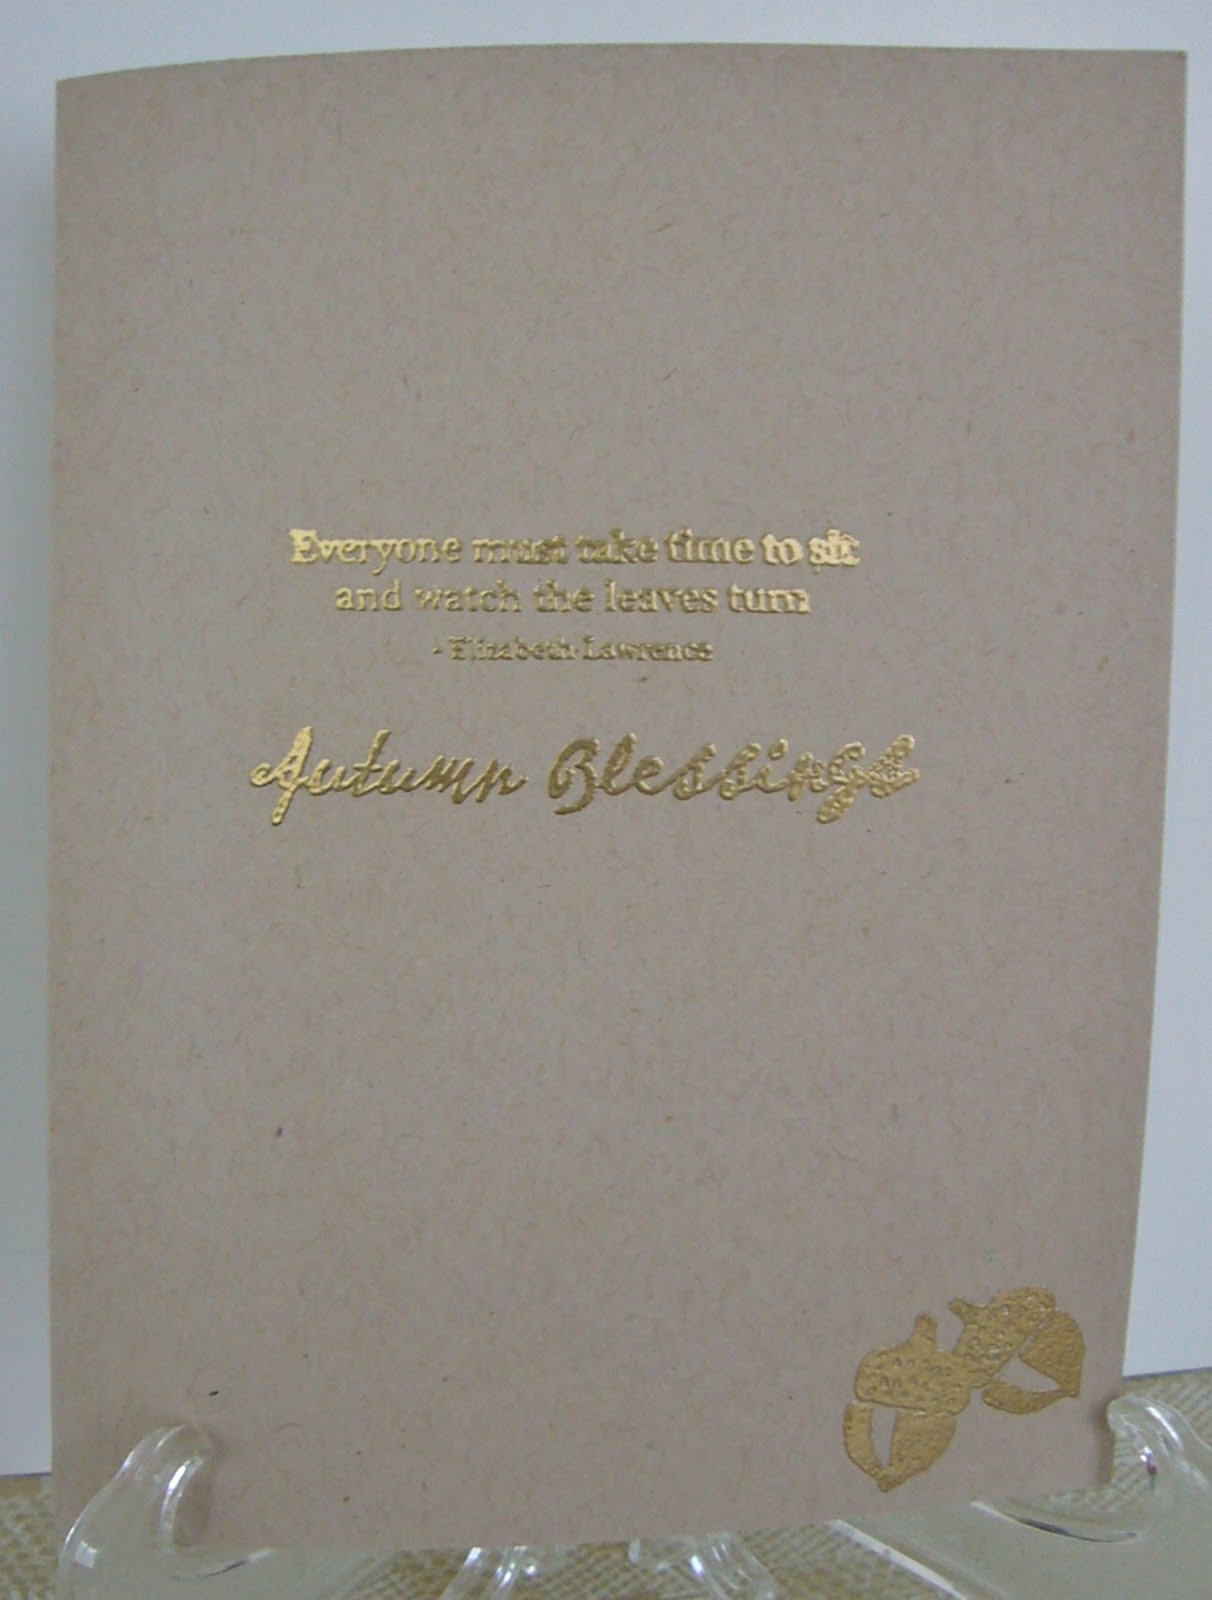
For the inside I chose a nice sentiment and added a pair of acorns to a bottom corner.  All were stamped with the Versamark and embossed.


Hopefully you can read the sentiment in the close-up shot.


This was a nice and easy card to put together, especially after my sis did all the cutting.  ;)  I did add some veining to the leaves.  If I had thought it through I would have distressed the leaves as well before trying to affix everything.  Oh, well, I did it a bit after taking all the photos!!


I'm going to leave you with a little tease today.  I am adding a new dimension to my crafting and hope to have some samples up for you soon.  Wish me luck!!

Thanks so much for stopping by today.  Here are your little details:

     Dies:  Impression Obsession 'Leaves Die Set'
     Stamps:  TCP Studio 'Autumn Harvest'
     Paper: miscellaneous scraps, Kraft CS cut at 5 1/2 x 4 1/4
     Embossing Powder:  Stampendous! 'Detail Gold'

'Til next time.....

Big HUGS!!!
CHRISTINE

Wednesday, August 14, 2013

It'll Be Okay

Happy mid-week everyone!  I'm designer of the day over at the CARD A DAY BLOG.  This is a week of using some kind of embossing but without a specific theme.  So, I have a little rainy day card for you using both wet and dry embossing.  It's a cute little card, and really quite easy to make.

I decided to start with an embossing folder, and build my card around whatever design I chose.  In this case, I chose a cloud folder.  I knew I had at least one stamp that was handy that I could use with clouds for a background.  I used my Cuttlebug to emboss a piece of vellum with the clouds, and then picked a dark blue mat to give an overall look of a very gray day.  Just to keep things a bit neutral, I chose kraft card for my base.


I stamped my focal image and my sentiment on white with Versamark ink and embossed with black powder.  The embossing gave a nice outline to color in, which I did very simply using Copics in cheery colors.  I also gave the sentiment a bit of shading with the same blue Copic marker.


I then die cut the two pieces using a slightly fancy die for the label and a die that complemented the look of the clouds for the image.


Not wanting any glue or tape to show behind the vellum I simply used brads to affix the label and vellum to the mat.  I then used foam tape to affix the image piece to the vellum as well as the mat onto the base.


In all this was a relatively quick card to put together.  I got a slightly late start on creating, so quick was a good thing for me today. (heehee)

As always, thanks so much for coming by.  I do hope you enjoyed your visit!

Here are just a few details:
     Paper:  Gina K Designs "In the Navy"
     Brads:  Bo Bunny "Bodacious Brads" in Buttercup
     Embossing Powder:  Stampendous  "Detail Black"
     Stamps:  Pure Innocence for My Favorite Things "My Umbrella"
     Dies:  Spellbinders and Lifestyle Crafts
     Embossing Folder:  Darice "Clouds"
     Markers:  Copics Y04 (Acacia), B24 (Sky), E00 (Skin White), R11 (Pale Cherry Pink)

That's it for now --- see you again soon!!

Big HUGS!
CHRISTINE

Saturday, June 8, 2013

Hi!

Hey there, folks!  Well, I don't usually do more than one post during a given theme for the Card A Day Blog, but this week is an exception.  I have a second inspiration for you during this 'friendship' week that I hope you will enjoy.  Once again, except for the card base, all my pieces were leftovers/scraps.  Even my central image, a wonderful digital design by Guy Gondron for an internet class I took awhile back on coloring with Copics, was a leftover image just waiting for the right project.  So, since I have used a digi design on this card, I am entering it into the Seasonal Fun Challenge (must use a digital design) at CDAC.  I haven't mentioned this before, but I've been having a real issue with arthritis in my right hand so that I am scarcely able to write, let alone color, for any extended time.  Fortunately, I had colored this image at the time of the class, and here is my card!


When I was browsing through a collection of images I had previously printed out (or even colored), I came upon this cute turtle.  I couldn't help thinking first, how cute he looks peering up at that little ladybug flying by his head, and second, how much he reminded me of a turtle my hubby encountered in our yard one day and brought into the house for us to see.  Of course, we immediately named him;  Bartholomew T. Turtle.  I decided to use a kraft card base to mimic sand, and put Bartholomew in a little grassy area right by the sand.  For the grass I used two different dies (One from Impression-Obsession and the other, I think, from Lifestyle Crafts) to cut my green scraps.  Here is a close shot of the coloring and the grass:


Since I didn't want Bartholomew to look lonely on the card, I decided to put a nice frame around him.  I actually used a test cut that I had saved from an earlier project.  When choosing the colors for the frame, I wanted to highlight the color of the little ladybug.  I used Tim Holtz Distress Inks in "Spiced Marmalade" and "Ripe Persimmon" to add the color to the frame.  Also, I wanted to have some dimension on the card, so I layered the grasses and the frame with foam tape.  Here is an angled pic for you which shows the dimension:


Finally, I stamped the simple greeting, and left the inside blank so there is lots of room to write a nice message to a favorite friend.  The stamp came from a set called "Happy Messages" by Stampendous, and was stamped with Versamark "Onyx Black."

If you have some friends you haven't seen or spoken with for awhile, why not put together a few cute cards and write them a 'happy message?'  Everyone loves to open their mailbox to find a lovely greeting card waiting to be enjoyed.

Thanks so much for stopping by today.  I hope you're enjoying a wonderful weekend!!

Big HUGS!
CHRISTINE

Monday, June 3, 2013

my friend

That's YOU, I hope!  So happy you decided to come for a visit today.  We had a pretty scary time of it this weekend with some nasty storms.  There were tornadoes in the area which did a fair amount of damage, but luckily no deaths or major injuries.  Certainly nothing like what the poor folks in Oklahoma have seen.  Lots of prayers going out to them.

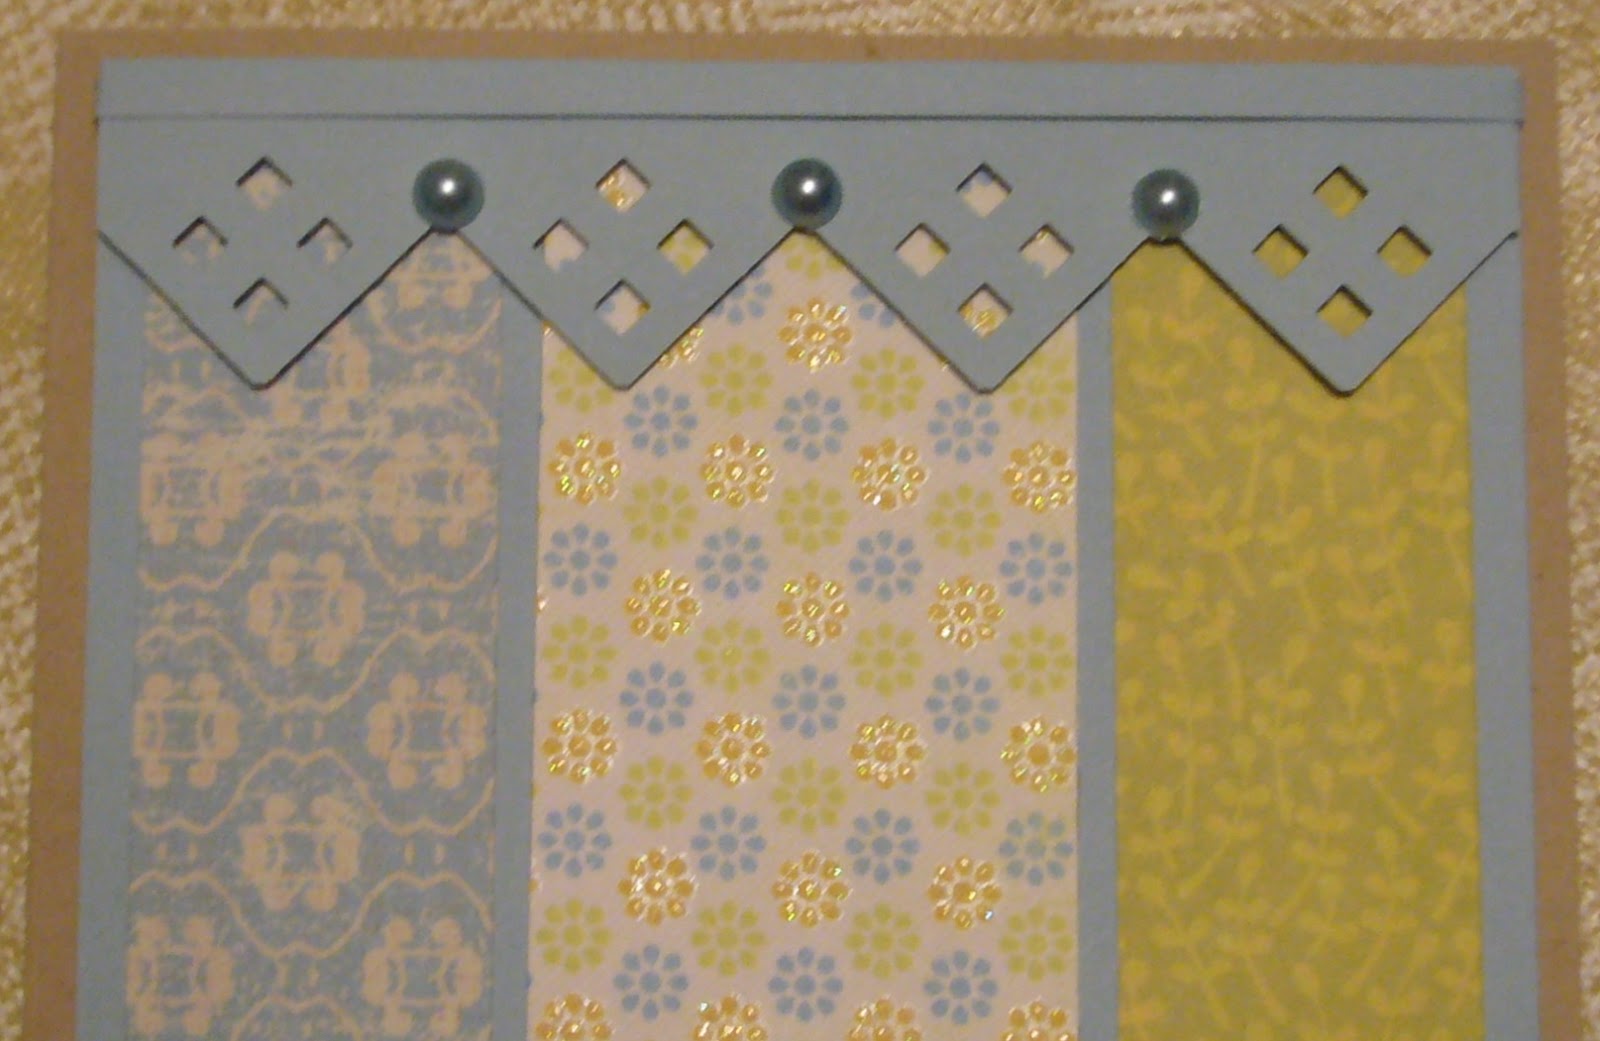
On a happier note, I do have a card to show you today.  We're having 'friendship' week over at the Card A Day Blog.  I think a cheery card for a friend is one of the easiest cards to create.  Just put together a few elements that please you, and you're done!  That's pretty much what I did with my card.


I happened to have a few pieces left over from when my sister was visiting.  I thought it would be easier to use them for a card rather than put them away.  That sound too much like 'cleaning.'  I decided on a banner style, and started playing.


My base card is a piece of kraft cs that was left from an earlier project.  The blue mat was left from my sister's playtime, as were the three pieces used for the flags.  I used a border punch for the 'valance', then added a thin strip for trim and a few pearls for extra prettiness.  Last step was to add the cute little sentiment.


As you can see, I brought the colors to the inside with just a few thin strips of the design papers, using them in the same order as on the front, and then stamped the greeting.
 
This was actually one of my quicker cards to make, from idea to completed project.  I usually fuss for much too long a time before I manage to get started let alone get finished.  ;)   I'm also entering this card in the CDAC Anything Goes Challenge.
 
Here is your peek at the full front of the card.  I hope you can see the sparkle in the center flag.


The details are short and sweet:

          Papers:  KandCo and Recollections
          Pearls:  Recollections
          Punch:  Creative Memories
          Ink:  Versamark black onyx
          Stamps:  Stampendous 'Happy Messages' set SSC109

Thank you so much for your visit.  I'll be back with you in a few days.  In the meantime, I hope everyone has some nice calm weather and lots of wonderful moments!

Big HUGS,
CHRISTINE