I started out with a left-over rosette with some embellishments for my inspiration. I've been wanting to use this rosette for several months because it's just been sitting on a chair waiting for some action. I knew that if I put it away somewhere it would most probably languish for even longer, so I took this opportunity to put it to work.
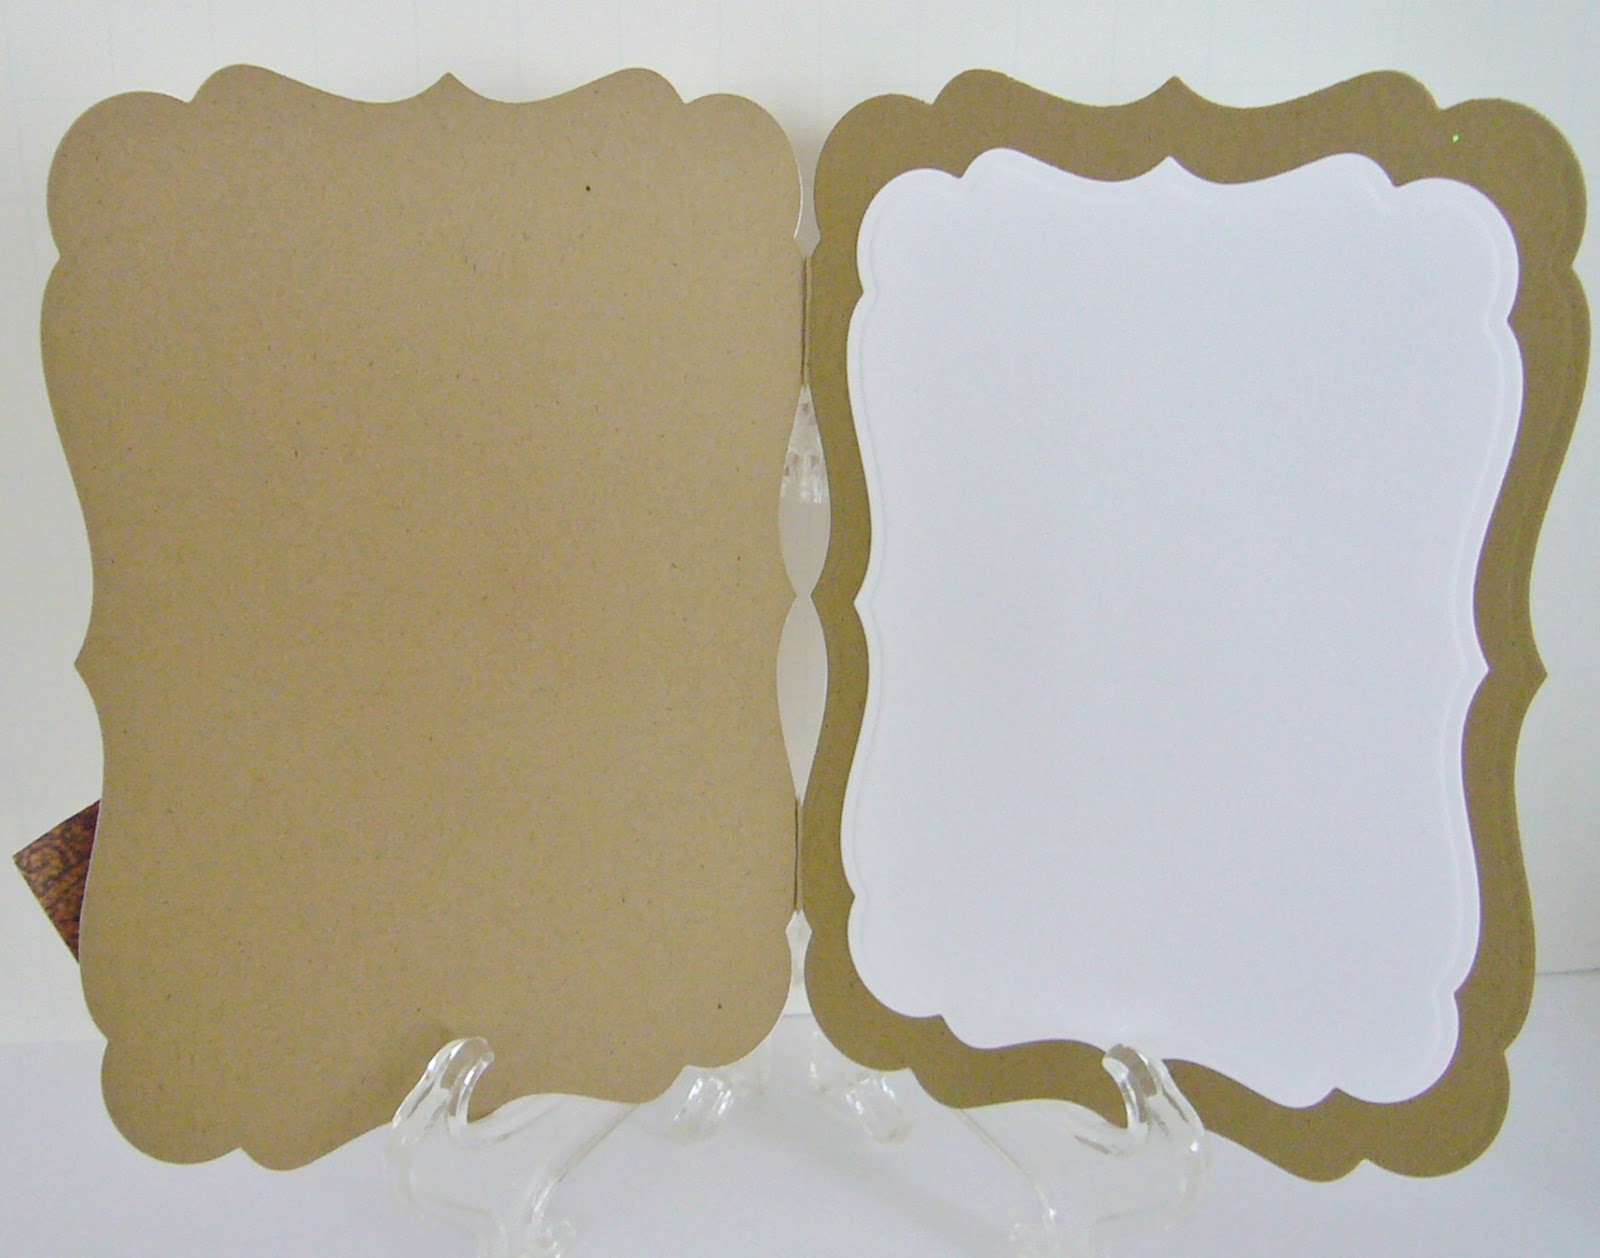
For my card base, I took some kraft card stock and the largest die from one of the Spellbinders label sets. The die was just about the right size to make a card that would fit nicely into a standard A2 sized envelope. I cut the card at 5 1/2 x 8 1/2, scored and folded it, and cut it with the edge of the die sitting just off the folded edge of the card. That way I was able too get a nicely shaped card in one piece. I cut a piece of dp with the same die, but made sure the die cut all around the paper. Then I cut a third piece, this time a solid glitter paper, using the largest die and the next size smaller to create a frame. I think I'd better show you a picture so you can see just what I'm talking about.

You can't see the kraft card base because I assembled the framed dp and covered the front to give the card a nicely cut full shape that doesn't show the folds. Next, I used a scrap of blue patterned paper to create the trim around the rosette. This was cut with a die from one of the fancy labels sets. I cut this piece in half to be long enough to fill the space.
I then needed to finish the rosette with its embellishments so I arranged the pieces and glued them together. I'm not sure if the leaves were die cut or punched (they've been around for awhile as well), and the glittery flowers came out of a package. The pearl embellishment is a button, and the tag, I think, is a die cut. Sorry to be a bit vague about some of the pieces, but they came from a stay with my sister, and I'm not always too great about writing down what was used at the time.

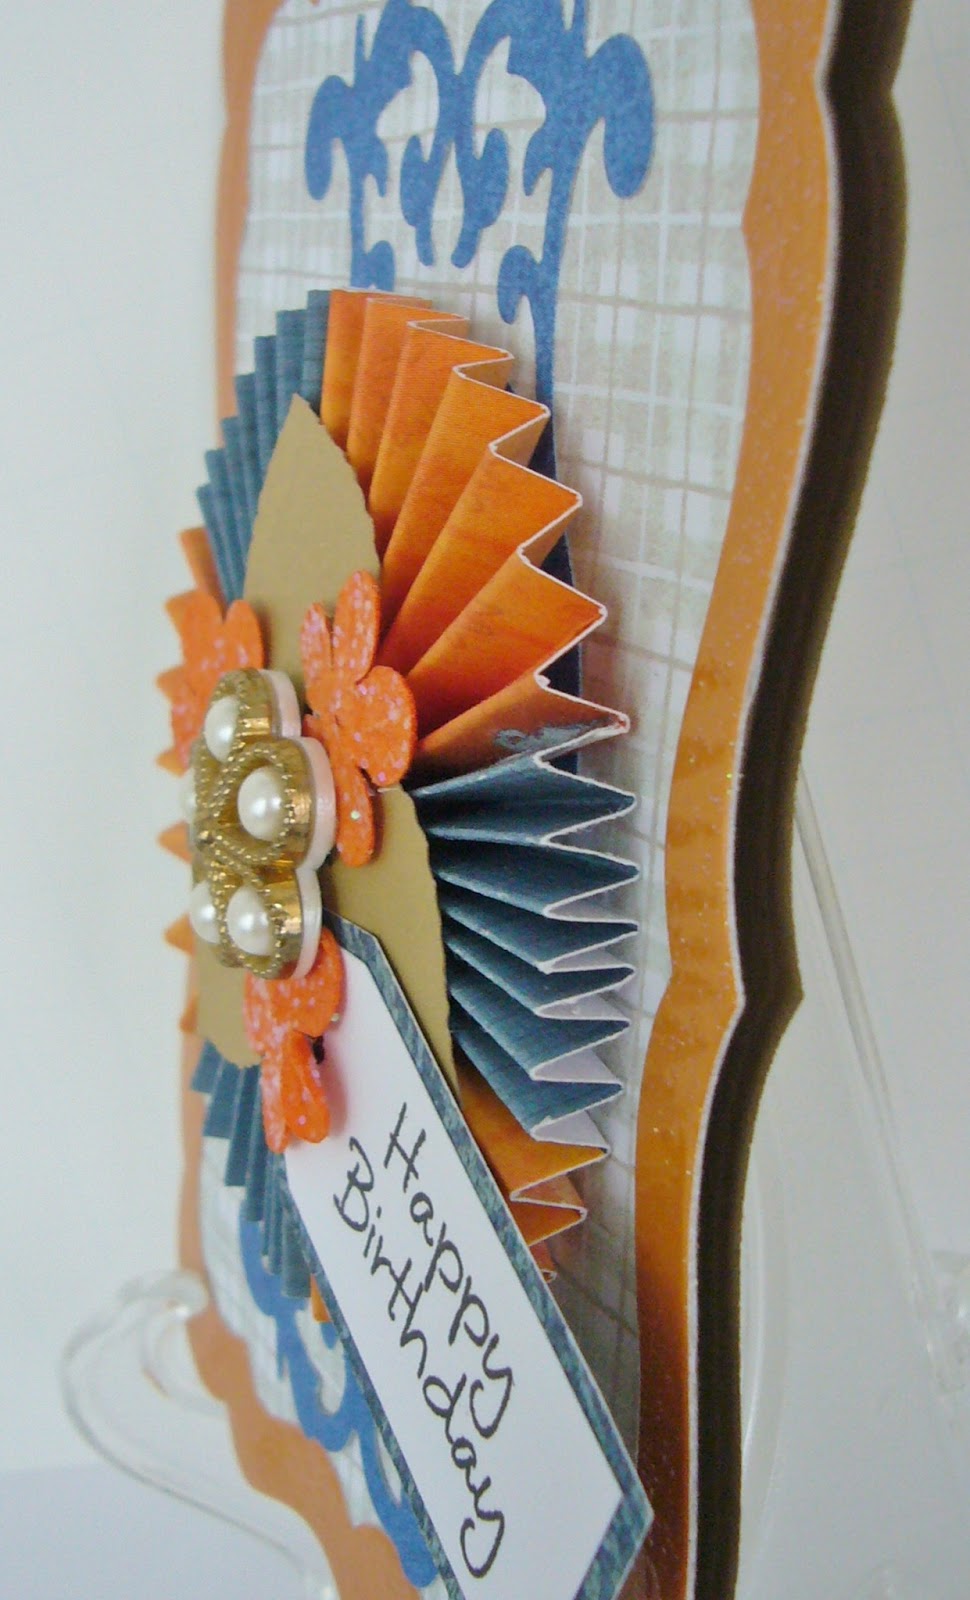
You can see from these angled photos how much dimension is on this card. It will fit into an A2 envelope for hand delivery, but a special envelope would be needed for mailing.
Once I had the card assembled I decided I wanted an insert for writing a message. I used plain white card stock and the smaller of the two frame dies for this piece. You can see this in the next pic as well as see how the card was cut initially as one piece on the fold.
I showed the finished card to my dd who really liked it. (I should have saved it for her next birthday -- heehee!) I hope it gives you some ideas on using your larger dies for making your card bases.

Papers used: DCWV glitter cardstock matstack and Sizzix Little Sizzles Pastels
Adhesives: Scotch ATG and Quick-Drying Tacky Glue, and Ranger Matte Accents
I look forward to seeing you again soon. Thanks for visiting!!
'Til next time.....
Big HUGS!
CHRISTINE
That is a cool looking card! Looks a good die for this type of card making too. Fantastic color combination too
ReplyDeleteNice!!
ReplyDelete