Followers

Showing posts with label Sizzix. Show all posts

Thursday, April 3, 2014

In Sympathy

Welcome, friends.  We have a week of those sometimes difficult-to-make Sympathy cards as our inspiration for you at the Card A Day Blog.  I have been enjoying using lots of my dies for my cards recently, and my card today is another example of that.

I used four different die sets, beginning with the medallion.  My initial thought was to have a sympathy sentiment in the center, but that changed when I came across my Inkadinkado inchie set of cross stamps.  I used a scrap of slightly shimmery gold paper to cut the medallion, then stamped the cross on a bit of 'Very Vanilla' Stampin' Up card and heat embossed it with Stammpendous 'Detail Gold' powder.

 
I used the same off-white paper as the circle to die cut the background and the flower.  I used Ranger Distress 'Antique Linen' ink to frame the cross, as well as to edge the flower.  I then shaped the flower petals with a stylus and assembled the pieces using a gold glitter brad from American Crafts.
 
 
Next I die cut the leaves from some coordinating scraps of green papers and formed them with the stylus as well.


When I was ready for assembly, I ran the background through my Xyron sticker maker and affixed it to the green card which was cut at 5 1/2" x 4 1/4."  I used Matte Accents to attach the leaves and a Glue Dot to add the flower.  I layered the circle and the medallion both with foam tape before affixing them to complete the card.


I think this is a very elegant and tasteful card to present to a bereaved family member or friend.  I hope it has been a good inspiration for you, and I thank you for your visit today.
 
I'll be back in a couple of days with my first card for my Guest Designer spot at Beccy's Place.  We just might have some goodies in store so I do hope you'll come back and take a peek.
 
'Til next time.....
 
BIG Hugs!!!
CHRISTINE

Wednesday, March 19, 2014

Bold Floral Congratulations

Hello all you friendly people out there!  I hope everyone is enjoying a wonderful day.  Where I live we have been seeing lots of sunshine and steadily rising temperatures - just beautiful.  My card today, for the Card A Day Blog theme of "Congratulations," has some very bold flowers in bright colors.  I just couldn't help carrying over the happy mood from our celebration of Spring last week, especially since tomorrow is actually the first day of Spring.


My flowers were made with some paper flowers that just needed to be punched out and rolled.  The package comes with three different sizes, but I was able to use only the smallest size on my card.  The larger flowers would be lovely for a home dec project or for making up a pretty package.


Next I went through my green scraps to find some pieces to die cut leaves for the flowers.  There were two dies in the same set that were perfect for the sizes of my scraps.  How lucky!  I love it when I can make good use of those scraps I couldn't bear to part with.


I didn't want my card to be too fussy, but I wasn't happy with the plain white background I had, so I decided to use an embossing folder to add some subtle design and texture.  I rounded opposing corners on both the card base and the background which I mounted to the base with foam tape.


Once I had the leaves and flowers in place, all I needed was the sentiment.  I stamped it in brown ink on paper matching the card base, and cut it into a tag shape.  I affixed it to the card with foam tape.


This was a pretty quick card to pull together, and I am quite pleased with it.  However, it will need to have a box, or at least a boxy envelope for presentation as the flowers are very dimensional.


The little details:
     Flowers:  Imaginisce "Roly Rosies"
     Dies:  Sizzix Sizzliits "Flowers, Branches & Leaves" set
     Embossing Folder:  Darice "Henna"
     Stamp:  Hero Arts
     Ink:  Memento "Rich Cocoa"
     Paper:  Recollections and scraps

As always thank you so very much for your visit.  'Til next time.....

Big HUGS!!!
CHRISTINE

Wednesday, January 22, 2014

Don't BUG Me!

It is SO still the season for catching all those nasty bugs that keep floating around.  I hope you've been able to avoid being in that situation.  On that note we, at the Card A Day Blog, have some Get Well inspirations to share.  I received some really cute supplies from my dear sister for Christmas, and decided to use some of them for today's card.

My card was a fairly quick one to make once I decided just what I wanted to do.  First I'll show you the main supplies I used.


The two stamp and die sets were part of my Christmas gift.  Now, here's my card:


When I was getting out my supplies I thought I would stamp the 'bug' outline and color it, but there were a few dp scraps sitting next to my new sets and one just caught my eye.  So I lined up the outline stamp where I wanted it on the scrap, and used the die to cut it out.

In the same stack of scraps I found a piece of handmade paper that was perfect for cutting out the clouds.  The handmade paper gave the clouds some nice texture.


I'm not sure you can see the texture in the photos, but it shows up nicely in person.

Next, I cut a scrap of blue for some sky, and I tore a piece of kraft card to use for the ground.  I used two brown-toned inks to color the edges a bit without making the ground too busy-looking.


After stamping the sentiment, I laid the 'sky' down with my ATG, and used foam tape to affix the ground pieces and the car.  I used a double layer of the foam tape to lift the lower ground piece above the car.


My card base, which is sized at 4 1/4" x 5 1/2" to fit a standard A2 envelope, is a dark navy blue, so I added a white insert for the message and signature.

The pictures don't really show it off very well, but this card is very cute in person and will certainly help brighten the day for someone who isn't feeling quite up to par.

Details:
     Stamp/Die Sets:  taylored expressions "Wheely Great" set and hampton art "Welcome Home" set by doodlebug design inc. and Sizzix.
     Inks:  VersaMagic "Ocean Depth" Chalk Ink and Memento "Desert Sand" and "Rich Cocoa."
     Cardstock:  Gina K Designs "In the Navy" and Neenah "Kraft."

Thanks, as always, for your visit.  Please know that I truly appreciate the time you take to spend with me.  'Til next time.....

Big HUGS!!!!!
CHRISTINE

Tuesday, August 6, 2013

DIE-riffic!!

We're having a week of 'Using Die Cuts' at the Card A Day Blog.  I tend to use dies in making many of my cards, so this one is quite a natural for me.  One thing I haven't done very often is use a die to make the actual card base.  So, that's what I have to show you today.

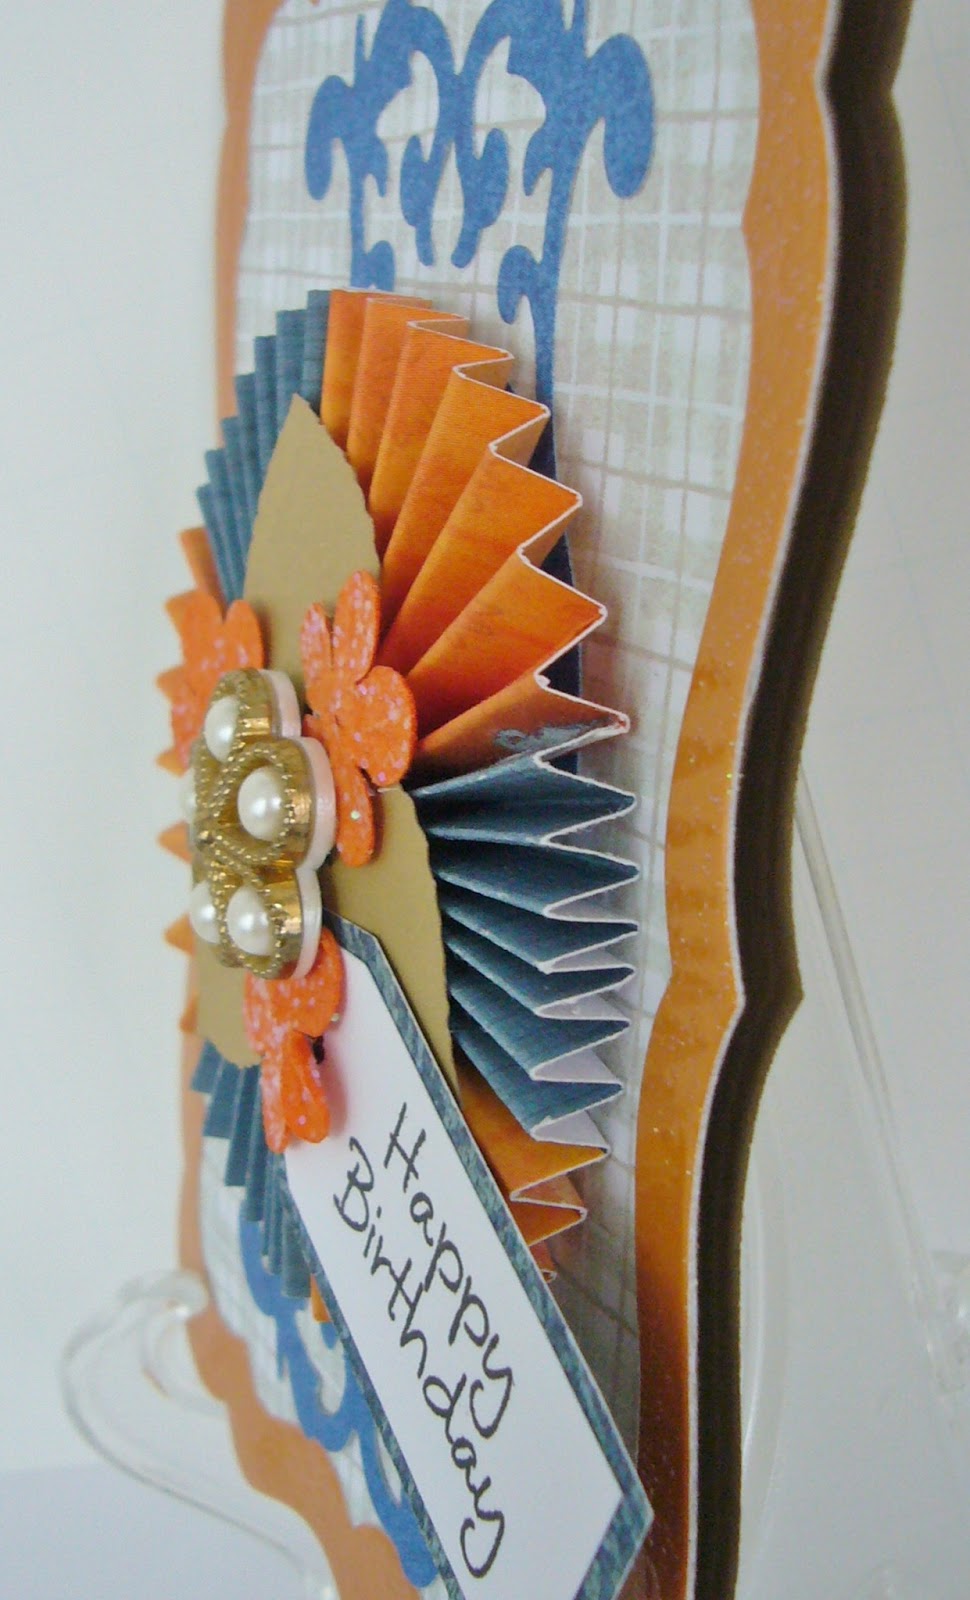
I started out with a left-over rosette with some embellishments for my inspiration.  I've been wanting to use this rosette for several months because it's just been sitting on a chair waiting for some action.  I knew that if I put it away somewhere it would most probably languish for even longer, so I took this opportunity to put it to work.

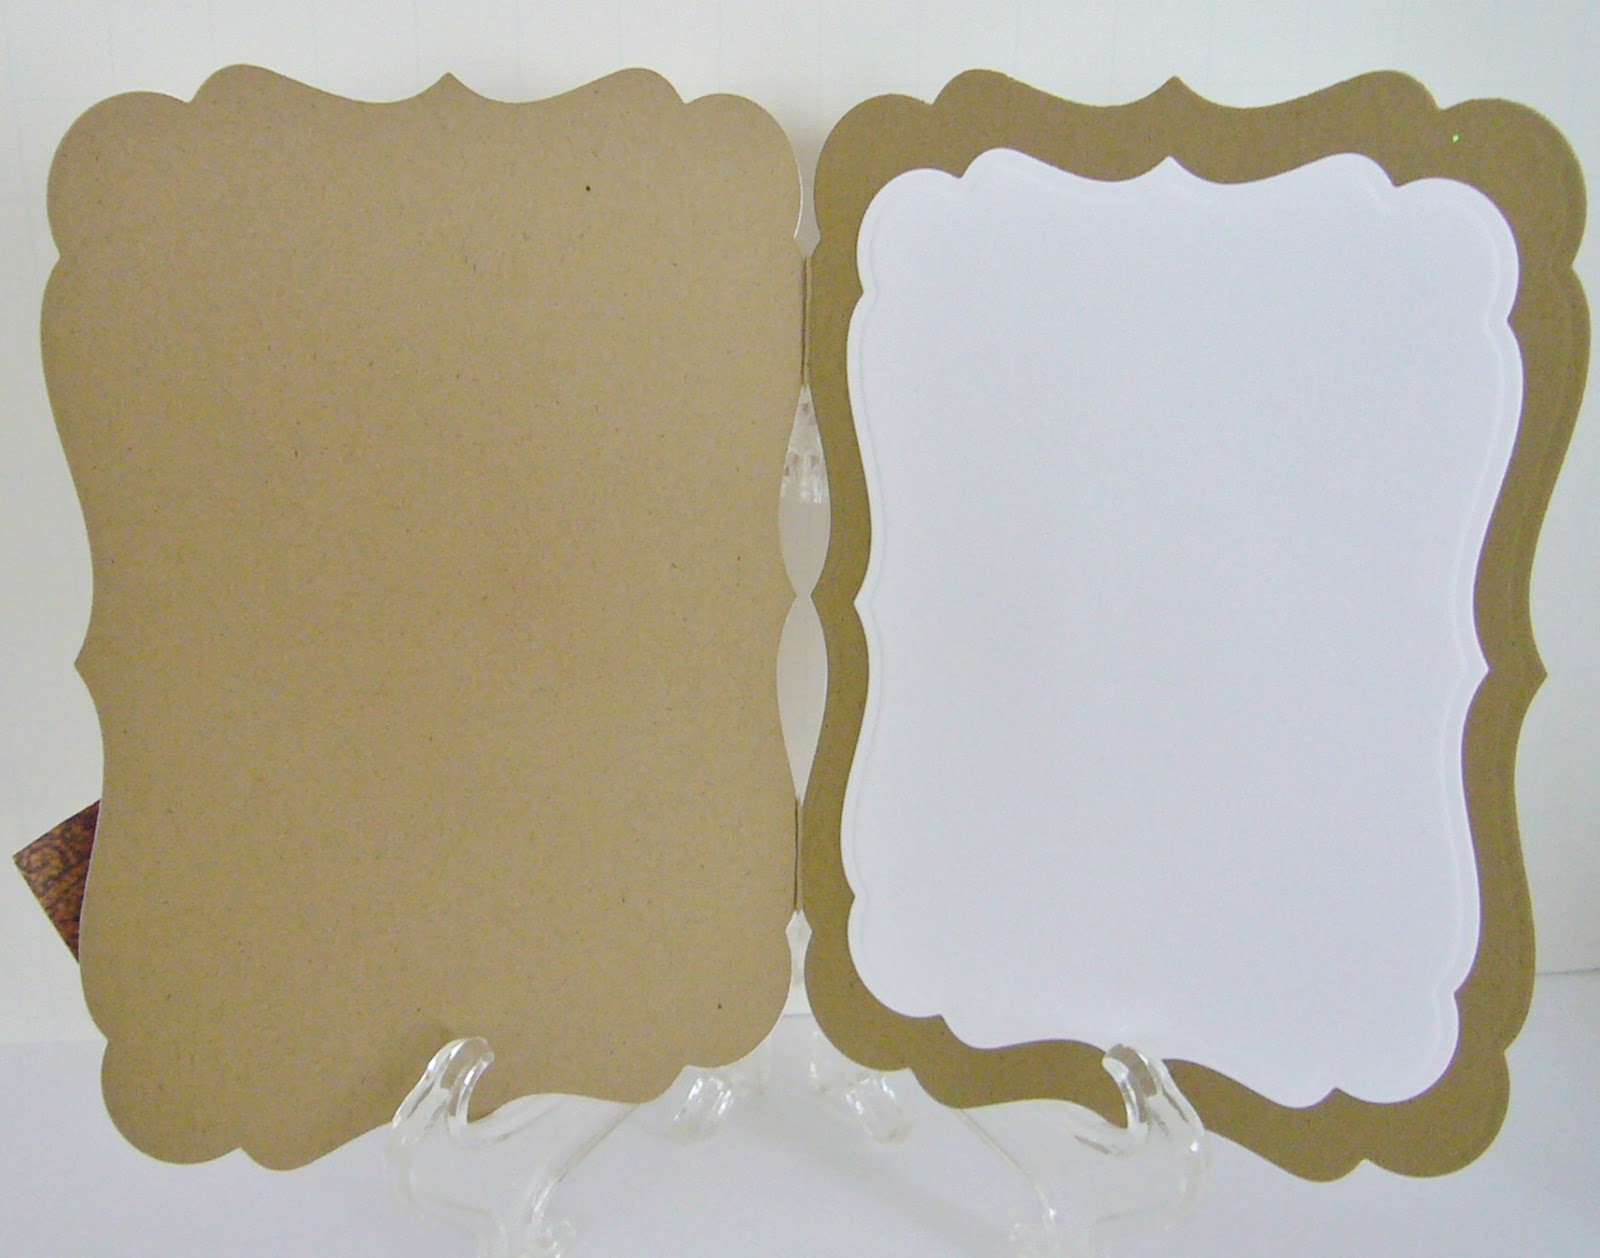
For my card base, I took some kraft card stock and the largest die from one of the Spellbinders label sets.  The die was just about the right size to make a card that would fit nicely into a standard A2 sized envelope.  I cut the card at 5 1/2 x 8 1/2, scored and folded it, and cut it with the edge of the die sitting just off the folded edge of the card.  That way I was able too get a nicely shaped card in one piece.  I cut a piece of dp with the same die, but made sure the die cut all around the paper.  Then I cut a third piece, this time a solid glitter paper, using the largest die and the next size smaller to create a frame.  I think I'd better show you a picture so you can see just what I'm talking about.


You can't see the kraft card base because I assembled the framed dp and covered the front to give the card a nicely cut full shape that doesn't show the folds.  Next, I used a scrap of blue patterned paper to create the trim around the rosette.  This was cut with a die from one of the fancy labels sets.  I cut this piece in half to be long enough to fill the space.

I then needed to finish the rosette with its embellishments so I arranged the pieces and glued them together.  I'm not sure if the leaves were die cut or punched (they've been around for awhile as well), and the glittery flowers came out of a package.  The pearl embellishment is a button, and the tag, I think, is a die cut.  Sorry to be a bit vague about some of the pieces, but they came from a stay with my sister, and I'm not always too great about writing down what was used at the time.


You can see from these angled photos how much dimension is on this card.  It will fit into an A2 envelope for hand delivery, but a special envelope would be needed for mailing.


Once I had the card assembled I decided I wanted an insert for writing a message.  I used plain white card stock and the smaller of the two frame dies for this piece.  You can see this in the next pic as well as see how the card was cut initially as one piece on the fold.


I showed the finished card to my dd who really liked it.  (I should have saved it for her next birthday -- heehee!)  I hope it gives you some ideas on using your larger dies for making your card bases.


Papers used:  DCWV glitter cardstock matstack and Sizzix Little Sizzles Pastels
Adhesives:  Scotch ATG and Quick-Drying Tacky Glue, and Ranger Matte Accents

I look forward to seeing you again soon.  Thanks for visiting!!

'Til next time.....

Big HUGS!
CHRISTINE

Friday, July 5, 2013

Whale, what d'ya know!!

Hello friends!  I hope all my USA buddies had a wonderful Independence Day celebration.  We had a nice quiet day at home, so I used the time to make a cute little card.  It just happens to be red, white and blue, although it's not the patriotic colors.  This time I made a fun card for a new challenge site.  It's called House of Cards, and it just started on the first of this month.  They have four different themes each month, and their first theme is 'cute and fun.'  They have a color inspiration for this first week, and at least three of the colors must be used.

                              http://design-seeds.com/palettes/FreshCherry.png

I've been wanting to use a new stamp and die set that I've had for a little while, so I decided this would be the perfect opportunity.  Here is the card (made all from scraps):

 
I really like the fun Lifestyles Crafts border die for the water.


And here is a pic of the supplies I used:


I really enjoyed making this card; it was one of my quickest cards ever!  ;)  I hope you enjoyed it, too.

 
Thanks for stopping by today.  See you again soon!

Big HUGS!!
CHRISTINE

Tuesday, May 21, 2013

birthday wishes

I'd like to start my post today with condolences for the victims of the deadly storms of the past few days.  We must never take for granted our loved ones and all the wonderful things life has brought to us.  Blessings and prayers to all those who are suffering.

Todays card is for the theme of 'Birthday' at the Card A Day Blog.  My card is brought to you by a very special guest designer who has asked to remain nameless.  So I can't tell you her name, but my dear sister is visiting me this week, and many of you know that she is also a cardmaker.  I couldn't resist bringing you one of her cards!  Here is your first look:


You know how my sister and I are always trying to get creative with our scraps.  Well, this is another one of those creations.  It started out with a white base, which was a leftover just waiting for a project.  All the pink pieces were taken from my 'pinks' scrap envelope.  They were simply cut to pleasing sizes and set slightly askew for interest.  The cute flower is a die cut, and the sentiment was stamped on another pink scrap.  Here is a closer view of the central section of the card:


As you can see, some pearls of varying sizes were added for a little accent.  The flower and the sentiment were affixed with foam tape.  I've got an angled shot for you to see the dimension.


So that's it, really quick and easy.  I think the real fun, once you choose a color theme, is in choosing different pattern papers and just cutting and placing them in a pleasing arrangement.  Then all you need is a cute element and a sentiment and you're done.


Here's the fine print:
          Papers:  sorry, don't really know, they're scraps, but the card base is probably Georgia Pacific
          Stamp:  Gina K. Designs 'Nature's Greetings' set
          Die:  Sizzix Sizzlits
          Pearls:  KaiserCraft self-adhesive
          Ink:  Versafine black

That's it.  I hope you all have a great day!  Stay safe.

Big HUGS,
CHRISTINE


Thursday, December 13, 2012

Gift Card to Die For

As we get ready to close out our year of cardmaking at the Card A Day Blog, I get to bring you one last inspiration.  Our final theme of the year is 'Snow.'  I had all sorts of ideas, but at the last minute I received a die that I had ordered, so I decided to use it for my card.  I also had been making rosettes to use as tags on Christmas gifts, and it became a simple matter to combine the two elements.

My new die is for a gift card holder.  I chose a paper to coordinate with one of my rosettes, and used the die to cut it out.  I scored for the folds (the scores were lightly marked by the die), and affixed the flap for the gift card.  My last step for the card, itself, was to stamp and emboss a greeting for the inside.  Here are some shots of the inside of the card:


Sorry about the glare in the top photo.  I wanted to show the card as it would be used so I inserted a used gift card into the pocket.  Also, I wanted to emphasize the snow idea on the inside, and used a snowflake stamp along with a greeting to accomplish that.  It also helps to have snowflakes on the card stock that I used.

The rosette I chose was made using another die, the Snowflake Rosette by Tim Holtz.  The paper for that piece also has a snowflake pattern on the red ground.  The scores for the rosette are done as perforations which makes it a bit fiddly to work with, as well as exposing the paper edges.  In this case the edges were showing too much white, so I simply inked those edges to smooth out the color.  I also applied a glitter spray, and added a rhinestone to the center of the snowflake.  I then affixed the snowflake/rosette to the front of the card with foam tape to lift it a bit off the surface making it easier to open/close the flap.

I have three more photos for you.  The first one shows the open card:


The next two give you a much better look at the rosette.  If you click on the pictures you might even be able to see the glitter on the rosette as well as the card itself.


Thank you so much for taking time out of your busy day to visit.  It's such a bustling time for everyone with the holidays looming.  Don't forget to take time for the really important things.

And here are the small details:
     Dies:  Sizzix BigzXL Gift Card Holder and Tim Holtz Snowflake Rosette
     Paper:  Recollections "Jolly Jamboree" stack
     Stamps:  Close to My Heart "Very Merry Christmas" and My Mind's Eye "Holly Jolly"
     Bling:  Studio18 Rhinestones and Crafter's Companion Spray & Sparkle Gold
     Ink:  Versamark
     Embossing Powder:  Stampendous Detail Gold


Hugs to all!
CHRISTINE

Monday, September 17, 2012

Love Is in the Air

Well, I never promised you a rose garden (Who remembers that song?), but I did promise you a wedding card, and it even has a nice flower on it, though it isn't a rose.  I have lots of pictures for you, so I won't talk too much except for a few details.  I made this card in the standard A2 (4 1/4 x 5 1/2) size.  However, because of the dimension I had to make a special 'envelope box' for the card.

So, how about some photos.........


I just love the soft colors in these papers.  They might look a bit washed out in the photos, but the card looks really lovely in person.
 
Here's the inside:


Since the card front was so busy I decided to keep the inside very clean.  I thought I remembered some wedding related stickers in a pad I got from my sister, and, sure enough, there were some.  The colors in the sticker matched the paper beautifully.

You can see all the dimension in the next two photos.


The last pictures show the box I made for this card.  If I were mailing the card it would need a much sturdier box.  Since it was hand-delivered, a box made with card stock worked out just fine.


The bride is a very crafty young lady, and I know she will appreciate the handiwork in this card.  I hope you enjoyed it as well.  I'd love a comment to let me know you were here.

See you again soon!!

Supplies:
          Paper:  Kaisercraft 'Pink Gelato' 6 1/2" Pad (also sentiment tag), Stampin' Up 'Whisper White'
          Dies:  Die-namics 'Leafy Flourish', Sizzix 'Flowers, Branches and Leaves' set and Tim Holtz 'Tattered Florals', Spellbinders 'Fancy Tags Three'
          Sentiment Sticker:  K & Company Beyond Postmarks 'All Occasion 2 Card Quotables'
          Embellishments:  August Moon 'Pearl Combo'


Please remember to keep your creative genius happy and well-fed.

CHRISTINE

Sunday, July 8, 2012

IT'S GOOD TO BE GREEN

Well, yes, I know it isn't St. Patrick's day, but I'm the designer today for the Card A Day Blog, and our theme for this week is 'MONOCHROMATIC.'  Per dd's request, I have used various shades of the wonderful and soothing color of GREEN to make my card.  So, please don't be green with envy because you didn't get to hit the green for a round of golf, and don't let your kids turn green with a sick tummy because you let them eat too many green apples.  Just sit back with a nice cup of green tea, and enjoy a few moments with me.

I have several dies in my stash that have been feeling neglected, and I thought this would be a great time to bring some of them out to use for a little layering.  The particular dies I had in mind come from the Spellbinders "Mix & Match Classic Edges and Inserts" collection, and my idea was to use them to layer papers for my card front.  I had lots of fun looking for different green papers; it was really hard not to go too crazy choosing papers - I stopped at ten plus one for the base.  I was aiming for a fun mix of solids and patterns in a nice range of green hues.  Here is your first look at the front:


This picture is a close-up to show the different cuts of the dies.  Each edge was used twice because I have six different inserts and only three edges (There are more in the Spellbinders collection.).  After I die cut the papers, using my Cuttlebug, and decided on the placement, I mounted them on a mat, and then cut that piece to size for the card front. To finish it off nicely I used a scallop punch on the top edge.  (The mat is the very light green at the bottom.)  I compared several greens for the card base to choose the one that would best frame the colors used in the front piece.  Here is the full front view:


Since the front piece was already quite busy, I didn't want to clutter it up with embellishments, so I simply threaded a thin ribbon through one of the die cut patterns before mounting to the base.  I have left the card without a sentiment because, as you will see, it can be used for many occasions with an appropriate sentiment being added when needed.


In this angled photo you get a hint of the surprise inside the card.  Yes, there is a gift card pocket inside.


I inserted a piece cut from the front to bring some interest to the inside of the card.  The mat supports the gift card pocket and provides a light space for a signature.  The pocket is simply cut and folded to size with the top punched using the same scallop punch used earlier.  Everything was affixed using my ATG.


If I had been thinking more quickly I would have made the decorative strip into a bookmark, thereby making the card two gifts in one!!  Ah well, perhaps next time.

Here is your list of supplies:
          Papers:  Solids=Stampin' Up for card base, DCWV Lemon Flower, Sizzix Little Sizzles Pastels, Bazzill Pastels, Recollections Colored Core.  Patterns=My Mind's Eye Quite Contrary, Sizzix Little Sizzlets Pastels, K&Company Watercolor Bouquet
          Dies:  Spellbinders Edgeabilities Mix & Match Classic Edges One and Classic Decorative Inserts One and Two
          Paper Punch:  EK Success Scalloped Scallops


Thanks for visiting today, and always keep your creative genius happy and well-fed!

CHRISTINE


Thursday, June 21, 2012

Just Because

Hi lovely friends!!  This card was such fun to make.  The theme for this week at the Card A Day Blog is Just Because.  I guess you can use almost anything for a just because type of card to make it appropriate for the intended recipient.  I chose butterflies because they're light and free and fun, and they always make me smile.

I was with my sister recently.  Many of you know she also makes cards.  As usual she had lots of scraps laying on her table, so I brought a few home with me to make a card, and the pieces were just perfect for this week's theme.


As you can see, I have lots of butterflies flitting around the vine climbing the trellis.  The card base is the standard A2 (5 1/2 x 4 1/4).  I liked the look of the mat leaving a border only on the two sides so I cut it the length of the base and 1/4" smaller in the width.  The white mat is embossed using the Cuttlebug, and the butterflies are attached only in the center to look as though they're actually flying.

Here's a closer shot...all the butterflies are different:


 I decided to bring just a little bit of the design to the inside of the card.  I used just a patch of the DP for a tiny 'meadow' scene with some tiny butterflies.


Here's one more pic, and then your list of supplies:


     Embossing Folder:  QuicKut Diamonds & Dots
     Die:  Sizzlits:  Branch w/Leaves (medium)
     Paper:  K&Company DP 'Happy Trails', DCWV textured paper for leaves, Stampin' Up for base
     Punch:  Martha Stewart Border Arches, various small butterflies (sorry, don't know)

Wishing you a most beautiful day . . . . . . . just because!


Always keep your creative genius happy and well-fed!!

CHRISTINE