Followers

Friday, September 14, 2012

It's Harvest Time

Hi!!  Yes, I know I promised you a wedding card, and I'll post it for you in a few days.  But, for now, it's Canadian Thanksgiving time over at the Card A Day Blog.  It seems our lovely northern neighbors celebrate Thanksgiving in much the same way and for pretty much the same reasons we do in the States.  They just celebrate a little earlier, in October.  So, for all your Canadian friends, here's a nice design for you.  I've used the pretty colors of harvest time, but know that you can easily adapt the design for any use.  Here is your first look:


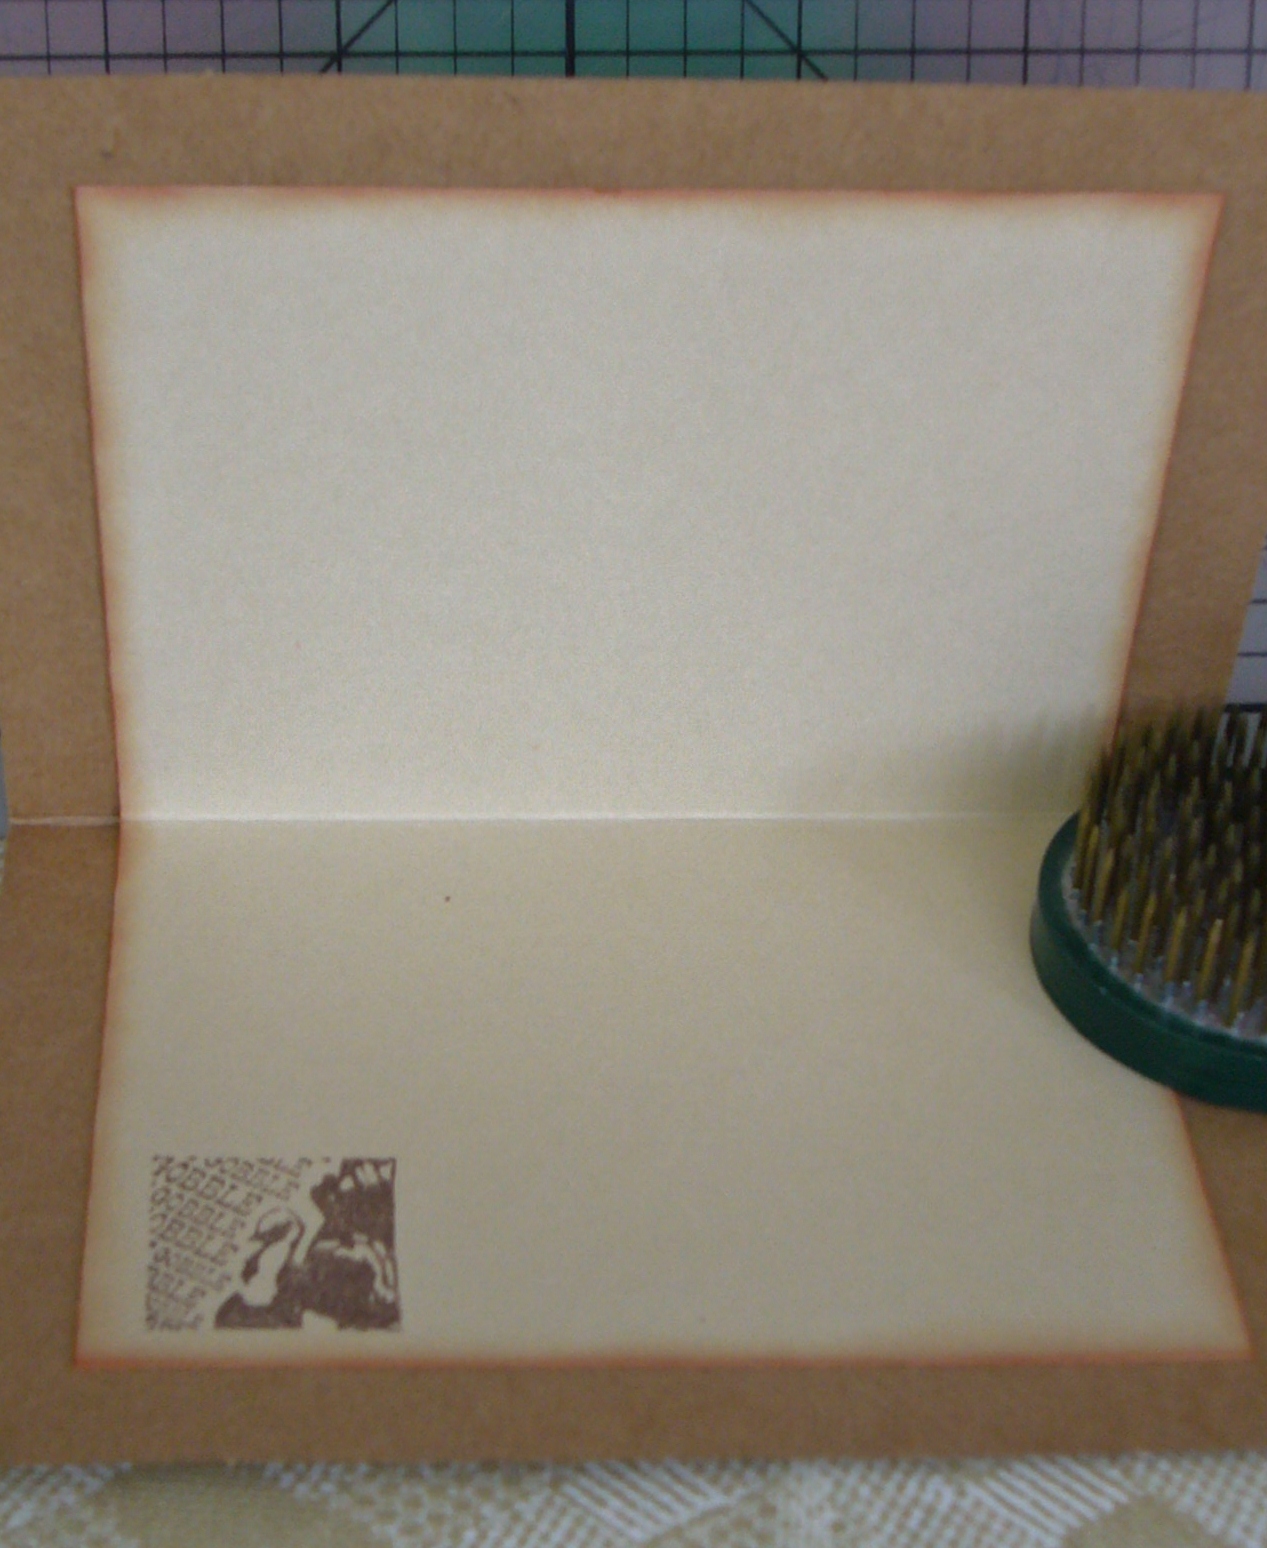
Surprise!!!  I'm starting with the inside.  (I know, how backward of me. heehee)  First off, I want to say that this card was made TOTALLY of scraps -- even the card base is a refashioned kraft card, just turned to the reverse side.  Being a little dark to write on - and to cover what had been stamped previously, it needed a liner for a message and signature.  I inked the edges of the liner to bring in some color from the card front, and gave it a little turkey stamp in the corner for fun.

The next three photos are close-ups of the central images on the front of the card, shown left, right and center.
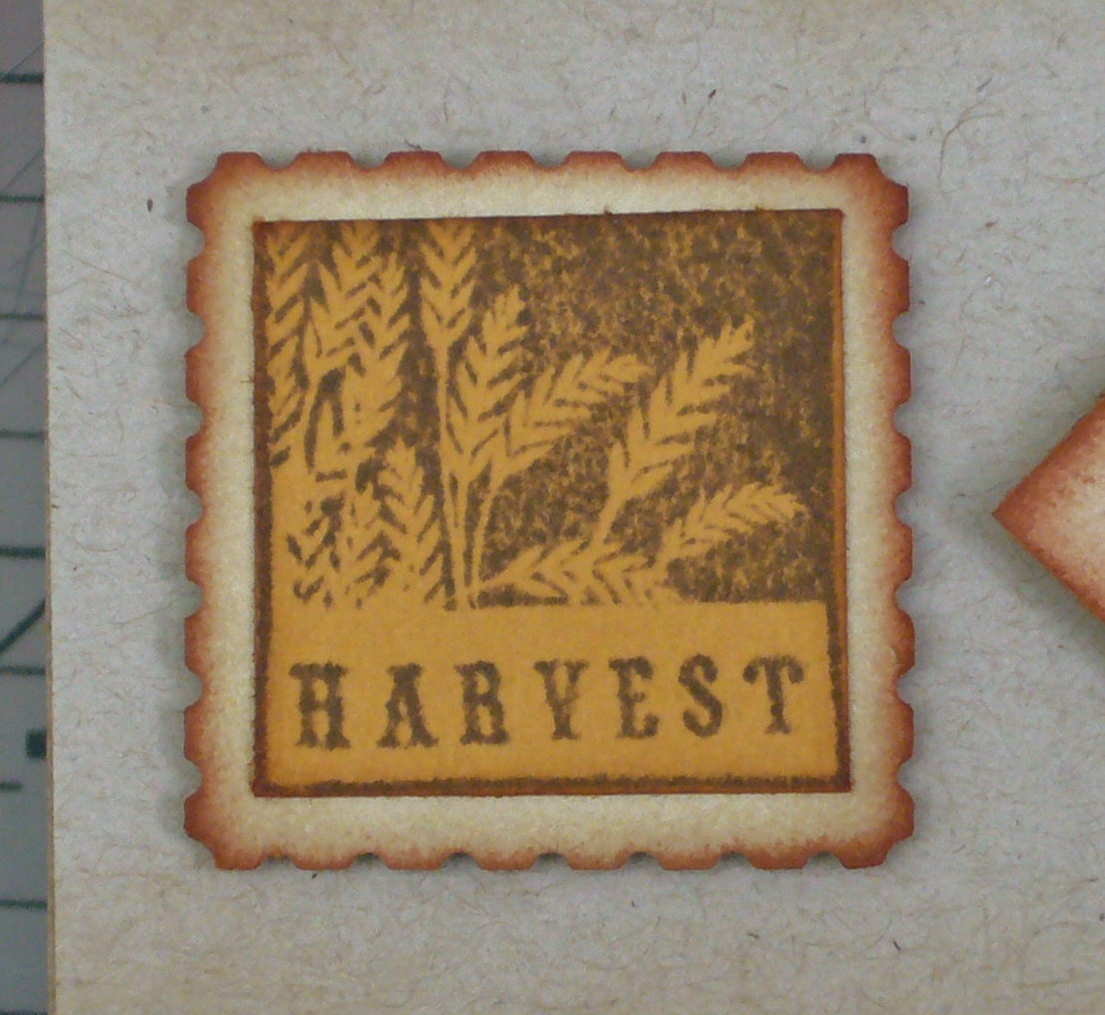


I used different colors on which to stamp each image, but I used the same ink as well as the same color to frame each one.  The two side images were mounted with thin foam tape, and the center image was mounted using slightly thicker foam squares to bring it up just a little higher.  These pieces were affixed to another layer of kraft card which was punched top and bottom with a lacy design.

The final piece of the puzzle is the design paper used for the front of the card.  Here is an angled shot which shows the layering.


All that's left to show you is the straight-on photo of my card.  You will see that the design paper was cut to leave just a tiny margin of the card base, and the lacy layer fits to the side edges of the base.


I had thought to use the brighter yellow paper for the centerpiece; unfortunately, the scrap was just a bit smaller than I needed.  Cest la vie!  I'm making the best use of what I have -- it's all part of the fun.  Why don't you challenge yourself to make a card only of scraps, using one of our themes at the CADB, and enter our monthly challenge for prizes?

Thanks for taking the time to visit today.  Here are the little details:

          Stamps:  Inkadinkado 'Harvest Inchie Bundle'
          Inks:  Memento 'Rich Cocoa,' 'Potter's Clay' and 'Desert Sand'
          Punches:  Stampin' Up 'Stamp' and Martha Stewart 'Lacy Edge'
          Design Paper:  K and Company

Here's to keeping your creative genius happy and well-fed!  (Don't forget the chocolate!)

CHRISTINE

Thursday, September 6, 2012

A Golden Autumn

HOW CAN IT BE SEPTEMBER ALREADY???????

Sorry for yelling.  I just can't believe how quickly this year is going.  Even the long, hot summer is over, and all-too-soon we will be seeing the colors of Autumn.  I have another Card A Day Blog design for you today.  As you might already have guessed, our weekly theme is 'Autumn.'  I had several ideas percolating in my brain for this theme, but I love tone-on-tone treatments, so that is the idea that won over all the others.

I started with a base of kraft card stock cut at 4 1/4" x 11" or half an 8 1/2 x 11 sheet cut the long way to make a tall A2 standard sized card.  That piece then needed to be scored and cut to make a step card with one step and a higher centerpiece.  Here is your first view:


The cuts were made 1" from each long side and cut from 1" to 6 1/2".  The center score was done at 5 1/2" and the side scores were made at 1", 2" and 6 1/2".  I really like how the center lifts from the borders.
 
The side border pieces as well as the sentiment piece were cut from a golden paper which has a pretty sheen that, unfortunately, does not show up well in the photos.  The centerpiece was cut from a sandy colored paper, and the mat from a darker mustard paper.  By the way, these pieces were all scraps and I no longer remember where they came from.
 
I used Versamark to stamp the center image as well as the borders and greeting, and used a lovely golden embossing powder to highlight them.


Overall, this was a fairly quick and easy card to make and would be great when multiples are needed.  It's a super design for any occasion.


Not too many extra details for you on this one.  The stamps all came from TPC Studio:  Autumn Harvest set and Patterned Borders.  The embossing powder I used (and I really love this one) is Medieval Metals from Sweet Stamps.
 
Now I'm off to make a wedding card.  I'll show it to you soon after the wedding which is this coming Saturday -- eek! only a couple of days away.  I'd better get creating......................
 
 
Do remember to always keep your creative genius happy and well-fed!
 
Big HUGS to all!!
CHRISTINE

Sunday, August 26, 2012

A Little Faith

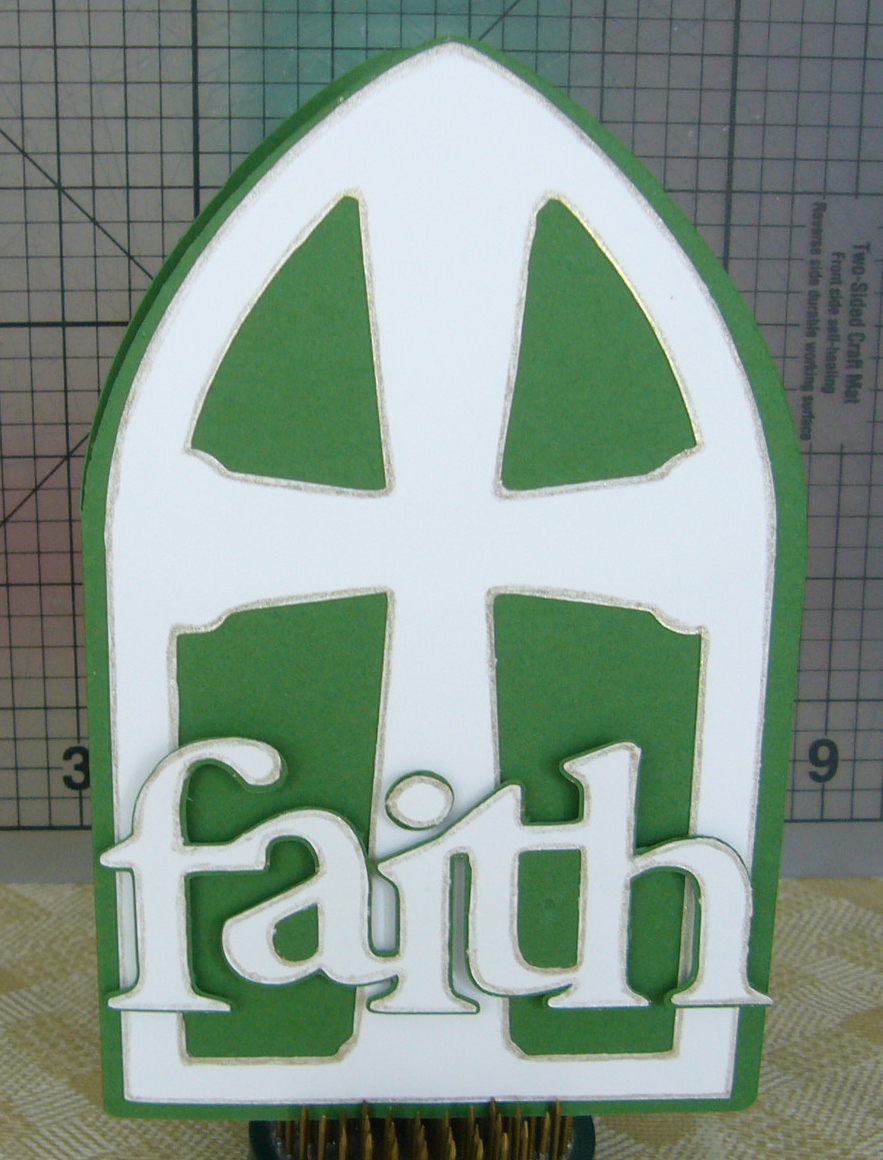
Happy Sunday, everyone!!  I do hope you're having a beautiful day, and I thank you for spending a bit of it with me.  I have another CADB design for you, and I'm so happy to have Sunday for this week's theme, which just happens to be 'With Faith.'  While there are many kinds of faith, I decided to work within a religious meaning.  I've been wanting to make more use of my Cricut and the many cartridges that I have, and I knew I had a cartridge with appropriate images for a 'faith' card.  So I went to my cart stash and pulled it out.

The card I made is really clean and simple.  Using the Cricut Craft Room software made designing my card really easy.  (Disclaimer:  no affiliation, not receiving payment or product for comments)  Once I had the design ready, the rest was simply a matter of choosing paper, cutting and assembling.


I chose the main image that I wanted, then created the card cutout using the shadow of the main image.  I chose the word 'faith' with its shadow and mounted it using foam tape.  I cut a matching white layer for the inside of the card so I could stamp a sentiment and have a nice space for a signature and personal message, if desired.


For just a tiny bit of glimmer (which is extremely hard to see in the photos) I used a glitter pen to outline all the white shapes.
 
 
This card fits into a 4" x 6" envelope.  Yes, I know, not my usual A2.  Crazy isn't it?  I jumped WAY out of my comfort zone on this one!!     heehee


Here are the very brief details:
          Cricut Cartdridge:  Inspired Heart (Cut on Cricut Expression 2)
          Papers:  Stampin' Up 'Whisper White' and 'Garden Green'
          Stamp:  Stampin' Up 'Thoughts and Prayers' set
          Ink:  Ancient Page 'Pine' dye inkpad
          Glitter Pen:  Sakura Gelly Roll 'Clear Star'
 
See you again soon.  In the meantime remember to always keep your creative genius happy and well fed!!!
 
CHRISTINE


Friday, August 17, 2012

One of My Favorite Cards

Hello, out there!  I have another card for you today which is posted in the Card A Day Blog for this weeks' theme, "Cheer Up."  This is certainly one of, if not my most favorite card that I've made.  I actually made it some time ago, but never got around to posting it for you.  It really is a quick and easy card to put together.  Probably the most time-consuming part of the card, aside from choosing the design paper, is the coloring.  And even THAT is done quickly once you have the colors chosen.

I made this card while at visiting my DS (sister, that is), and, since I was using many of her supplies, have no record of most of what I used.  I did start out with a standard A2 sized card base (4 1/4" x 5 1/2") in a lovely linen textured card stock.  I spotted a beautiful piece in DS's scrap box that I thought would make the perfect backdrop for my pretty lady stamp.  Then, all I needed was a sentiment.


The colors to use for the stamp were easily chosen to match the colors in the floral background paper.  The image was stamped on a nice smooth white piece of card, colored with Copics, and the white was toned down by gently inking around the image leaving a plain white border.  That piece was then matted to a piece of blue card cut just a bit larger.  The pearls were added for an extra touch of class.  Memory fails as to whether the pearls just happened to be the right color or I used the same blue Copic marker as in the image, but I think it was the former.


The sentiment was stamped in black on the same blue card as the mat, and then die cut and inked lightly with the blue as used on the lady piece.


And here are the two stamped pieces together:


As you can see, the dp is cut on the diagonal to cover just half of the card front, leaving a tiny white border at the top and left side.  The card was given some dimension by mounting the lady to the card with foam squares and the sentiment with a thinner foam tape.


Who knows, perhaps I will allow myself to use this card one day.....................

The image stamp is from Sweet Stamps; 1900's Lady, #513F.

Hope this card was able to cheer you.  Do remember to keep your creative genius happy and well-fed!

Hugs to all!
CHRISTINE

Wednesday, August 8, 2012

Thinking of You

Greetings to all!  I hope you're having a wonderful day.  I've just returned from a lovely long weekend with my dear sister in Chicago, and the card I have for you today was made entirely from her materials  I did bring a few things of my own on the trip, but ended up not using them.

This card is for the Card A Day Blog, where our theme for the week is 'Embossing.'  I had brought several embossing folders and a few stamps to use for my card, but my sis pulled out some nice vellum.  So, I decided to do some hand embossing with a little paper piercing on the vellum since I haven't used those techniques in quite some time.  After doing a little test piece, I determined that my card would have a clean and simple look to showcase the hand embossing.


I used metal stencils from my sister's stash; one for the corner and one for the three center florals.  The left and top edges were also embossed and pierced using a stencil from Ecstasy Crafts.

The card base is a nice smooth white, cut to 4 1/4"x 5 1/2".  The mat is a glossy yellow cut just a bit smaller as I wanted only a tiny bit of the white edge showing.  And the vellum is affixed with white brads in three corners.  For a little variation I rounded just the lower right corner of all three layers.


Staying with the CAS idea, I stamped the greeting directly on the vellum and used white embossing powder to match the hand embossing.

This card definitely is versatile enough to use for many occasions.  I hope you'll click on the photos to get the best views.


This is really quite an easy card to make if you like to hand emboss.  That part does take some time, and, if you've never done it before, maybe a little practice.

The small print:
          Paper:  Best Occasions from Walmart Glossy Yellow,  Card base Neenah 'Solar White'
          Stamp:  Hero Arts 'Sweer Threads Labels'
          Stencils:  Ecstasy Crafts #PS123, (sorry, but I don't have names for the corner or floral)
          Ink:  Versamark
          Embossing Powder:  Stampendous 'Detail White'
Hope you'll come back to visit often, and remember to always keep your creative genius happy and well-fed!!

CHRISTINE

Thursday, August 2, 2012

A Real Cut-Up

Hi everyone!  Wow, I can't believe we're already into the month of August.  This year is going by so very fast that I can hardly keep up............. 

My card today is for the Card A Day Blog theme of Using Die Cuts.  I had a certain design in mind, but then I remembered I hadn't made a card, yet, for a special little girl in my family whose birthday party is in two days.  So, I decided to combine the two projects and save a little time.  Since we were using die cuts, I thought I'd delve into my Cricut carts and see what I could come up with.  I started exploring one of the carts that was included in the purchase of the Expression 2 when it was released for the Cricut Anniversary.  I was hoping to make a card using nothing BUT die cuts, and I nearly succeeded.  The cartridge I used is called 'Just a Note' and includes a card feature.  I was able to find the perfect card for our little birthday girl.


This tri-fold card turned out to be just what I needed.  We will be celebrating a first birthday, and the cake, appropriately, has one candle.  I really didn't have to do much besides setting the sizes for the cuts and choosing the papers.  I knew I would be using pink, so I had no problem making choices for the layers with coordinating papers from my stash.  I also happened to have some coordinating stickers which I was able to use for a little embellishment along with some tiny punched hearts and a little bling to accent the letters on the front.

Here are two more pics to show the different parts of the card more clearly:


The picture just above is the inside of the card.  I wanted to hide 'lst' or '#1' under the cake, and I happened to have a number one sticker that I paired with the little flower standing in for the # sign.

Here is your final pic which shows the card before the two sides are opened:


I hope you've enjoyed your visit today.  Don't be shy about leaving a comment; I love to read them.  And I'll be sure to answer any questions promptly.

The nitty-gritty:
          Papers:  Recollections and K&Company
          Stickers:  K&Company Brenda Walton 'Small Wonders Girl'
          Punch:  Stampin' Up Owl (Yes, the tiny hearts)
          Gems:  Darice


REMEMBER,  always keep your creative genius happy and well-fed!

CHRISTINE


Wednesday, July 18, 2012

Mama Needs a NEW Pair of Shoes

Hello and Welcome!!  I hope you are enjoying the weather in your neck-of-the-woods.  As today's designer for the Card A Day Blog, I was very happy to have to stay inside to make my card.  We've been having plenty of hot, hot days this summer, and I just don't do well in extreme temps anymore.

This week's theme at CADB is 'NEW'; new job, new home, new whatever.  When I started thinking about my card I was hoping to come up with something just a little bit different.  I thought about new hat and new dress, but then I remembered some fun stamps I've had for awhile of shoes.  That's the idea that really grabbed me.  Upon looking at the stamps again, I found the ideal sentiment for this week's theme.  You'll see what I mean.  Here's your first look:


These first two pictures give you a close look at just two of the shoe stamps I used.  I wanted different colors to match all my outfits (heehee) so I used colors from the background dp.

I had been playing with some of my punches recently, and that left me with some miscellaneous punched elements.  I happened to have one that was the perfect fit for tiling my shoes.  Let's take a peek:


Here you can see the multicolored background with solid-colored framing that matches the card base.  In the next shot you get a better idea of the whole card front.


I mentioned that the stamp set I used had a perfect sentiment.  Here it is:


This card would be perfect for someone who just needs a little pick-me-up.  Here is your straight-on front view:


The sentiment and the focal shoe were both heat embossed with Stampendous 'Detail Black'and mounted with foam tape for just a tiny bit of extra dimension.  This card measures 5" x 7".

Nitty-Gritty:
          Stamps:  Pink by Design 'Shoe Addict' and 'Designer Shoes' sets
          Paper:  K&Company (dp) and Recollections (card base), stash white
          Punch:  Martha Stewart corner and edge (sorry, I don't have the name.)
          Ink:  Versamark, Memento 'New Sprout', Memories Direct 'Pink', Stampin' Up 'Wisteria Wonder' and 'Bashful Blue'

FYI for anyone who might be visiting for the first time:  We have new themes weekly and challenges - with prizes - every month at the CADB.  Hope you'll stop by and play along!

Remember to always keep your creative genius happy and well-fed!!

CHRISTINE

Sunday, July 8, 2012

IT'S GOOD TO BE GREEN

Well, yes, I know it isn't St. Patrick's day, but I'm the designer today for the Card A Day Blog, and our theme for this week is 'MONOCHROMATIC.'  Per dd's request, I have used various shades of the wonderful and soothing color of GREEN to make my card.  So, please don't be green with envy because you didn't get to hit the green for a round of golf, and don't let your kids turn green with a sick tummy because you let them eat too many green apples.  Just sit back with a nice cup of green tea, and enjoy a few moments with me.

I have several dies in my stash that have been feeling neglected, and I thought this would be a great time to bring some of them out to use for a little layering.  The particular dies I had in mind come from the Spellbinders "Mix & Match Classic Edges and Inserts" collection, and my idea was to use them to layer papers for my card front.  I had lots of fun looking for different green papers; it was really hard not to go too crazy choosing papers - I stopped at ten plus one for the base.  I was aiming for a fun mix of solids and patterns in a nice range of green hues.  Here is your first look at the front:


This picture is a close-up to show the different cuts of the dies.  Each edge was used twice because I have six different inserts and only three edges (There are more in the Spellbinders collection.).  After I die cut the papers, using my Cuttlebug, and decided on the placement, I mounted them on a mat, and then cut that piece to size for the card front. To finish it off nicely I used a scallop punch on the top edge.  (The mat is the very light green at the bottom.)  I compared several greens for the card base to choose the one that would best frame the colors used in the front piece.  Here is the full front view:


Since the front piece was already quite busy, I didn't want to clutter it up with embellishments, so I simply threaded a thin ribbon through one of the die cut patterns before mounting to the base.  I have left the card without a sentiment because, as you will see, it can be used for many occasions with an appropriate sentiment being added when needed.


In this angled photo you get a hint of the surprise inside the card.  Yes, there is a gift card pocket inside.


I inserted a piece cut from the front to bring some interest to the inside of the card.  The mat supports the gift card pocket and provides a light space for a signature.  The pocket is simply cut and folded to size with the top punched using the same scallop punch used earlier.  Everything was affixed using my ATG.


If I had been thinking more quickly I would have made the decorative strip into a bookmark, thereby making the card two gifts in one!!  Ah well, perhaps next time.

Here is your list of supplies:
          Papers:  Solids=Stampin' Up for card base, DCWV Lemon Flower, Sizzix Little Sizzles Pastels, Bazzill Pastels, Recollections Colored Core.  Patterns=My Mind's Eye Quite Contrary, Sizzix Little Sizzlets Pastels, K&Company Watercolor Bouquet
          Dies:  Spellbinders Edgeabilities Mix & Match Classic Edges One and Classic Decorative Inserts One and Two
          Paper Punch:  EK Success Scalloped Scallops


Thanks for visiting today, and always keep your creative genius happy and well-fed!

CHRISTINE


Thursday, June 21, 2012

Just Because

Hi lovely friends!!  This card was such fun to make.  The theme for this week at the Card A Day Blog is Just Because.  I guess you can use almost anything for a just because type of card to make it appropriate for the intended recipient.  I chose butterflies because they're light and free and fun, and they always make me smile.

I was with my sister recently.  Many of you know she also makes cards.  As usual she had lots of scraps laying on her table, so I brought a few home with me to make a card, and the pieces were just perfect for this week's theme.


As you can see, I have lots of butterflies flitting around the vine climbing the trellis.  The card base is the standard A2 (5 1/2 x 4 1/4).  I liked the look of the mat leaving a border only on the two sides so I cut it the length of the base and 1/4" smaller in the width.  The white mat is embossed using the Cuttlebug, and the butterflies are attached only in the center to look as though they're actually flying.

Here's a closer shot...all the butterflies are different:


 I decided to bring just a little bit of the design to the inside of the card.  I used just a patch of the DP for a tiny 'meadow' scene with some tiny butterflies.


Here's one more pic, and then your list of supplies:


     Embossing Folder:  QuicKut Diamonds & Dots
     Die:  Sizzlits:  Branch w/Leaves (medium)
     Paper:  K&Company DP 'Happy Trails', DCWV textured paper for leaves, Stampin' Up for base
     Punch:  Martha Stewart Border Arches, various small butterflies (sorry, don't know)

Wishing you a most beautiful day . . . . . . . just because!


Always keep your creative genius happy and well-fed!!

CHRISTINE

Thursday, June 14, 2012

FLAG DAY SALUTE!

Hi everyone!  Sorry I've been away for awhile -- bit of an injury kept me from doing much with my hands.  But I'm much better, now, and happy to be bringing you this card which celebrates Flag Day and honors our military heroes. 

I am designer today for the Card A Day Blog where our theme of the week is "Red, White and Blue."  It was a happy coincidence that I had signed up for this date (or maybe it was my subconscience telling me to do it).  Either way, I hope you enjoy this simple patriotic card.

I started with an A2-sized card base in kraft.  I chose that color to symbolize earth; not the Earth, just earth.  I used a nice blue mat which I embossed in my Cuttlebug using a stars folder.  I wanted to incorporate the U.S. flag in my card, and I chose a Cricut cartridge with various flag designs.  I love the flag motif in the shape of the U.S.


I hope you can see the embossed stars on the blue background (click on the picture to enlarge it).  I had a closer pic, but it was not quite in focus.  The sentiment is from the Pink by Design set called "Our Troops."  It's a must-have set for any cardmaker with someone in the military or for OWH.

My inside sentiment is from the same set.  I wanted just a bit of the color brought to the inside, so I used a white mat, stamped the sentiment in red, and added a blue paper strip to break up the white.


Thanks for visiting today.  Display your flags proudly!!

Here are the supplies used:
          Cricut Cartridge:  Stand and Salute
          Ink:  Stampin'Up Classic 'Real Red'
          Stamps:  Pink By Design 'Our Troops'
          Embossing Folder:  Cuttlebug 'Stars'
          Brads:  American Crafts 'Elements' Mini Glitter Brads Primaries
          Glues:  Tombo Mono Adhesive, Zig 2-Way

Remember, always keep your creative genius happy and well-fed!

CHRISTINE

Monday, May 21, 2012

Framed Thank You

" 'Tis better to give than to receive", but when we do receive it is simply the nice thing to do to express our thanks to the giver with a lovely card.  As today's designer for the Card A Day Blog, I have a lovely and quick card for you which can be adapted for most any sentiment.

My card is done in the standard A2 size (5 1/2 x 4 1/4).  I started with an ivory card base (inked around the edges), and used a kraft paper for the mat which I embossed with my Cuttlebug and inked lightly.  The frame was made with a two-sided designer cardstock since both sides would show after folding.

To make the frame, I started with a five inch square.  Each corner was folded to the center, and then folded back on itself to reveal the inside.  You can determine the inner dimensions of the frame by how much you fold back each corner.  In this case, the corner measures 1" from the center of the fold to the point.

I next used a piece of the same ivory for the centerpiece.  I stamped a flower for a light background, and used a scrap piece of gold card for the die cut sentiment.  You can also stamp the sentiment in a darker ink, or use embossing powder to make it stand out. Once the sentiment is taped to the center, the frame is secured with foam tape to give it just a bit of dimension.  The outer corners are secured with two-sided tape (or they can be left loose if desired).   Here is a slightly closer picture for you:


I don't have a shot of the inside of the card since it is left blank for a personal message.  As you can see, this is a card that is quite easily reproduced if you need several of the same kind. 

And here are the supply details:
          Cardstock:  K&Company 'Ancestry' and Stampin' Up Ivory
          Ink:  Memento Desert Sand and Rich Cocoa; TH Distress Ink Antique Linen
          Stamp:  Gina K. Designs 'Nature's Greetings' set
          Die:  Cuttlebug 'Thank You' by ProvoCraft
          Embossing Folder:  Cuttlebug 'Mini Floral'


Thanks so much for joining me today.  I hope to see you again very soon!

Do remember always keep your creative genius happy and well-fed!!

CHRISTINE

Wednesday, May 16, 2012

Nouveau Dad

Hi again!  I hope all you moms out there had as beautiful a Mothers' Day as I did.  And today's card, for the current theme of Fathers' Day at the Card A Day Blog, is for a first-time dad in our family.  I decided to combine the CADB theme with the current CDAC Progressive Challenge.  One of the images in this challenge is a sweet baby face from Glitterbabe, which I decided would be perfect for my card.

Since this card was being made for a man, I decided to start with a black card base (standard A2 size) and kraft cardstock for the mat.  I ran the mat through my Cuttlebug and inked it a bit to enhance the embossing.  I colored the main image with Copics and used stamps from two different sets to add some fun.  The digi image, as well as one of the stamped images, were cut with dies, and the other pieces on the front of the card were cut with decorative edged scissors.


I created my own sentiment, and inked all the pieces around the edges.  I used two sizes of foam tape to layer the different images.

For the inside, I added a kraft liner and brought in the dot pattern with a cute border stamp.  I printed my sentiment on the same white stock as the outside, cut it out with another die, and inked it as I did the outside pieces.


 I took some time deciding what to do for my card, but once I had the design in mind, creating it was really fun and easy.  I hope you have lots of fun creating cards for all the fathers in your life.

Thanks for joining me today.  Here are the details:


The dies are Spellbinders Deckled Edge Rectangles and QuicKutz Nesting Eyelet Circles.
Stamp sets used:  TCP Studio 'Baby' and 'Dots & Stripes' and Paper Studio 'Nursery Icons'


Do remember to always keep your creative genius happy and well-fed!

CHRISTINE 


Tuesday, May 1, 2012

Thoughts and Prayers

So glad you decided to visit.  I'm the designer again, today, for the Card A Day Blog, and we're starting a new month, with a new theme, and new opportunities for prizes!!  Our new theme is SYMPATHY, not usually the favorite type of card for most of us to come up with.  Personally, I like to keep them simple, and I think I've succeeded in doing that with my card.

I decided to feature one of the images from the current Crafter's Digital Art Center Progressive Challenge.  Do check them out; it's a great way to sample digi images from various designers, share your projects and have a chance to win more great prizes!  The camelia image I used here came from the Wax Fruit Company, and was just perfect for my card.


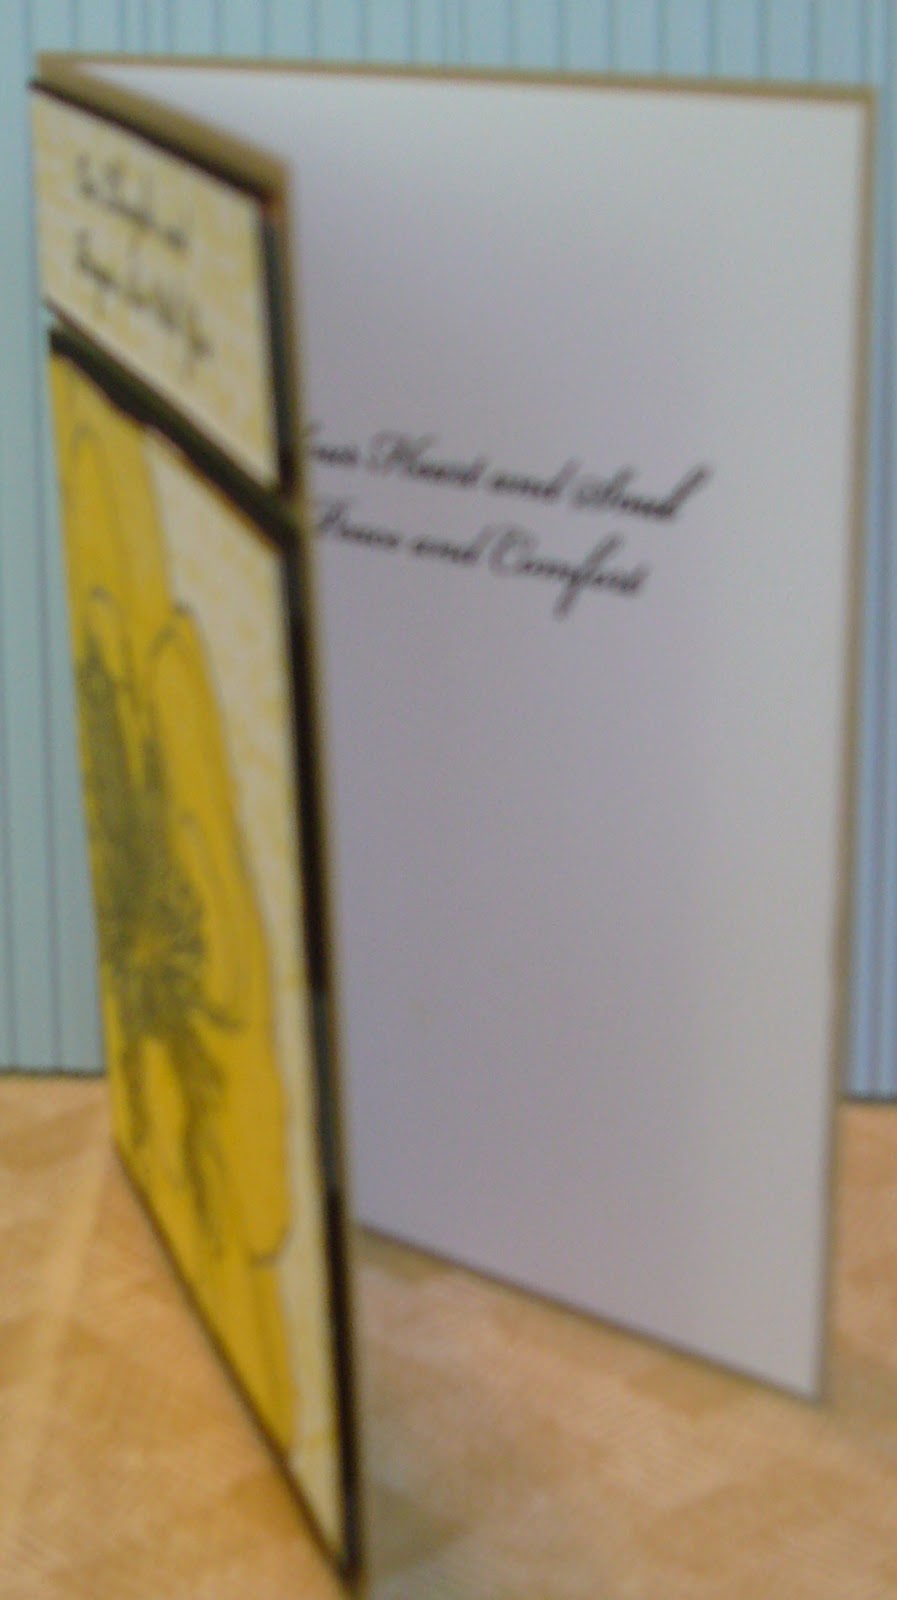
I began by coloring the image in a paint program with two shades of yellow, after checking to be sure that there actually are yellow camelias.  I printed the flower on bright white card stock, and did a little color enhancement with colored pencils.  I then over-stamped with a script stamp.  I used the same script stamp as a background for my sentiment, which was stamped in black.  Both pieces were layered on black cardstock, and mounted with foam tape to the kraft base card.  Here is a slightly closer shot:


I kept the inside of the card very simple by adding a white liner with the stamped sentiment.


As you can see, your sympathy cards can be made very simply, but still be very elegant.  Thanks for looking today.  Here are the other details:


          Stamps:  My Favorite Things 'Clearly Sentimental About Sympathy' and Clear Stamps by Kaisercraft 'Script'
          Inks:  Tim Holtz Distress by Ranger 'Mustard Seed' and Versafine 'Onyx Black'


Have a fabulous day, and keep your creative genius happy and well-fed!!!


CHRISTINE