Hello, out there! I have a new card for you today for the theme of "Thinking of You" at the Card A Day Blog . This card has some layering, but I wanted to keep it nice and flat for mailing. So, there's no foam tape and no fancy shaping on the flowers. All of which makes it nice and simple. Also, I used ALL leftovers - again.
I started out with a butterfly stamp. I had two from which to choose, so I stamped and colored both of them before deciding which one to use. My choice of colors on the butterfly determined what my card base and all the other elements would be.
I stamped the butterfly with Memento 'Tuxedo Black' on an old scrap of some kind of art paper. My daughter had a painting, done by the mom of a friend, that had a huge border which I cut 'for future use.' After testing the paper, I determined that it wouldn't work too well for watercoloring (which is what I thought I was going to do), so I used some Memento and Tombow markers to make my butterfly bright and cheery.
I knew I wanted to use flowers with my butterfly, so once my coloring was done, I went into my stash of flowers and chose some that I had punched quite some time ago for another project which just happened to be in the right colors. (I just love when that happens - don't you?) I also wanted something to layer behind my focal piece, and I found a punched border that was just right. I used Tim Holtz 'Antique Linen' Distress Ink to give the piece a similar aged look.
I layered the flowers, and added glitter glue for their centers. I also used the Stickles 'Cotton Candy' to add a little sparkle to parts of the butterfly. Unfortunately, the sparkle isn't showing up much in the photos, but it is a nice touch.
I chose - well, actually my daughter chose the sentiment from a selection I showed her. I used a piece of Stampin' Up 'Very Vanilla' to line the inside of the card, and stamped the greeting with the same Memento ink.
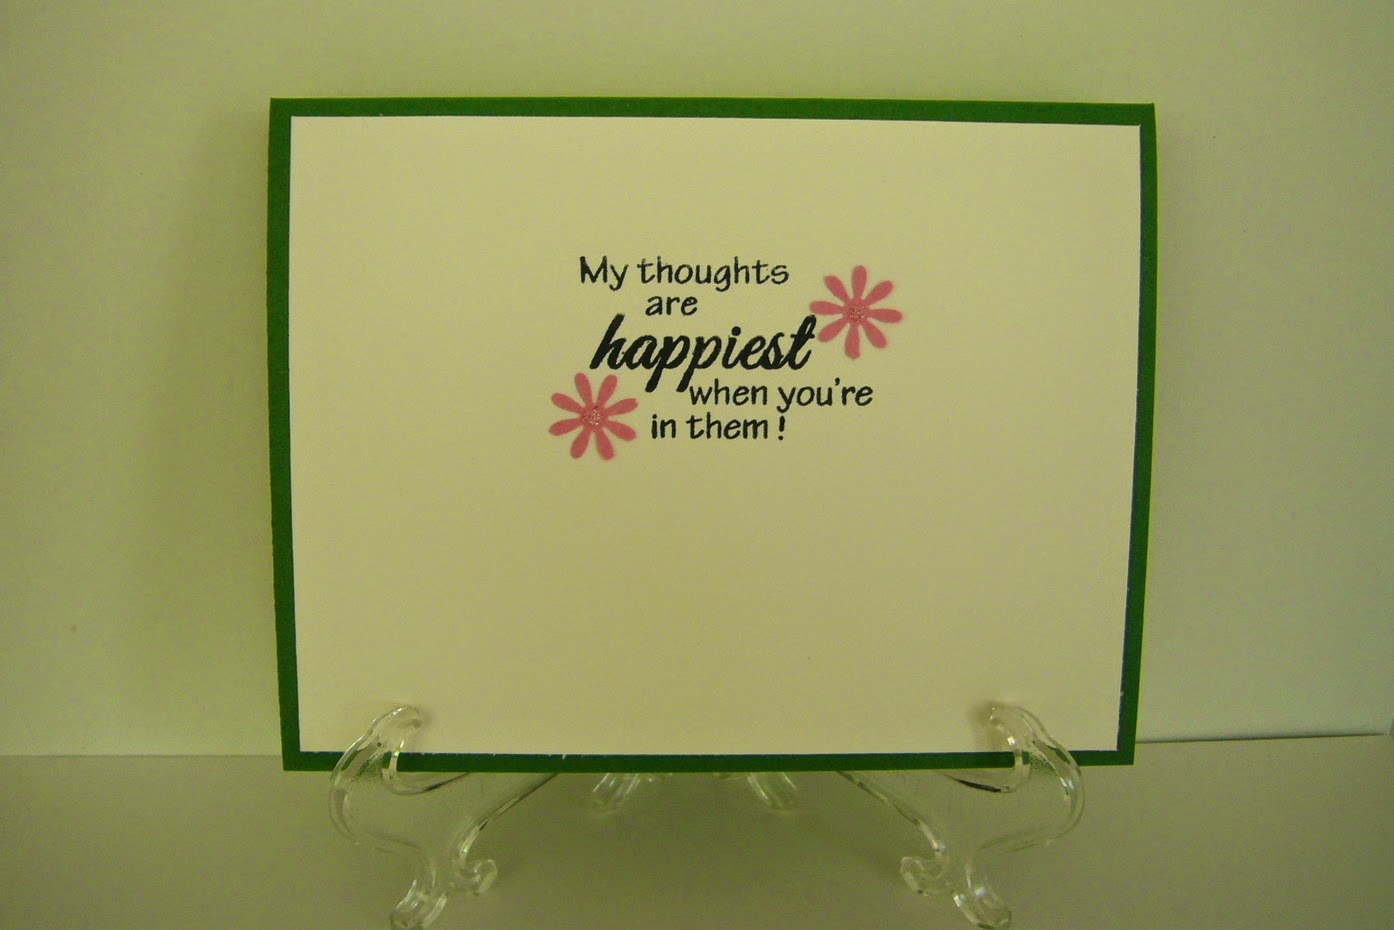
I thought it would be a nice touch to bring some color inside with a couple of the tiny flowers.
And that's it! I hope you've enjoyed your visit today. I also hope you're enjoying a truly wonderful day. Come back SOON!!
Other details:
Stamps: 'Dot Butterfly' from Sweet Stamps and sentiment from Pink by Design
Also used studio G glitter glue in yellow.
Various flower punches. You can use whatever fits the size for your project.
Card base: PapertreyInk (I think)
'Til next time...
BIG Hugs!!!
CHRISTINE
This blog was created for the display and exchange of craft ideas and information, especially on cardmaking, but also including such lovely activities as scrapbooking, knitting, crocheting and sewing.
Followers
Showing posts with label Sweet Stamps. Show all posts
Saturday, May 10, 2014
Thursday, April 3, 2014
In Sympathy
Welcome, friends. We have a week of those sometimes difficult-to-make Sympathy cards as our inspiration for you at the Card A Day Blog. I have been enjoying using lots of my dies for my cards recently, and my card today is another example of that.
I used four different die sets, beginning with the medallion. My initial thought was to have a sympathy sentiment in the center, but that changed when I came across my Inkadinkado inchie set of cross stamps. I used a scrap of slightly shimmery gold paper to cut the medallion, then stamped the cross on a bit of 'Very Vanilla' Stampin' Up card and heat embossed it with Stammpendous 'Detail Gold' powder.
I used the same off-white paper as the circle to die cut the background and the flower. I used Ranger Distress 'Antique Linen' ink to frame the cross, as well as to edge the flower. I then shaped the flower petals with a stylus and assembled the pieces using a gold glitter brad from American Crafts.
Next I die cut the leaves from some coordinating scraps of green papers and formed them with the stylus as well.
When I was ready for assembly, I ran the background through my Xyron sticker maker and affixed it to the green card which was cut at 5 1/2" x 4 1/4." I used Matte Accents to attach the leaves and a Glue Dot to add the flower. I layered the circle and the medallion both with foam tape before affixing them to complete the card.
I think this is a very elegant and tasteful card to present to a bereaved family member or friend. I hope it has been a good inspiration for you, and I thank you for your visit today.
I'll be back in a couple of days with my first card for my Guest Designer spot at Beccy's Place. We just might have some goodies in store so I do hope you'll come back and take a peek.
'Til next time.....
BIG Hugs!!!
CHRISTINE
Saturday, July 20, 2013
In the Navy
Greetings! Today I have a special request card to show you. My dd has some friends in the military, and she wanted to send some goodies to one of them who is overseas in a war zone. But she needed a card. DD told me some ideas she had, and I showed her supplies that were on hand for her use, and together we came up with a design that she was quite happy to send to her friend.
I started with a (you guessed it) Navy Blue card base. It's a very dark blue, which comes across nearly black in the photos:
I used a Cuttlebug folder to emboss the stars in the background layer, but I added a frame layer to provide a blank space for the featured sticker. I considered brushing on some color to highlight the stars, but elected not to do that because the embossing shows up beautifully in person. The eagle and flag image was stamped with Versamark and heat embossed with a powder color which picked up color from the sticker below.


I cut out the stamped/embossed eagle and used foam tape to affix it to the background. The sticker itself is three layers which provided enough dimension on its own, so I affixed it directly onto the background. I have several sentiment stamp sets which can be used for patriotic-type cards such as this one. Here is the sentiment my daughter chose:
DD wanted to keep the clean look of the card, so instead of handwriting a message directly inside, she chose to compose a letter to insert on a separate page.
I hope you've enjoyed this simple and elegant card for my dd's Navy buddy. It certainly was a pleasure and an honor to make it for him.
The details:
Stamps: Pink by Design "Our Troops" and Inkadinkadoo "Patriotic Eagle"
Embossing folder: Cuttlebug "Stars"
Dimensional Sticker: K & Company "Navy"
Ink: Versamark
Paper: Gina K Designs heavy base weight "In the Navy," and Georgia Pacific white
Embossing Powder: Sweet Stamps "Fine Detail Copper"
Miscellaneous: Stamp On It "Frame-Its Kit," foam tape, Scotch ATG
'Til next time.....
Big HUGS!
CHRISTINE
I started with a (you guessed it) Navy Blue card base. It's a very dark blue, which comes across nearly black in the photos:
I used a Cuttlebug folder to emboss the stars in the background layer, but I added a frame layer to provide a blank space for the featured sticker. I considered brushing on some color to highlight the stars, but elected not to do that because the embossing shows up beautifully in person. The eagle and flag image was stamped with Versamark and heat embossed with a powder color which picked up color from the sticker below.
I cut out the stamped/embossed eagle and used foam tape to affix it to the background. The sticker itself is three layers which provided enough dimension on its own, so I affixed it directly onto the background. I have several sentiment stamp sets which can be used for patriotic-type cards such as this one. Here is the sentiment my daughter chose:
DD wanted to keep the clean look of the card, so instead of handwriting a message directly inside, she chose to compose a letter to insert on a separate page.
I hope you've enjoyed this simple and elegant card for my dd's Navy buddy. It certainly was a pleasure and an honor to make it for him.
The details:
Stamps: Pink by Design "Our Troops" and Inkadinkadoo "Patriotic Eagle"
Embossing folder: Cuttlebug "Stars"
Dimensional Sticker: K & Company "Navy"
Ink: Versamark
Paper: Gina K Designs heavy base weight "In the Navy," and Georgia Pacific white
Embossing Powder: Sweet Stamps "Fine Detail Copper"
Miscellaneous: Stamp On It "Frame-Its Kit," foam tape, Scotch ATG
'Til next time.....
Big HUGS!
CHRISTINE
Wednesday, May 8, 2013
An Expression of Sympathy
No need to be alarmed by my title. I just have a card for you. So happy to have you join me today. My card is for the 'Sympathy' theme week over at the Card A Day Blog and then it's going into my card box for later use. It was somewhat of a quickie to make as I had decided to use pieces from a small pile of scraps I hadn't yet filed away. So, without delay, here is my card:
Okay, let's see if I can remember any of the details.....Most of the cuts and papers were left over from a decorative box I made which you can see here . Even the 5 1/2x4 1/4 card base came from those leftovers. The doily was a half piece that I had saved from something - don't remember what it was. The large flower piece was an extra cut that I had made for a wedding card, and the small flower is a plastic button with the shank cut off that was left from some 'recycled bottle' bracelets I was helping some Girl Scouts make.
The sentiment strip is a small scrap of handmade paper, purchased not made by me. And the sentiment, itself, was stamped with Versamark and heat embossed using Sweet Stamps 'Fine Detail Copper' embossing powder. The stamp is from Hero Arts set C1342. Sorry, but I don't have a name.
The side frame pieces were affixed using Tombow Mono, but the other pieces were layered using foam tape or Scotch Quick Drying Tacky Glue.
Well, I said it was a quickie, didn't I?! Nope, I haven't even finished the inside; saving that for when the card will be used.
I hope you've had a sweet, though short, visit today. Come back and see me again soon!!
Big THANKS and even bigger HUGS,
CHRISTINE
Thursday, September 6, 2012
A Golden Autumn
HOW CAN IT BE SEPTEMBER ALREADY???????
Sorry for yelling. I just can't believe how quickly this year is going. Even the long, hot summer is over, and all-too-soon we will be seeing the colors of Autumn. I have another Card A Day Blog design for you today. As you might already have guessed, our weekly theme is 'Autumn.' I had several ideas percolating in my brain for this theme, but I love tone-on-tone treatments, so that is the idea that won over all the others.
I started with a base of kraft card stock cut at 4 1/4" x 11" or half an 8 1/2 x 11 sheet cut the long way to make a tall A2 standard sized card. That piece then needed to be scored and cut to make a step card with one step and a higher centerpiece. Here is your first view:
Sorry for yelling. I just can't believe how quickly this year is going. Even the long, hot summer is over, and all-too-soon we will be seeing the colors of Autumn. I have another Card A Day Blog design for you today. As you might already have guessed, our weekly theme is 'Autumn.' I had several ideas percolating in my brain for this theme, but I love tone-on-tone treatments, so that is the idea that won over all the others.
I started with a base of kraft card stock cut at 4 1/4" x 11" or half an 8 1/2 x 11 sheet cut the long way to make a tall A2 standard sized card. That piece then needed to be scored and cut to make a step card with one step and a higher centerpiece. Here is your first view:
The cuts were made 1" from each long side and cut from 1" to 6 1/2". The center score was done at 5 1/2" and the side scores were made at 1", 2" and 6 1/2". I really like how the center lifts from the borders.
The side border pieces as well as the sentiment piece were cut from a golden paper which has a pretty sheen that, unfortunately, does not show up well in the photos. The centerpiece was cut from a sandy colored paper, and the mat from a darker mustard paper. By the way, these pieces were all scraps and I no longer remember where they came from.
I used Versamark to stamp the center image as well as the borders and greeting, and used a lovely golden embossing powder to highlight them.
Overall, this was a fairly quick and easy card to make and would be great when multiples are needed. It's a super design for any occasion.
Not too many extra details for you on this one. The stamps all came from TPC Studio: Autumn Harvest set and Patterned Borders. The embossing powder I used (and I really love this one) is Medieval Metals from Sweet Stamps.
Now I'm off to make a wedding card. I'll show it to you soon after the wedding which is this coming Saturday -- eek! only a couple of days away. I'd better get creating......................
Do remember to always keep your creative genius happy and well-fed!
Big HUGS to all!!
CHRISTINE
Friday, August 17, 2012
One of My Favorite Cards
Hello, out there! I have another card for you today which is posted in the Card A Day Blog for this weeks' theme, "Cheer Up." This is certainly one of, if not my most favorite card that I've made. I actually made it some time ago, but never got around to posting it for you. It really is a quick and easy card to put together. Probably the most time-consuming part of the card, aside from choosing the design paper, is the coloring. And even THAT is done quickly once you have the colors chosen.
I made this card while at visiting my DS (sister, that is), and, since I was using many of her supplies, have no record of most of what I used. I did start out with a standard A2 sized card base (4 1/4" x 5 1/2") in a lovely linen textured card stock. I spotted a beautiful piece in DS's scrap box that I thought would make the perfect backdrop for my pretty lady stamp. Then, all I needed was a sentiment.
The colors to use for the stamp were easily chosen to match the colors in the floral background paper. The image was stamped on a nice smooth white piece of card, colored with Copics, and the white was toned down by gently inking around the image leaving a plain white border. That piece was then matted to a piece of blue card cut just a bit larger. The pearls were added for an extra touch of class. Memory fails as to whether the pearls just happened to be the right color or I used the same blue Copic marker as in the image, but I think it was the former.
The sentiment was stamped in black on the same blue card as the mat, and then die cut and inked lightly with the blue as used on the lady piece.
And here are the two stamped pieces together:
As you can see, the dp is cut on the diagonal to cover just half of the card front, leaving a tiny white border at the top and left side. The card was given some dimension by mounting the lady to the card with foam squares and the sentiment with a thinner foam tape.
Who knows, perhaps I will allow myself to use this card one day.....................
The image stamp is from Sweet Stamps; 1900's Lady, #513F.
Hope this card was able to cheer you. Do remember to keep your creative genius happy and well-fed!
Hugs to all!
CHRISTINE
I made this card while at visiting my DS (sister, that is), and, since I was using many of her supplies, have no record of most of what I used. I did start out with a standard A2 sized card base (4 1/4" x 5 1/2") in a lovely linen textured card stock. I spotted a beautiful piece in DS's scrap box that I thought would make the perfect backdrop for my pretty lady stamp. Then, all I needed was a sentiment.
The colors to use for the stamp were easily chosen to match the colors in the floral background paper. The image was stamped on a nice smooth white piece of card, colored with Copics, and the white was toned down by gently inking around the image leaving a plain white border. That piece was then matted to a piece of blue card cut just a bit larger. The pearls were added for an extra touch of class. Memory fails as to whether the pearls just happened to be the right color or I used the same blue Copic marker as in the image, but I think it was the former.
The sentiment was stamped in black on the same blue card as the mat, and then die cut and inked lightly with the blue as used on the lady piece.
And here are the two stamped pieces together:
As you can see, the dp is cut on the diagonal to cover just half of the card front, leaving a tiny white border at the top and left side. The card was given some dimension by mounting the lady to the card with foam squares and the sentiment with a thinner foam tape.
Who knows, perhaps I will allow myself to use this card one day.....................
The image stamp is from Sweet Stamps; 1900's Lady, #513F.
Hope this card was able to cheer you. Do remember to keep your creative genius happy and well-fed!
Hugs to all!
CHRISTINE
Saturday, November 26, 2011
Shopping.....
We all love shopping, don't we? Especially Christmas Shopping!! Well, maybe sometimes not so much. But I hope you'll enjoy the card I've made for this week's Christmas Shopping theme on the Card A Day Blog. This card is also my entry for the CDAC Progressive Challenge Group. We are on a new set of challenges (this is cdacpc7), and there's still time to get in on the fun. So, if you like free, and you love challenges, check it out soon!
The digital image I used on my card comes from Sugar Creek Hollow. Their webstore is undergoing some construction right now, but they also have a blog and offer their own challenges.
My card is pretty much a one-layer card. Well, it's one layer mounted on a card base. I've veered away slightly from my usual A2 card, and cut this one at 4 1/4" x 6" because I needed just a little extra room for all the stamps I was using. Everything is stamped directly onto the white card except for the main sentiment and the paper-pieced central image which are mounted with foam tape.
I used a large background stamp and three different colors to take away the stark white of the card. The extra sentiments were stamped directly on the card, and the gifts were stamped and heat embossed. I colored the chic chick with Copics and embellished her with glitter pens. Here are some close-ups so you can see the details.
I added a little color to the inside of the card using the same inks I used for the background on the card front, and stamped a fun greeting to go with the spirit of the card.
Here's the full front shot:
The Recipe:
Stamps: Impression Obsession 'Screen' background, JustRite 'Small Letter' set, Recollections 'Merry Merry' set, Pink by Design 'Shopaholic' and 'Designer Shoes' sets, Inkadinkado 'Holiday Inchie' bundle, and Stampin' Up 'Jolly Bingo Bits'
Markers/Pens: Copic Y0000, Y00, Y02, Y38 and Sakura Pink Star, Red Star and Green Star
Inks: Color Box Yellow Citrus, Lime Pastel and Ice Blue; Memories Direct Red and Ancient Page Pine
Embossing Powders: Stampendous Detail Gold and Detail Silver; Sweet Stamps Fine Detail Copper and Fine Detail Rose
Papers: Stampin' Up Garden Green and Wassau White cardstocks
Be safe on all your holiday shopping trips, and always keep your creative genius happy and well-fed!
CHRISTINE
The digital image I used on my card comes from Sugar Creek Hollow. Their webstore is undergoing some construction right now, but they also have a blog and offer their own challenges.
My card is pretty much a one-layer card. Well, it's one layer mounted on a card base. I've veered away slightly from my usual A2 card, and cut this one at 4 1/4" x 6" because I needed just a little extra room for all the stamps I was using. Everything is stamped directly onto the white card except for the main sentiment and the paper-pieced central image which are mounted with foam tape.
I used a large background stamp and three different colors to take away the stark white of the card. The extra sentiments were stamped directly on the card, and the gifts were stamped and heat embossed. I colored the chic chick with Copics and embellished her with glitter pens. Here are some close-ups so you can see the details.
I added a little color to the inside of the card using the same inks I used for the background on the card front, and stamped a fun greeting to go with the spirit of the card.
Here's the full front shot:
The Recipe:
Stamps: Impression Obsession 'Screen' background, JustRite 'Small Letter' set, Recollections 'Merry Merry' set, Pink by Design 'Shopaholic' and 'Designer Shoes' sets, Inkadinkado 'Holiday Inchie' bundle, and Stampin' Up 'Jolly Bingo Bits'
Markers/Pens: Copic Y0000, Y00, Y02, Y38 and Sakura Pink Star, Red Star and Green Star
Inks: Color Box Yellow Citrus, Lime Pastel and Ice Blue; Memories Direct Red and Ancient Page Pine
Embossing Powders: Stampendous Detail Gold and Detail Silver; Sweet Stamps Fine Detail Copper and Fine Detail Rose
Papers: Stampin' Up Garden Green and Wassau White cardstocks
Be safe on all your holiday shopping trips, and always keep your creative genius happy and well-fed!
CHRISTINE
Labels:
Ancient Page,
CADB,
CDAC,
Christmas,
Color Box,
Copic,
heat embossing,
Impression Obsession,
JustRite,
Memories Direct,
Pink by Design,
Recollections,
Sakura,
Stampendous,
Sweet Stamps,
Versamark
Subscribe to:
Posts (Atom)