Hello and Welcome!! I hope you are enjoying the weather in your neck-of-the-woods. As today's designer for the Card A Day Blog, I was very happy to have to stay inside to make my card. We've been having plenty of hot, hot days this summer, and I just don't do well in extreme temps anymore.
This week's theme at CADB is 'NEW'; new job, new home, new whatever. When I started thinking about my card I was hoping to come up with something just a little bit different. I thought about new hat and new dress, but then I remembered some fun stamps I've had for awhile of shoes. That's the idea that really grabbed me. Upon looking at the stamps again, I found the ideal sentiment for this week's theme. You'll see what I mean. Here's your first look:
These first two pictures give you a close look at just two of the shoe stamps I used. I wanted different colors to match all my outfits (heehee) so I used colors from the background dp.
I had been playing with some of my punches recently, and that left me with some miscellaneous punched elements. I happened to have one that was the perfect fit for tiling my shoes. Let's take a peek:
Here you can see the multicolored background with solid-colored framing that matches the card base. In the next shot you get a better idea of the whole card front.
I mentioned that the stamp set I used had a perfect sentiment. Here it is:
This card would be perfect for someone who just needs a little pick-me-up. Here is your straight-on front view:
The sentiment and the focal shoe were both heat embossed with Stampendous 'Detail Black'and mounted with foam tape for just a tiny bit of extra dimension. This card measures 5" x 7".
Nitty-Gritty:
Stamps: Pink by Design 'Shoe Addict' and 'Designer Shoes' sets
Paper: K&Company (dp) and Recollections (card base), stash white
Punch: Martha Stewart corner and edge (sorry, I don't have the name.)
Ink: Versamark, Memento 'New Sprout', Memories Direct 'Pink', Stampin' Up 'Wisteria Wonder' and 'Bashful Blue'
FYI for anyone who might be visiting for the first time: We have new themes weekly and challenges - with prizes - every month at the CADB. Hope you'll stop by and play along!
Remember to always keep your creative genius happy and well-fed!!
CHRISTINE
This blog was created for the display and exchange of craft ideas and information, especially on cardmaking, but also including such lovely activities as scrapbooking, knitting, crocheting and sewing.
Followers
Wednesday, July 18, 2012
Sunday, July 8, 2012
IT'S GOOD TO BE GREEN
Well, yes, I know it isn't St. Patrick's day, but I'm the designer today for the Card A Day Blog, and our theme for this week is 'MONOCHROMATIC.' Per dd's request, I have used various shades of the wonderful and soothing color of GREEN to make my card. So, please don't be green with envy because you didn't get to hit the green for a round of golf, and don't let your kids turn green with a sick tummy because you let them eat too many green apples. Just sit back with a nice cup of green tea, and enjoy a few moments with me.
I have several dies in my stash that have been feeling neglected, and I thought this would be a great time to bring some of them out to use for a little layering. The particular dies I had in mind come from the Spellbinders "Mix & Match Classic Edges and Inserts" collection, and my idea was to use them to layer papers for my card front. I had lots of fun looking for different green papers; it was really hard not to go too crazy choosing papers - I stopped at ten plus one for the base. I was aiming for a fun mix of solids and patterns in a nice range of green hues. Here is your first look at the front:
This picture is a close-up to show the different cuts of the dies. Each edge was used twice because I have six different inserts and only three edges (There are more in the Spellbinders collection.). After I die cut the papers, using my Cuttlebug, and decided on the placement, I mounted them on a mat, and then cut that piece to size for the card front. To finish it off nicely I used a scallop punch on the top edge. (The mat is the very light green at the bottom.) I compared several greens for the card base to choose the one that would best frame the colors used in the front piece. Here is the full front view:
Since the front piece was already quite busy, I didn't want to clutter it up with embellishments, so I simply threaded a thin ribbon through one of the die cut patterns before mounting to the base. I have left the card without a sentiment because, as you will see, it can be used for many occasions with an appropriate sentiment being added when needed.
In this angled photo you get a hint of the surprise inside the card. Yes, there is a gift card pocket inside.
I inserted a piece cut from the front to bring some interest to the inside of the card. The mat supports the gift card pocket and provides a light space for a signature. The pocket is simply cut and folded to size with the top punched using the same scallop punch used earlier. Everything was affixed using my ATG.
If I had been thinking more quickly I would have made the decorative strip into a bookmark, thereby making the card two gifts in one!! Ah well, perhaps next time.
Here is your list of supplies:
Papers: Solids=Stampin' Up for card base, DCWV Lemon Flower, Sizzix Little Sizzles Pastels, Bazzill Pastels, Recollections Colored Core. Patterns=My Mind's Eye Quite Contrary, Sizzix Little Sizzlets Pastels, K&Company Watercolor Bouquet
Dies: Spellbinders Edgeabilities Mix & Match Classic Edges One and Classic Decorative Inserts One and Two
Paper Punch: EK Success Scalloped Scallops
Thanks for visiting today, and always keep your creative genius happy and well-fed!
CHRISTINE
Thursday, June 21, 2012
Just Because
Hi lovely friends!! This card was such fun to make. The theme for this week at the Card A Day Blog is Just Because. I guess you can use almost anything for a just because type of card to make it appropriate for the intended recipient. I chose butterflies because they're light and free and fun, and they always make me smile.
I was with my sister recently. Many of you know she also makes cards. As usual she had lots of scraps laying on her table, so I brought a few home with me to make a card, and the pieces were just perfect for this week's theme.
As you can see, I have lots of butterflies flitting around the vine climbing the trellis. The card base is the standard A2 (5 1/2 x 4 1/4). I liked the look of the mat leaving a border only on the two sides so I cut it the length of the base and 1/4" smaller in the width. The white mat is embossed using the Cuttlebug, and the butterflies are attached only in the center to look as though they're actually flying.
Here's a closer shot...all the butterflies are different:
I decided to bring just a little bit of the design to the inside of the card. I used just a patch of the DP for a tiny 'meadow' scene with some tiny butterflies.
Here's one more pic, and then your list of supplies:
Embossing Folder: QuicKut Diamonds & Dots
Die: Sizzlits: Branch w/Leaves (medium)
Paper: K&Company DP 'Happy Trails', DCWV textured paper for leaves, Stampin' Up for base
Punch: Martha Stewart Border Arches, various small butterflies (sorry, don't know)
Wishing you a most beautiful day . . . . . . . just because!
Always keep your creative genius happy and well-fed!!
CHRISTINE
Thursday, June 14, 2012
FLAG DAY SALUTE!
Hi everyone! Sorry I've been away for awhile -- bit of an injury kept me from doing much with my hands. But I'm much better, now, and happy to be bringing you this card which celebrates Flag Day and honors our military heroes.
I am designer today for the Card A Day Blog where our theme of the week is "Red, White and Blue." It was a happy coincidence that I had signed up for this date (or maybe it was my subconscience telling me to do it). Either way, I hope you enjoy this simple patriotic card.
I started with an A2-sized card base in kraft. I chose that color to symbolize earth; not the Earth, just earth. I used a nice blue mat which I embossed in my Cuttlebug using a stars folder. I wanted to incorporate the U.S. flag in my card, and I chose a Cricut cartridge with various flag designs. I love the flag motif in the shape of the U.S.
I am designer today for the Card A Day Blog where our theme of the week is "Red, White and Blue." It was a happy coincidence that I had signed up for this date (or maybe it was my subconscience telling me to do it). Either way, I hope you enjoy this simple patriotic card.
I started with an A2-sized card base in kraft. I chose that color to symbolize earth; not the Earth, just earth. I used a nice blue mat which I embossed in my Cuttlebug using a stars folder. I wanted to incorporate the U.S. flag in my card, and I chose a Cricut cartridge with various flag designs. I love the flag motif in the shape of the U.S.
I hope you can see the embossed stars on the blue background (click on the picture to enlarge it). I had a closer pic, but it was not quite in focus. The sentiment is from the Pink by Design set called "Our Troops." It's a must-have set for any cardmaker with someone in the military or for OWH.
My inside sentiment is from the same set. I wanted just a bit of the color brought to the inside, so I used a white mat, stamped the sentiment in red, and added a blue paper strip to break up the white.
Thanks for visiting today. Display your flags proudly!!
Here are the supplies used:
Cricut Cartridge: Stand and Salute
Ink: Stampin'Up Classic 'Real Red'
Stamps: Pink By Design 'Our Troops'
Embossing Folder: Cuttlebug 'Stars'
Brads: American Crafts 'Elements' Mini Glitter Brads Primaries
Glues: Tombo Mono Adhesive, Zig 2-Way
Remember, always keep your creative genius happy and well-fed!
CHRISTINE
Monday, May 21, 2012
Framed Thank You
" 'Tis better to give than to receive", but when we do receive it is simply the nice thing to do to express our thanks to the giver with a lovely card. As today's designer for the Card A Day Blog, I have a lovely and quick card for you which can be adapted for most any sentiment.
My card is done in the standard A2 size (5 1/2 x 4 1/4). I started with an ivory card base (inked around the edges), and used a kraft paper for the mat which I embossed with my Cuttlebug and inked lightly. The frame was made with a two-sided designer cardstock since both sides would show after folding.
To make the frame, I started with a five inch square. Each corner was folded to the center, and then folded back on itself to reveal the inside. You can determine the inner dimensions of the frame by how much you fold back each corner. In this case, the corner measures 1" from the center of the fold to the point.
I next used a piece of the same ivory for the centerpiece. I stamped a flower for a light background, and used a scrap piece of gold card for the die cut sentiment. You can also stamp the sentiment in a darker ink, or use embossing powder to make it stand out. Once the sentiment is taped to the center, the frame is secured with foam tape to give it just a bit of dimension. The outer corners are secured with two-sided tape (or they can be left loose if desired). Here is a slightly closer picture for you:
I don't have a shot of the inside of the card since it is left blank for a personal message. As you can see, this is a card that is quite easily reproduced if you need several of the same kind.
And here are the supply details:
Cardstock: K&Company 'Ancestry' and Stampin' Up Ivory
Ink: Memento Desert Sand and Rich Cocoa; TH Distress Ink Antique Linen
Stamp: Gina K. Designs 'Nature's Greetings' set
Die: Cuttlebug 'Thank You' by ProvoCraft
Embossing Folder: Cuttlebug 'Mini Floral'
Thanks so much for joining me today. I hope to see you again very soon!
Do remember always keep your creative genius happy and well-fed!!
CHRISTINE
My card is done in the standard A2 size (5 1/2 x 4 1/4). I started with an ivory card base (inked around the edges), and used a kraft paper for the mat which I embossed with my Cuttlebug and inked lightly. The frame was made with a two-sided designer cardstock since both sides would show after folding.
To make the frame, I started with a five inch square. Each corner was folded to the center, and then folded back on itself to reveal the inside. You can determine the inner dimensions of the frame by how much you fold back each corner. In this case, the corner measures 1" from the center of the fold to the point.
I next used a piece of the same ivory for the centerpiece. I stamped a flower for a light background, and used a scrap piece of gold card for the die cut sentiment. You can also stamp the sentiment in a darker ink, or use embossing powder to make it stand out. Once the sentiment is taped to the center, the frame is secured with foam tape to give it just a bit of dimension. The outer corners are secured with two-sided tape (or they can be left loose if desired). Here is a slightly closer picture for you:
I don't have a shot of the inside of the card since it is left blank for a personal message. As you can see, this is a card that is quite easily reproduced if you need several of the same kind.
And here are the supply details:
Cardstock: K&Company 'Ancestry' and Stampin' Up Ivory
Ink: Memento Desert Sand and Rich Cocoa; TH Distress Ink Antique Linen
Stamp: Gina K. Designs 'Nature's Greetings' set
Die: Cuttlebug 'Thank You' by ProvoCraft
Embossing Folder: Cuttlebug 'Mini Floral'
Thanks so much for joining me today. I hope to see you again very soon!
Do remember always keep your creative genius happy and well-fed!!
CHRISTINE
Wednesday, May 16, 2012
Nouveau Dad
Hi again! I hope all you moms out there had as beautiful a Mothers' Day as I did. And today's card, for the current theme of Fathers' Day at the Card A Day Blog, is for a first-time dad in our family. I decided to combine the CADB theme with the current CDAC Progressive Challenge. One of the images in this challenge is a sweet baby face from Glitterbabe, which I decided would be perfect for my card.
Since this card was being made for a man, I decided to start with a black card base (standard A2 size) and kraft cardstock for the mat. I ran the mat through my Cuttlebug and inked it a bit to enhance the embossing. I colored the main image with Copics and used stamps from two different sets to add some fun. The digi image, as well as one of the stamped images, were cut with dies, and the other pieces on the front of the card were cut with decorative edged scissors.
I created my own sentiment, and inked all the pieces around the edges. I used two sizes of foam tape to layer the different images.
For the inside, I added a kraft liner and brought in the dot pattern with a cute border stamp. I printed my sentiment on the same white stock as the outside, cut it out with another die, and inked it as I did the outside pieces.
I took some time deciding what to do for my card, but once I had the design in mind, creating it was really fun and easy. I hope you have lots of fun creating cards for all the fathers in your life.
Thanks for joining me today. Here are the details:
The dies are Spellbinders Deckled Edge Rectangles and QuicKutz Nesting Eyelet Circles.
Stamp sets used: TCP Studio 'Baby' and 'Dots & Stripes' and Paper Studio 'Nursery Icons'
Do remember to always keep your creative genius happy and well-fed!
CHRISTINE
Tuesday, May 1, 2012
Thoughts and Prayers
So glad you decided to visit. I'm the designer again, today, for the Card A Day Blog, and we're starting a new month, with a new theme, and new opportunities for prizes!! Our new theme is SYMPATHY, not usually the favorite type of card for most of us to come up with. Personally, I like to keep them simple, and I think I've succeeded in doing that with my card.
I decided to feature one of the images from the current Crafter's Digital Art Center Progressive Challenge. Do check them out; it's a great way to sample digi images from various designers, share your projects and have a chance to win more great prizes! The camelia image I used here came from the Wax Fruit Company, and was just perfect for my card.
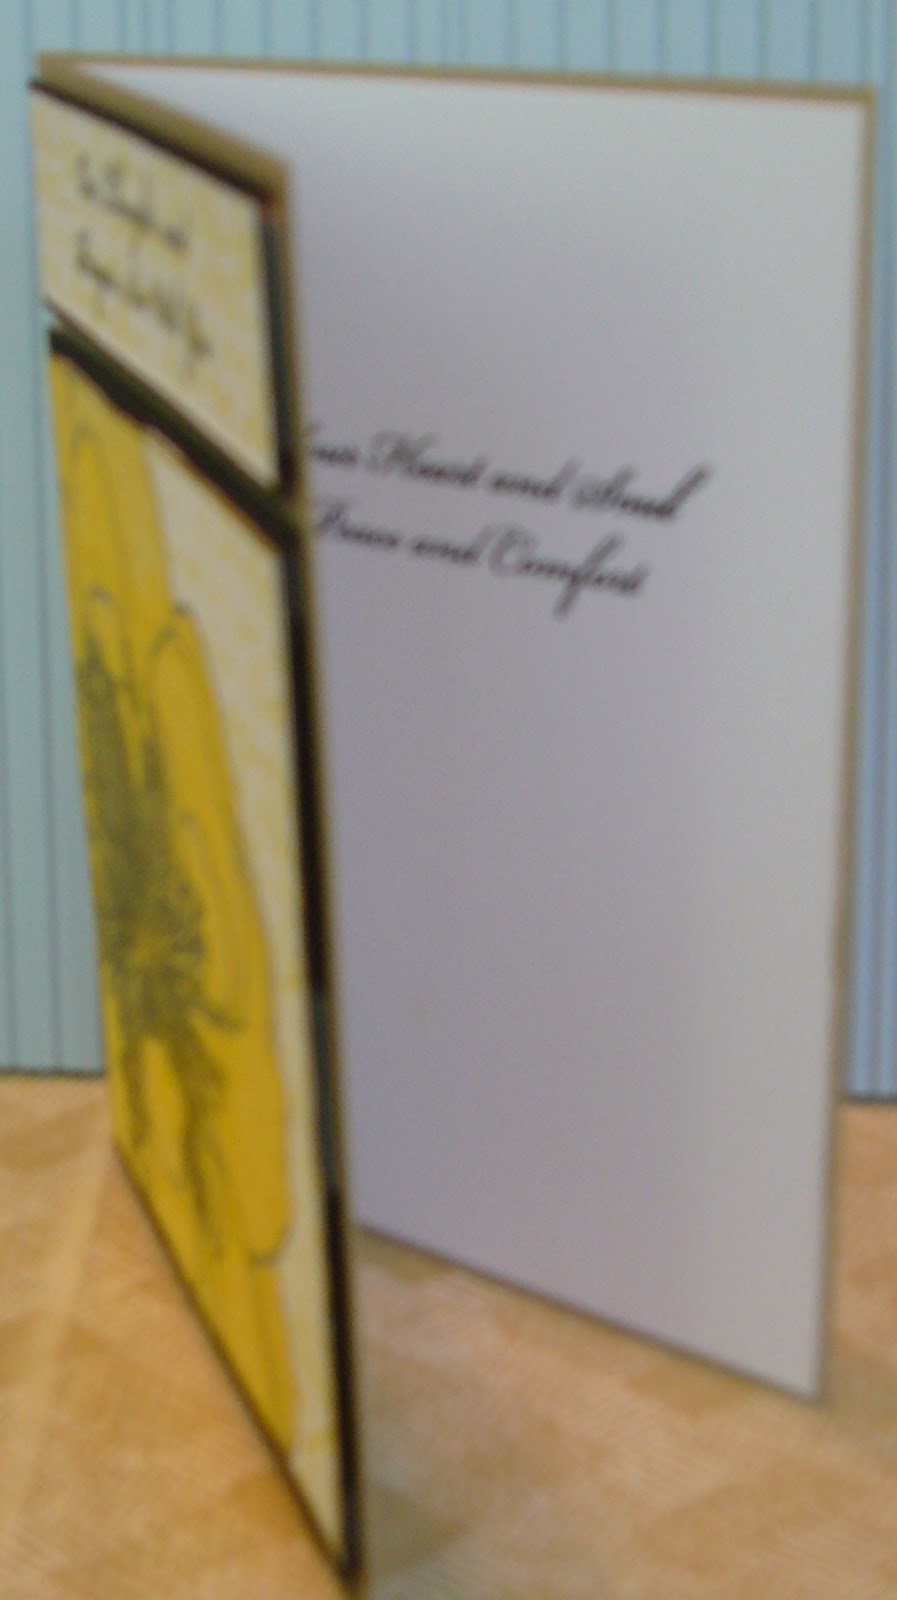
I began by coloring the image in a paint program with two shades of yellow, after checking to be sure that there actually are yellow camelias. I printed the flower on bright white card stock, and did a little color enhancement with colored pencils. I then over-stamped with a script stamp. I used the same script stamp as a background for my sentiment, which was stamped in black. Both pieces were layered on black cardstock, and mounted with foam tape to the kraft base card. Here is a slightly closer shot:
I kept the inside of the card very simple by adding a white liner with the stamped sentiment.
I decided to feature one of the images from the current Crafter's Digital Art Center Progressive Challenge. Do check them out; it's a great way to sample digi images from various designers, share your projects and have a chance to win more great prizes! The camelia image I used here came from the Wax Fruit Company, and was just perfect for my card.
I began by coloring the image in a paint program with two shades of yellow, after checking to be sure that there actually are yellow camelias. I printed the flower on bright white card stock, and did a little color enhancement with colored pencils. I then over-stamped with a script stamp. I used the same script stamp as a background for my sentiment, which was stamped in black. Both pieces were layered on black cardstock, and mounted with foam tape to the kraft base card. Here is a slightly closer shot:
I kept the inside of the card very simple by adding a white liner with the stamped sentiment.
As you can see, your sympathy cards can be made very simply, but still be very elegant. Thanks for looking today. Here are the other details:
Stamps: My Favorite Things 'Clearly Sentimental About Sympathy' and Clear Stamps by Kaisercraft 'Script'
Inks: Tim Holtz Distress by Ranger 'Mustard Seed' and Versafine 'Onyx Black'
Have a fabulous day, and keep your creative genius happy and well-fed!!!
CHRISTINE
Tuesday, April 17, 2012
2012 GRAD
Hi everyone!! As today's designer at the Card A Day Blog I have another fun, and fairly quick, graduation card to show you. I used my Cricut and the Cricut Craft Room online design software to make this one, but you can certainly make something very similar using scissors, paper punches or stickers.
The card base was cut at 9" X 7 1/2" with the finished card fitting into a #10 business envelope (9 1/2" x 4"). The white liner was cut at 9" X 7 1/4" and inserted to leave a bottom border. The letters of the two words were welded, and then cut at 1 5/8" (real dial size off).
As you can see in the photo, the graduate's colors are purple and gold. I chose a vibrant purple for the letters, a softer lilac for the base card and a pretty gold ribbon behind the letters. The ribbon was wrapped to the inside before attaching the liner so the ends are covered nicely. This card is for a young man, so I wanted to give it a masculine look.....no bows, no flowers.....you know the drill. I decided to use white numbers (with just a bit of glitter) to coordinate with the white liner. The words were applied with foam tape to give dimension.
Here's the full front view:
I'm really happy with the way this card turned out. I hope you like it, too. Here is the short list of supplies:
Paper: words-Core'dinations, card base-Basis by Leader Paper Products, liner-Wassau
Ribbon: The Ribbon Boutique (JoAnn's, I think)
Cricut Cartridges: words-Blackletter, card and liner-George and Basic Shapes plus Elegant Edges
Numbers: Thickers 'Delight' from American Crafts
Adhesive: Tombow Mono, generic foam tape
And that's it!!
Over at CADB we have challenges running all month long based on our themes for that month. Please join us; we always give prizes!!!
See you again soon, and remember, always keep your creative genius happy and well-fed.
CHRISTINE
The card base was cut at 9" X 7 1/2" with the finished card fitting into a #10 business envelope (9 1/2" x 4"). The white liner was cut at 9" X 7 1/4" and inserted to leave a bottom border. The letters of the two words were welded, and then cut at 1 5/8" (real dial size off).
As you can see in the photo, the graduate's colors are purple and gold. I chose a vibrant purple for the letters, a softer lilac for the base card and a pretty gold ribbon behind the letters. The ribbon was wrapped to the inside before attaching the liner so the ends are covered nicely. This card is for a young man, so I wanted to give it a masculine look.....no bows, no flowers.....you know the drill. I decided to use white numbers (with just a bit of glitter) to coordinate with the white liner. The words were applied with foam tape to give dimension.
Here's the full front view:
I'm really happy with the way this card turned out. I hope you like it, too. Here is the short list of supplies:
Paper: words-Core'dinations, card base-Basis by Leader Paper Products, liner-Wassau
Ribbon: The Ribbon Boutique (JoAnn's, I think)
Cricut Cartridges: words-Blackletter, card and liner-George and Basic Shapes plus Elegant Edges
Numbers: Thickers 'Delight' from American Crafts
Adhesive: Tombow Mono, generic foam tape
And that's it!!
Over at CADB we have challenges running all month long based on our themes for that month. Please join us; we always give prizes!!!
See you again soon, and remember, always keep your creative genius happy and well-fed.
CHRISTINE
Monday, April 9, 2012
Here's to Grandmom
Hi everyone! I do hope you and your family enjoyed a beautiful Easter celebration. Our Easter service was so joyful, and filled with glorious music. I'm here, today, to bring you a Mother's Day inspiration for the Card A Day Blog. I really enjoyed making this card, using images from one of the Crafter's Digital Art Center Progressive Challenges. The girl in the image reminds me of my daughter, so I decided to make this card for her to give to her grandmother. Here's the first peek:
The girl is a digi image from Back To Paper. I colored her with copics, and paper-pieced her dress using a matching blue marker to color the trim. The flowers are another digi, this time from Glitterbabe. I printed the flower in the yellow paper in three sizes and cut them out for dimension. The stems are just cut from a scrap.
The card stock I used is a nice weight, and I wasn't expecting the color to bleed through, but it did! Since I needed to cover the bleed on the inside, I printed the sentiment directly onto a matching blue card stock and used it as a liner.
And a closer view so you can see the fonts used:
Of course, I had to get daughter's approval every step of the way. She chose the outside sentiment, which comes from Sarah Hamer of 'My Pink Cricut.' Here is the full front view:
As you can see, I rounded the corners. I cut the liner just a bit smaller and rounded those corners to match. And of course Grandmom needs a little bling, so rhinestones were added to the flowers.
I hope you enjoyed your visit today! Think about joining the CADB challenges. Please do remember to keep your creative genius happy and well-fed!!
CHRISTINE
The girl is a digi image from Back To Paper. I colored her with copics, and paper-pieced her dress using a matching blue marker to color the trim. The flowers are another digi, this time from Glitterbabe. I printed the flower in the yellow paper in three sizes and cut them out for dimension. The stems are just cut from a scrap.
The card stock I used is a nice weight, and I wasn't expecting the color to bleed through, but it did! Since I needed to cover the bleed on the inside, I printed the sentiment directly onto a matching blue card stock and used it as a liner.
And a closer view so you can see the fonts used:
Of course, I had to get daughter's approval every step of the way. She chose the outside sentiment, which comes from Sarah Hamer of 'My Pink Cricut.' Here is the full front view:
As you can see, I rounded the corners. I cut the liner just a bit smaller and rounded those corners to match. And of course Grandmom needs a little bling, so rhinestones were added to the flowers.
I hope you enjoyed your visit today! Think about joining the CADB challenges. Please do remember to keep your creative genius happy and well-fed!!
CHRISTINE
Monday, March 19, 2012
SPRING HAS SPRUNG!!! Blog Hop
Spring Has Sprung!
The designers at Card a Day Blog are joining together to do a Blog Hop! The theme is dimensional cards!
To join in....visit all the participating designers by visiting their sites, some are having prize giveaways...so make sure you pop in!
Make sure you comment on all the blogs too, because at the end of the blog hop, they are going to send a list of all who commented on their blog,
and we are going to do a grand prize drawing of all comments on each blog!
The grand prize is your choice of a pdf pattern book, valued up to $20, from http://popupcards.com/shop-patterns.html !
Make sure to check back at Card a Day Blog March 23rd, to see who won!
So JOIN IN TODAY....comment on the main blog page, and visit the other hop pages and comment there too!
And now for the reveal of my creation for the hop! One of the first things that comes to my mind when I start seeing the signs of Spring is Easter. I'm generally thinking of the religious aspect, but for this hop I decided to go for the cute, more casual side of the holiday. I've been wanting to use some supplies that I picked up several months ago, and this hop, with the requirement of something dimensional, was the perfect opportunity.
My card started with a purple 8 1/2" x 5 1/2" base, which folds to a standard A2 size, and a nice bright white mat. From there I began my stamping. As happens so often with me most of my card was made with scraps. I needed to stamp an Easter egg, and found a nice scrap of design paper with pastel flowers. I also unearthed the perfect yellow scraps for the chicks that I was stamping. Then, as luck would have it, I found a nice die cut srip of grass that turned into the ideal foundation for an egg hunt.
I really love the stamps in this set by INKY ANTICS. After determining where the grass would be, I stamped a some of the three different little eggs to look hidden in the grass. I didn't want too much ink to show on the floral dp so, for the large egg, I used a light green that would blend somewhat. The chick was stamped with a coordinating color, and then cut out. I enhanced the beak and feet with marker. The other tiny eggs were placed to look as though the chick tossed them up in the air to land where the children would find them in the grass. Here's a view from another angle:
You can see that I added a bit of dimension by curving the egg in just a bit and mounting it with foam tape. I also curved the chick's wings out and mounted her, also with foam tape, to look as though she's sitting on the egg.
From this angle you might be able to see that the edge of the card has a bit of thickness folded into it. This was done to accommodate the surprise inside. In this case the surprise is a nice bright pink Easter egg made with the Honey POP Collection Honeycomb Paper. For those of you who may not be familiar with this paper, it's made especially for Inky Antics to be used with the stamp sets they've designed for it. Here is the inside of my card with your surprise:
And a couple of closer shots to show the coloring and the inside sentiment:
In the last pic, especially, you can see the score lines for the fold. The Honeycomb Paper is quite thick and needs this extra space, although the folded card remains fairly flat for mailing.
I hope you've enjoyed this little stop in your hop. Since this post is already so long I've eliminated the list of supplies, but you can check below in the labels, and if you have any questions feel free to leave them in a comment. I will try to get back to you quickly.
Keep that creative genius of yours happy and well-fed!!!
Hugs and Happy Spring Wishes!
CHRISTINE
Okay, here is the list of all the CADB hop participants. Remember to leave a comment for all the designers so you'll have more prize entries!! (It's short, and shouldn't take you too long.)
The designers at Card a Day Blog are joining together to do a Blog Hop! The theme is dimensional cards!
To join in....visit all the participating designers by visiting their sites, some are having prize giveaways...so make sure you pop in!
Make sure you comment on all the blogs too, because at the end of the blog hop, they are going to send a list of all who commented on their blog,
and we are going to do a grand prize drawing of all comments on each blog!
The grand prize is your choice of a pdf pattern book, valued up to $20, from http://popupcards.com/shop-patterns.html !
Make sure to check back at Card a Day Blog March 23rd, to see who won!
So JOIN IN TODAY....comment on the main blog page, and visit the other hop pages and comment there too!
And now for the reveal of my creation for the hop! One of the first things that comes to my mind when I start seeing the signs of Spring is Easter. I'm generally thinking of the religious aspect, but for this hop I decided to go for the cute, more casual side of the holiday. I've been wanting to use some supplies that I picked up several months ago, and this hop, with the requirement of something dimensional, was the perfect opportunity.
My card started with a purple 8 1/2" x 5 1/2" base, which folds to a standard A2 size, and a nice bright white mat. From there I began my stamping. As happens so often with me most of my card was made with scraps. I needed to stamp an Easter egg, and found a nice scrap of design paper with pastel flowers. I also unearthed the perfect yellow scraps for the chicks that I was stamping. Then, as luck would have it, I found a nice die cut srip of grass that turned into the ideal foundation for an egg hunt.
I really love the stamps in this set by INKY ANTICS. After determining where the grass would be, I stamped a some of the three different little eggs to look hidden in the grass. I didn't want too much ink to show on the floral dp so, for the large egg, I used a light green that would blend somewhat. The chick was stamped with a coordinating color, and then cut out. I enhanced the beak and feet with marker. The other tiny eggs were placed to look as though the chick tossed them up in the air to land where the children would find them in the grass. Here's a view from another angle:
You can see that I added a bit of dimension by curving the egg in just a bit and mounting it with foam tape. I also curved the chick's wings out and mounted her, also with foam tape, to look as though she's sitting on the egg.
From this angle you might be able to see that the edge of the card has a bit of thickness folded into it. This was done to accommodate the surprise inside. In this case the surprise is a nice bright pink Easter egg made with the Honey POP Collection Honeycomb Paper. For those of you who may not be familiar with this paper, it's made especially for Inky Antics to be used with the stamp sets they've designed for it. Here is the inside of my card with your surprise:
And a couple of closer shots to show the coloring and the inside sentiment:
In the last pic, especially, you can see the score lines for the fold. The Honeycomb Paper is quite thick and needs this extra space, although the folded card remains fairly flat for mailing.
I hope you've enjoyed this little stop in your hop. Since this post is already so long I've eliminated the list of supplies, but you can check below in the labels, and if you have any questions feel free to leave them in a comment. I will try to get back to you quickly.
Keep that creative genius of yours happy and well-fed!!!
Hugs and Happy Spring Wishes!
CHRISTINE
Okay, here is the list of all the CADB hop participants. Remember to leave a comment for all the designers so you'll have more prize entries!! (It's short, and shouldn't take you too long.)
Friday, March 16, 2012
Congratulations Graduate!
It's my turn, once again, to bring you some inspiration from the Card A Day Blog. Hello friends and welcome newcomers to my little creative space. This week's theme at CADB is 'Congratulations.' We have a graduation coming up before too long, so I decided to use that as my inspiration for this card. I didn't have to think about what colors to use because the school colors are purple and gold...one item taken care of; just needed to find the papers.
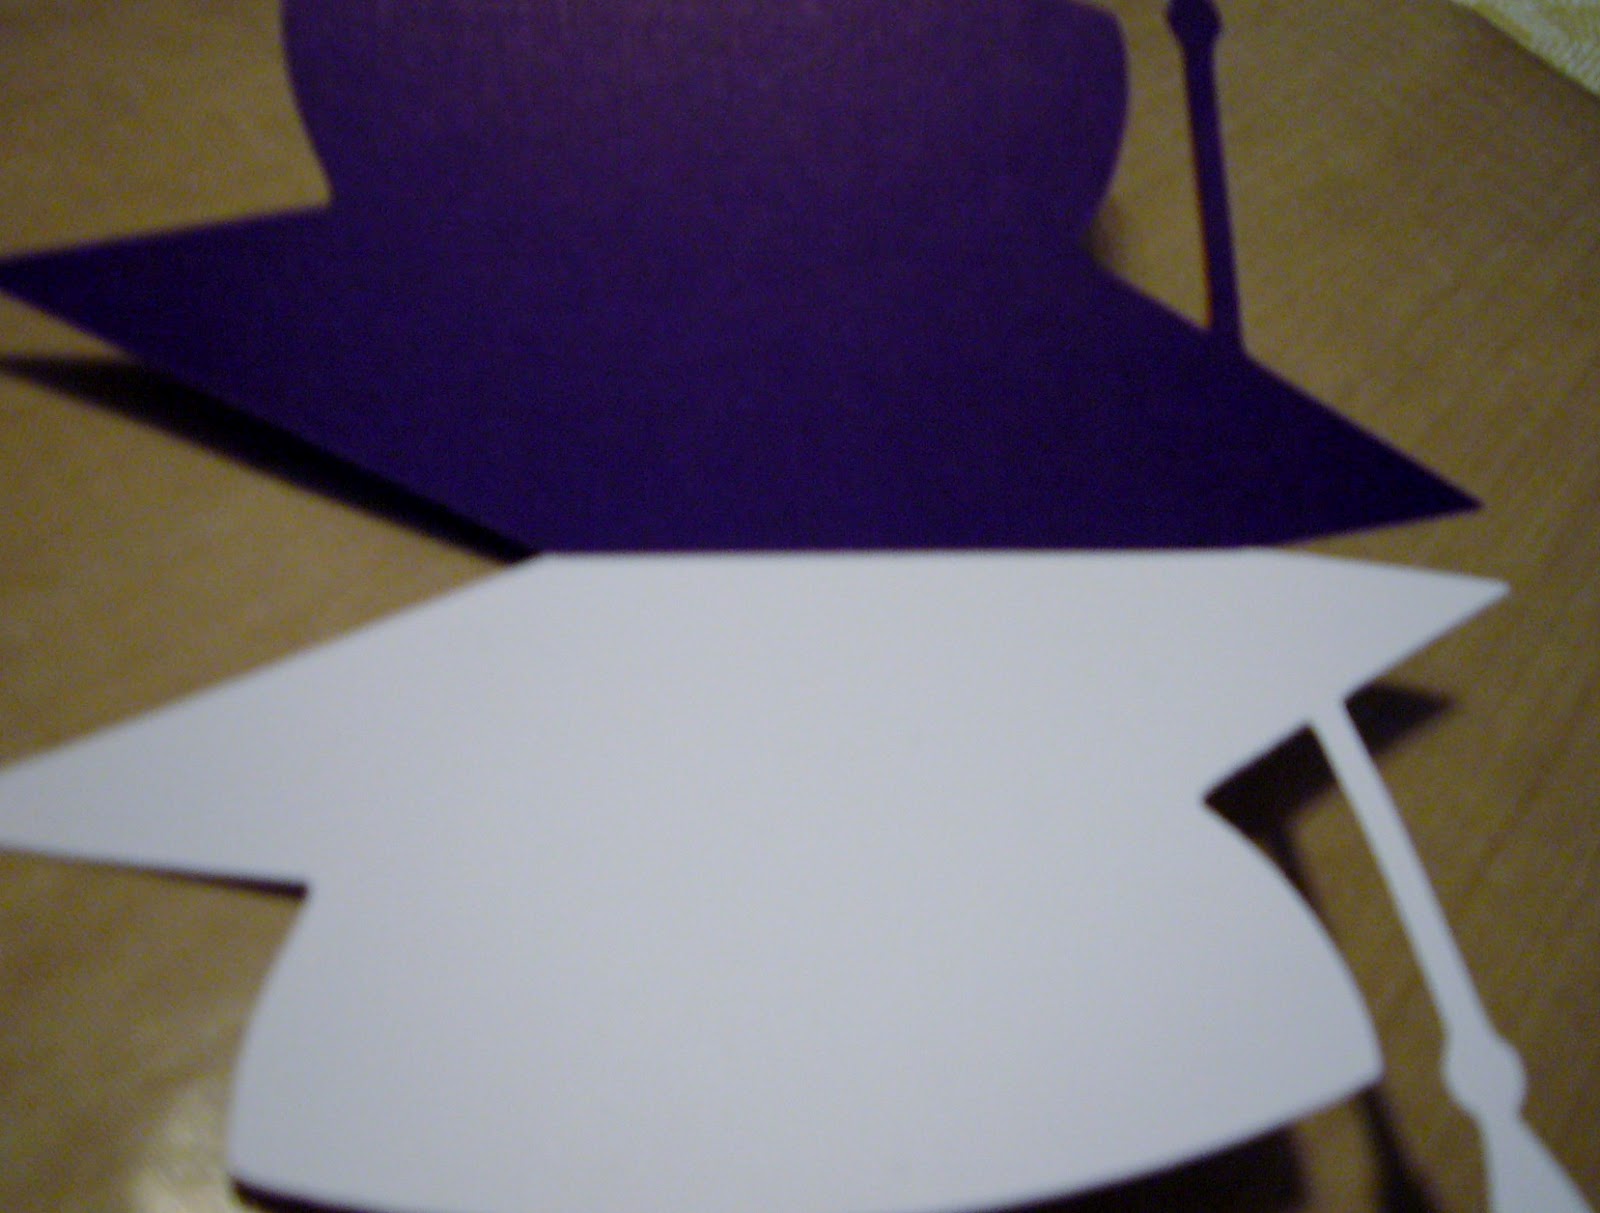
I knew I would be using a Cricut cut, and I had to do a bit of hunting to find what I needed. Here are the pieces before assembly:
As you can see, I decided to use the mortarboard for a shaped card. The one I used comes from the Cricut cartridge "Wrap It Up." The next photos show the back of the card where you can see the fold where the front and back are attached, and also the inside where the front is folded back.
An angled shot shows the bit of dimension added by attaching the sentiment with foam tape.
I used VersaMark and Detail Gold embossing powder for the stamp. Here's a nice close-up:
Finally, here is the full front view:
This card was really quite easy to make once I got the pieces sized on my Gypsy. Here are the rest of the details on supplies:
Papers: Core'dinations (both purples); Stampin 'Up Whisper White and More Mustard
Stamp: Close to My Heart "Frames, Tags, Borders" set
Die: Spellbinders Circle
Embossing Powders: Stampendous Detail Gold
Glues: Tombow Mono Glue Stick and Mono Dots
Be sure to stop by on Monday, March 19, for the Card A Day Blog SPRING HAS SPRUNG Blog Hop. There will be PRIZES!!
Thanks for visiting, and remember always keep your creative genius happy and well-fed!
CHRISTINE
I knew I would be using a Cricut cut, and I had to do a bit of hunting to find what I needed. Here are the pieces before assembly:
As you can see, I decided to use the mortarboard for a shaped card. The one I used comes from the Cricut cartridge "Wrap It Up." The next photos show the back of the card where you can see the fold where the front and back are attached, and also the inside where the front is folded back.
An angled shot shows the bit of dimension added by attaching the sentiment with foam tape.
I used VersaMark and Detail Gold embossing powder for the stamp. Here's a nice close-up:
Finally, here is the full front view:
This card was really quite easy to make once I got the pieces sized on my Gypsy. Here are the rest of the details on supplies:
Papers: Core'dinations (both purples); Stampin 'Up Whisper White and More Mustard
Stamp: Close to My Heart "Frames, Tags, Borders" set
Die: Spellbinders Circle
Embossing Powders: Stampendous Detail Gold
Glues: Tombow Mono Glue Stick and Mono Dots
Be sure to stop by on Monday, March 19, for the Card A Day Blog SPRING HAS SPRUNG Blog Hop. There will be PRIZES!!
Thanks for visiting, and remember always keep your creative genius happy and well-fed!
CHRISTINE
Wednesday, March 7, 2012
Little Star
My goodness, I've missed you! Guess I've been away too long, but I'm so very glad you've decided to visit today. I have another design for you from the Card A Day Blog. If you're visiting for the first time, welcome. I hope you'll stay awhile to see what I've been doing, and that you'll decide to become a follower. We have a fun blog hop coming up soon on CADB, and, of course, there'll be prizes!! So do stay tuned for that. (Little hint: MARCH 19th)
Our theme this week at CADB is BABY, and I have a cute and very simple card to show you. My card is all in pink for a sweet little girl, but it can be easily adapted for a boy.
I have quite a collection of Spellbinders (and other) dies, and I wanted to make use of some I had not used as yet. I chose the Shapeabilities Lace Doily Motifs and Lace Doily Accents. I must admit that with all the tiny cuts in these intricate dies I had some difficulty getting the larger of my pieces out of the die. But once I managed to get it out I was pleased with the result.
My first photo shows the main feature of the card, which is a cute onesie, as it is mounted on the layered die cuts which frame it.
The larger die cut needed to be inked to cut down on the brightness of the card stock. I used Tim Holtz by Ranger "Antique Linen" Distress Ink.
I chose a cute matching sticker for the sentiment.
Both stickers are from the Brenda Walton "Small Wonders Girl" collection by K & Company. These sets include really adorable embossed stickers with lovely soft colors and just a bit of glitter. The onesie is from the "Icon" collection, and the sentiment is from "Words."
Here is the full view of the card:
The base card is Bazill Basics "Peony Pink." It is a top-fold A2 sized card. The other papers are Stampin' Up "Very Vanilla" and Best Occasions "Bright Punch-Out Pack" from Walmart.
I hope this has been a good inspiration showing that you can make a card with lots of impact using very few materials and not too much time.
Thanks for stopping by, and remember.....
always keep your creative genius happy and well-fed!
CHRISTINE
Our theme this week at CADB is BABY, and I have a cute and very simple card to show you. My card is all in pink for a sweet little girl, but it can be easily adapted for a boy.
I have quite a collection of Spellbinders (and other) dies, and I wanted to make use of some I had not used as yet. I chose the Shapeabilities Lace Doily Motifs and Lace Doily Accents. I must admit that with all the tiny cuts in these intricate dies I had some difficulty getting the larger of my pieces out of the die. But once I managed to get it out I was pleased with the result.
My first photo shows the main feature of the card, which is a cute onesie, as it is mounted on the layered die cuts which frame it.
The larger die cut needed to be inked to cut down on the brightness of the card stock. I used Tim Holtz by Ranger "Antique Linen" Distress Ink.
I chose a cute matching sticker for the sentiment.
Both stickers are from the Brenda Walton "Small Wonders Girl" collection by K & Company. These sets include really adorable embossed stickers with lovely soft colors and just a bit of glitter. The onesie is from the "Icon" collection, and the sentiment is from "Words."
Here is the full view of the card:
The base card is Bazill Basics "Peony Pink." It is a top-fold A2 sized card. The other papers are Stampin' Up "Very Vanilla" and Best Occasions "Bright Punch-Out Pack" from Walmart.
I hope this has been a good inspiration showing that you can make a card with lots of impact using very few materials and not too much time.
Thanks for stopping by, and remember.....
always keep your creative genius happy and well-fed!
CHRISTINE
Monday, February 13, 2012
The Wearin' o' the Green
Top o' the mornin' lovely ones!! (or afternoon or evening or whenever you're catching this) I'm the designated designer today over at the Card A Day Blog, and we're celebrating a week of St. Patrick's Day greetings. So go get your green goodies and some shamrocks, and come join in our celebration. It might just be your lucky card that wins our challenge this month!
Now for my card. I've been wanting to use some of the great digi designs I've been accumulating, and I knew there had to be something appropriate for the theme this week. After a bit of searching, I found the perfect designs; I hope you'll agree. The design is fairly simple, but I think it comes across with great effect.
I didn't want to reduce the size of my central image too much, so I decided on a base size of 6" X 4 1/2". The image would have a double frame, and then a greeting banner would be added. Here are the first photos:
I printed the image (yes, it was already colored), and designed my own greeting. I chose a font that closely resembled the sentiment digi I would be using on the inside. I also chose a digi image of a bunch of shamrocks for the inside of the card.
Here's a closer shot. I did the coloring on these myself. I used Distress Inks for these images as well as the front frames.
Finally, here is the pic of the full front of my card. I used foam tape to mount the frame and the greeting.
Now for my card. I've been wanting to use some of the great digi designs I've been accumulating, and I knew there had to be something appropriate for the theme this week. After a bit of searching, I found the perfect designs; I hope you'll agree. The design is fairly simple, but I think it comes across with great effect.
I didn't want to reduce the size of my central image too much, so I decided on a base size of 6" X 4 1/2". The image would have a double frame, and then a greeting banner would be added. Here are the first photos:
I printed the image (yes, it was already colored), and designed my own greeting. I chose a font that closely resembled the sentiment digi I would be using on the inside. I also chose a digi image of a bunch of shamrocks for the inside of the card.
Here's a closer shot. I did the coloring on these myself. I used Distress Inks for these images as well as the front frames.
Finally, here is the pic of the full front of my card. I used foam tape to mount the frame and the greeting.
Now for the little details:
Card Stock: Recollections (for base and inner frame), Stampin' Up Very Vanilla (for all printed images)
Design Paper: K&Company
Ink: Tim Holtz Distress Ink by Ranger (Antique Linen and Bundled Sage)
Digi Images: Front image from Paper Crafting World, Inside sentiment by Meljen's Designs, Shamrock Bunch from Waltzingmouse Stamps
Dies: Spellbinders Labels Seventeen
Markers: Copic, Micron Pigma
Misc: Fiskars Paper Edgers - Victorian
Time to shake the green and get back to the red to wish you a very
Happy Valentine's Day!!!
With lots of hugs,
CHRISTINE
Subscribe to:
Posts (Atom)