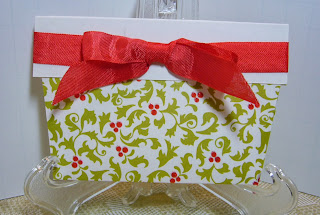
Welcome!! I'm so happy you've come to visit. As today's designer for the Card A Day Blog I have a fun gift card holder to show you for our theme of Christmas Gift Cards. I had seen some variations on this card style some time ago, so I knew right away what my design would be. Now, if you have a good imagination you might see some poinsettias, but if you're like me you'll see a pretty pot filled with lovely Christmas-y red flowers.
Let's start with the empty flower pot. I wanted my card to fit into a standard A2 sized envelope so I had a bit of figuring to do. I cut the single sided patterned card stock at 8 1/4" x 4 1/2". It could have been wider, but I wanted the card to look balanced. Any wider would just look strange. I scored at 1 1/8" from either end and right in the center at 4 1/8". I folded the piece in half, then tapered the two sides, leaving tabs on the front to attach the front and back together. The two scored ends are folded to the outside creating the rim of the flower pot. I taped the ends down lightly; then secured them with a pretty red ribbon. You could also cover the white with different paper as desired.
For the actual card holder, I used a coordinating piece of card cut at 4" x 3 3/4" with the design side to the back, and the top corners rounded. I used an old gift card to measure for the corners that would hold the new gift card, and made the corners from a scrap of green card. I used the same green for the die cut leaves and several red scraps to die cut the flowers.
I layered the flowers using liquid glue, then affixed them with thin foam tape. I added the leaves, some pearls for the centers, and, just for fun, a little white dove. I was careful when placing the flowers not to let them overlap the top edge too much (needing the keep to the 4 1/4" card size), and to be sure the card went easily into the base. Here's a photo with the gift card inserted:
You can see the 'flower pot' next to the insert. Here is a closer look at the flowers:
All you do is insert the gift card and slip that piece into the base 'flower pot'. A greeting or signature can be written on the card before the gift card is inserted.
So that's it. You can easily adjust the sizes if you want a bigger bunch of flowers, as well as changing up your papers and colors for any season. By the way, this was another card created entirely from scraps! This time I didn't even plan it that way; the right sized pieces just happened to be right where I needed them.
I hope you'll have lots of fun making your gift card holders, and thank you so very much for stopping by today!!
'Til next time.....
Big HUGS!
CHRISTINE


Super cute card Christine, makes for a really nice gift card holder
ReplyDelete