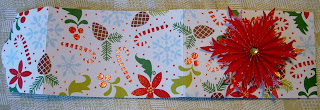
As we get ready to close out our year of cardmaking at the Card A Day Blog, I get to bring you one last inspiration. Our final theme of the year is 'Snow.' I had all sorts of ideas, but at the last minute I received a die that I had ordered, so I decided to use it for my card. I also had been making rosettes to use as tags on Christmas gifts, and it became a simple matter to combine the two elements.
My new die is for a gift card holder. I chose a paper to coordinate with one of my rosettes, and used the die to cut it out. I scored for the folds (the scores were lightly marked by the die), and affixed the flap for the gift card. My last step for the card, itself, was to stamp and emboss a greeting for the inside. Here are some shots of the inside of the card:
Sorry about the glare in the top photo. I wanted to show the card as it would be used so I inserted a used gift card into the pocket. Also, I wanted to emphasize the snow idea on the inside, and used a snowflake stamp along with a greeting to accomplish that. It also helps to have snowflakes on the card stock that I used.
The rosette I chose was made using another die, the Snowflake Rosette by Tim Holtz. The paper for that piece also has a snowflake pattern on the red ground. The scores for the rosette are done as perforations which makes it a bit fiddly to work with, as well as exposing the paper edges. In this case the edges were showing too much white, so I simply inked those edges to smooth out the color. I also applied a glitter spray, and added a rhinestone to the center of the snowflake. I then affixed the snowflake/rosette to the front of the card with foam tape to lift it a bit off the surface making it easier to open/close the flap.
I have three more photos for you. The first one shows the open card:
The next two give you a much better look at the rosette. If you click on the pictures you might even be able to see the glitter on the rosette as well as the card itself.
Thank you so much for taking time out of your busy day to visit. It's such a bustling time for everyone with the holidays looming. Don't forget to take time for the really important things.
And here are the small details:
Dies: Sizzix BigzXL Gift Card Holder and Tim Holtz Snowflake Rosette
Paper: Recollections "Jolly Jamboree" stack
Stamps: Close to My Heart "Very Merry Christmas" and My Mind's Eye "Holly Jolly"
Bling: Studio18 Rhinestones and Crafter's Companion Spray & Sparkle Gold
Ink: Versamark
Embossing Powder: Stampendous Detail Gold
Hugs to all!
CHRISTINE
This blog was created for the display and exchange of craft ideas and information, especially on cardmaking, but also including such lovely activities as scrapbooking, knitting, crocheting and sewing.
Followers
Thursday, December 13, 2012
Saturday, December 1, 2012
Sharing Joy
Hello Friends!
It's time to share another design that I've made for the Card A Day Blog. I'm rounding off a week of Holiday Thank You cards, and I wanted my design to still look like Christmas, but perhaps be a little less obvious. As I've mentioned before (and haven't shared with you YET) I've been working on some projects with a troop of Girl Scouts. Because of this I have even more scraps than usual, so I wanted to be sure to use some of those scraps for my card. Don't want to break with tradition, now, do we? (lol)
For my design, I started with a 5" x 4 1/4" card base. Yes, even this was a leftover. We had cut lots of card bases, and this one turned out to be just a bit smaller that it should have been. Well, I wasn't going to let it go to waste, was I?!
I had decided to create a simple background with some stamps using the stamp-off method because I didn't want the color to be too vibrant, kind of like the holiday season fading into memory. I went hunting through my stamps and found just exactly what I needed. I also came up with the perfect greeting for the card front. Once I had those elements I needed a way to 'frame' them, and remembered some leftover pieces from cutting rosettes that I had decided to keep for possible borders. I had quite a few from which to choose, so I decided on red because I wanted to use traditional Christmas colors and already had green, silver and blue (along with a little gingerbread brown). Here is your first look:
I stamped the design images directly on the card base after first stamping off on a piece of scrap paper to remove some of the ink. I chose stamps that were representative of the season without necessarily being too overt. The borders are the cast-off pieces of some die-cut rosettes that are shaped like snowflakes. I roughed up the edges to lift them a bit off the card. The greeting was stamped on a piece of white card which I inked around the edges and then mounted with foam squares. The next three photos are closer shots of the different areas of the card.
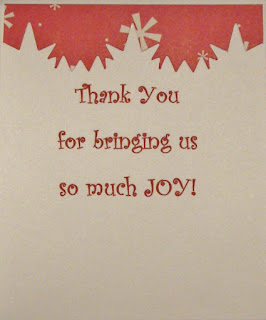
I know the greeting doesn't look too clear in the photo. It reads, "The true joy of the season is in the love shared with family and friends." I wanted to reflect that greeting in my sentiment on the inside.
I created the sentiment in MS Word. I was happy to find a font that matched the stamped greeting fairly well. I chose to print the sentiment in red to match the remaining 'border' piece that I wanted to use. I think it worked out quite nicely.
Here is your full view of the front of the card:
It's a rather simple card, but I think it's actually one of my favorites of my recent cards. I hope you've enjoyed it, too.
Now for those little details:
Stamps: Greeting from Great Impressions, Images from Craft Smart (Michael's)
Inks: Martha Stewart 'Sterling Metallic," Ranger Distress "Pine Needles" and "Vintage Photo" and Tsukineko Brilliance "Pearlescent Sky Blue"
Border: Leftover cuts from Sizzix Alterations "Snowflake Rosette"
Paper: Recollections "Jolly Jamboree" and generic white card stock
Once again, I am honored by your visit, and I thank you. It's really fun for me to be able to share my creations with you.
Until next time.....
BIG HUGS!
CHRISTINE
Subscribe to:
Comments (Atom)


